Difference between revisions of "Man ModelTrimming"
(Created page with "<languages/> {{DISPLAYTITLE:Model Trimming}} <translate> =Model Trimming= The model trimming tool is part of the Orthodontic and Impression additional modules. Takes one or tw...") |
(No difference)
|
Revision as of 07:54, 29 July 2015
Contents
Model Trimming
The model trimming tool is part of the Orthodontic and Impression additional modules. Takes one or two aligned jaws acquired from the scanner and close the jaw meshes with a trimmed base.
The tool is started with the ![]() button in the Main Toolbar that appear when the project has at least one jaw mesh ready.
button in the Main Toolbar that appear when the project has at least one jaw mesh ready.
Interface
The interface of the Model Trimming tool is different from the rest of the software. On the top right there are 4 tabs, one for every step of the process. The rest of the screen is made by one or three 3D Views:
- One View : During the Cut Margins step, show only one jaw at a time
- Three Views : During the other steps, shows all the information togheter but let you see everything from three different points of view at the same time
Steps
The procedure is made by 4 steps:
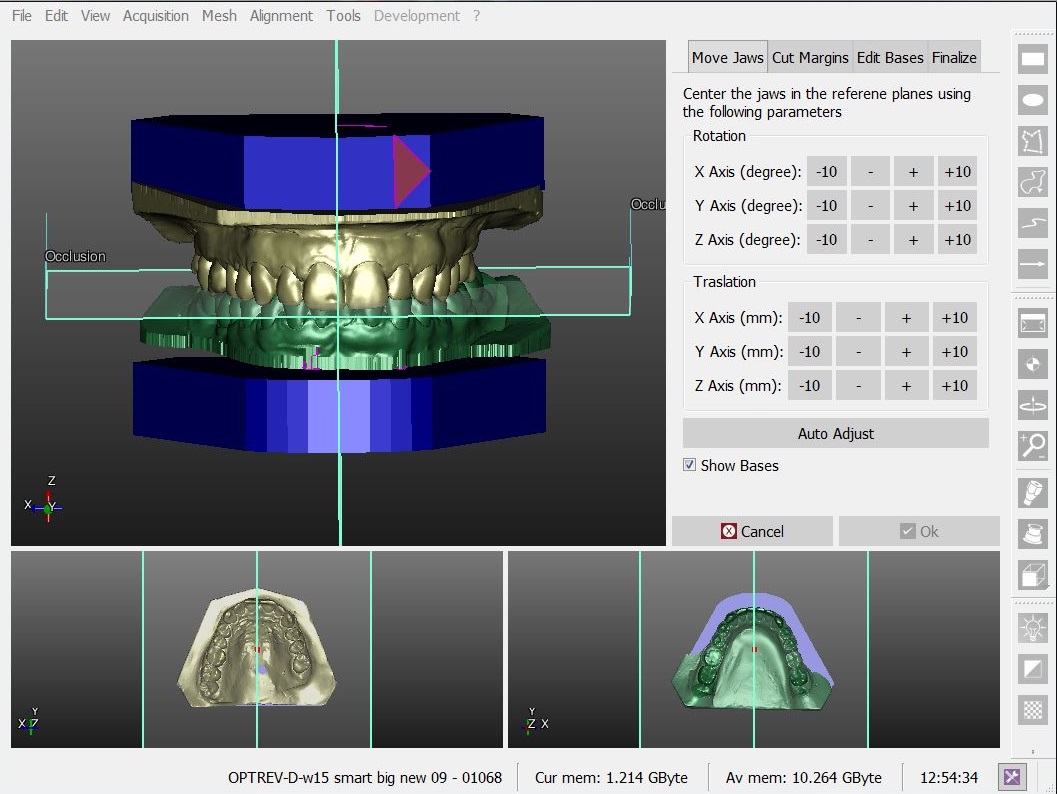
- Move Jaws : Adjust the acquisition position of the jaws to respect some reference planes (occlusal plane and simmetric plane)
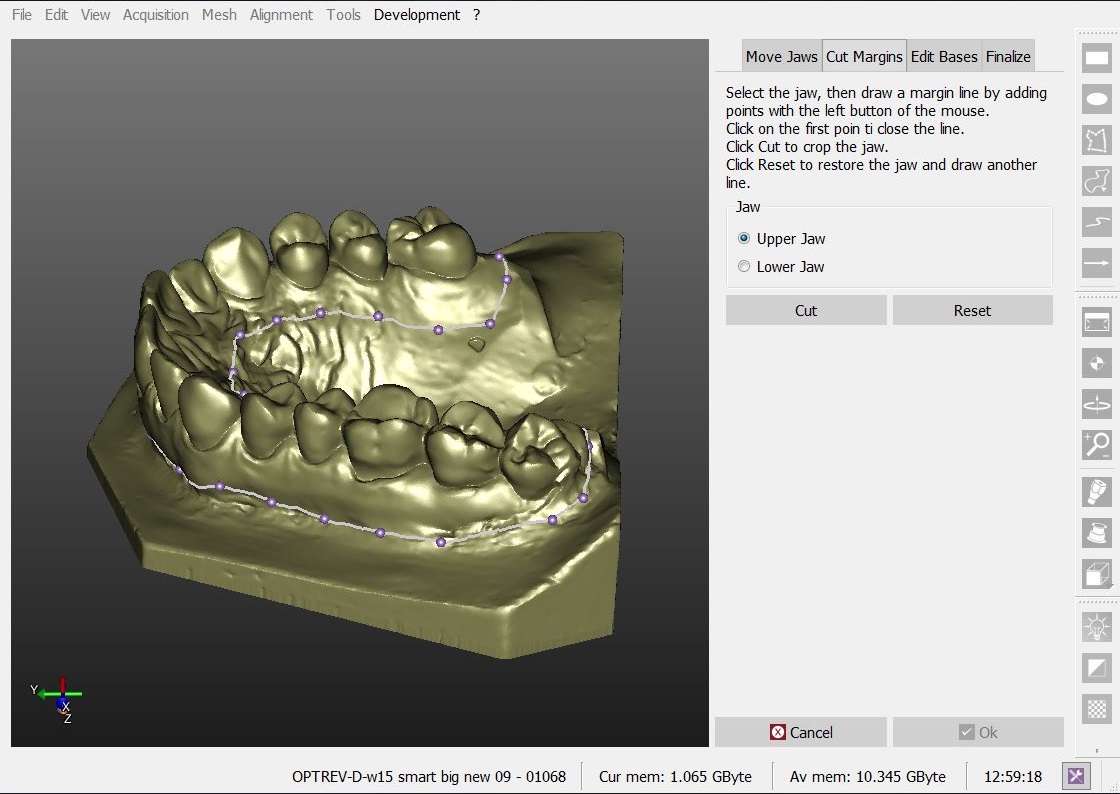
- Cut Margins : Draw a margin line on the mesh to cut away all the information that will be replaced by the trimmed base
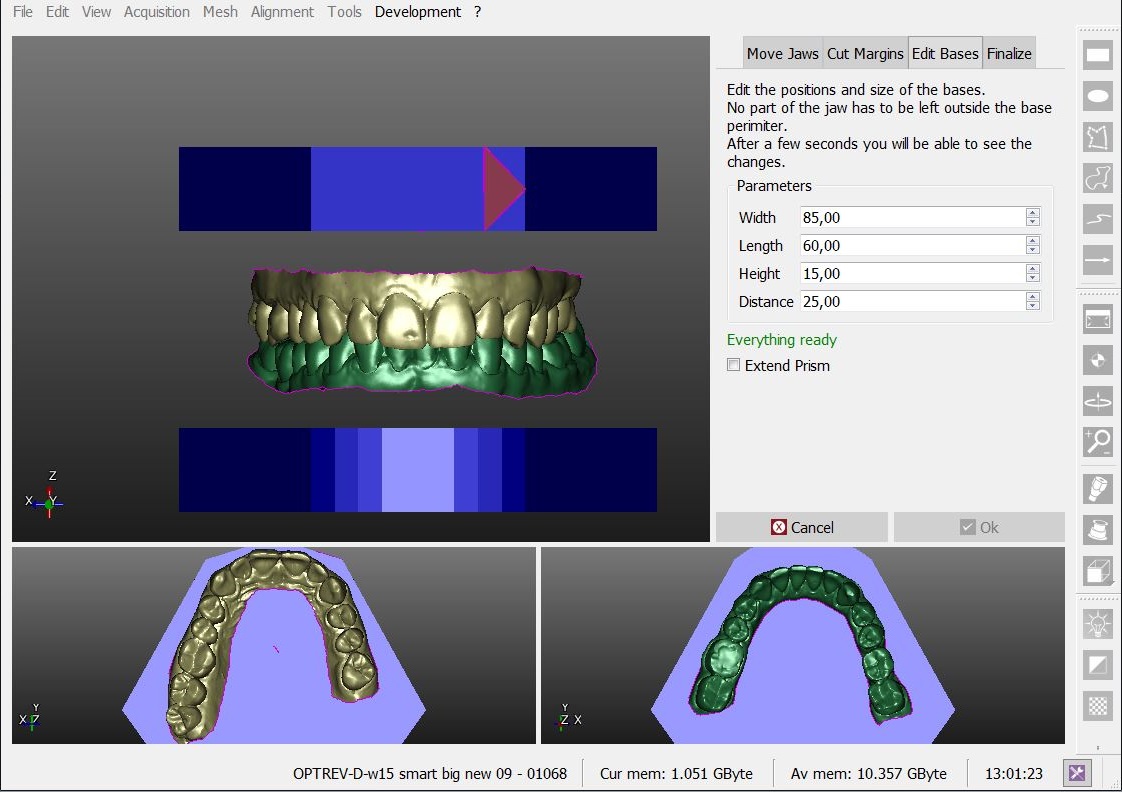
- Adjust Bases : Change the shape/position of the trimmed bases to adapt to the specific jaws to trim
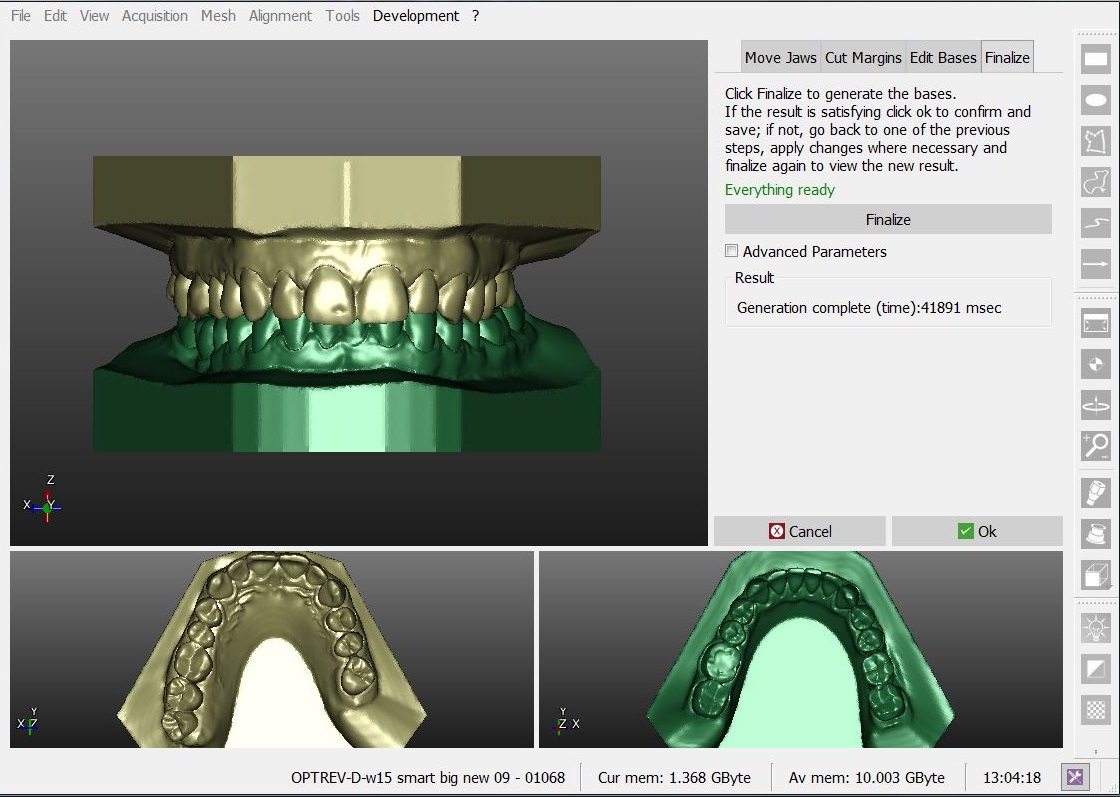
- Finalize : Create the finalized meshes merging the cutted jaws with the trimmed bases
Move Jaws
The jaw meshes positions acquired from the scanner is not always the same. This tool let the user adjust the position of the meshes with some buttons.
For every movement there are 4 buttons (-10, -, +, +10) that apply a specific movement at the objects.
All the movements (rotations and translations) are defined relative to some Axis. You can see the axis in the 3D views on the bottom-left angle of the view.
There's an additional options Show Bases that let the user see a preview of where the trimmed bases will be as a positioning aid.
Cut Margins
The jaw meshes acquired from the scanner may have part of the surfaces that is not part of the jaw but from the old base or support. This parts need to be removed before merging the data with the new trimmed base.
This page gives the user an interactive tool that can draw a line on the mesh surface:
- The first left mouse click on the mesh surface creates a point and start the margin definition
- Every sequent left mouse click different from the first add a point to the margin and connect it to the previous one
- A left mouse click on the first point close the margin
- After the margin is closed the user can:
- drag one point with the left mouse button to move it to a different position
- click between two points to add a new point in the middle
- press ESC to clear the margin and start again
When the margin is defined a click on the Cut button will cut away all the part of the mesh below the margin.
Adjust Bases
In this page the user can change 4 different parameters of the bases. When a parameter is changed the 3D view is updated after 2 seconds.
- Width : The maximum width of the base
- Length : The maximum length of the base
- Height : The base height
- Distance : The bases are always positionated in simmetry between the occlusal plane. This is the distance between the two bases
The jaw meshes after the cut need to fit completely inside the bases. If the bases are too smalls a warning message will appear below the parameters.
Finalize
This last page has only one button Finalize. When the button is clicked the software take all the data and compute the new, closed, mesh. This can take up to 2 minutes.
If the result is not good enough the user is free to return to one of the previous steps and change some parameters and positions and then return to the finalize step and compute the meshes again.
When the result after the Finalize button click is good the user can click Ok to confirm the base trimming and save the new meshes.


