Step-By-Step Wizard
Revision as of 11:51, 3 February 2016 by L.leonardi (talk | contribs) (Created page with "* La d’Outils Principale n’est pas montrée * À la place de l'Arbre du Projet, il y a la liste des étapes de l’Assistant à suivre p...")
Assistant
Dans les Projets Structuré OpticalRevEngDental offre un assistant qui guide l’utilisateur dès la première acquisition jusqu’à l’exportation des données.
Interface de l’Assistant
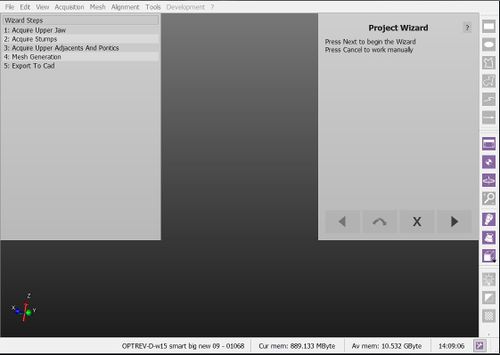
Lorsqu’on démarre l’Assistant, l’interface du logiciel change.
- La d’Outils Principale n’est pas montrée
- À la place de l'Arbre du Projet, il y a la liste des étapes de l’Assistant à suivre pour la réalisation du projet
- L’Assistant se trouve dans le coin en haut à droit. Celui guide l’utilisateur et il peut être contrôlé par 4 touches.
During all the wizard steps, all the other tools will be locked. All the interactions will be handled in the Wizard Panel on the top right of the screen
Wizard Sequence
The sequence of wizard steps depends on each specific project. It follows this logic:
- Acquire all the required data from the scanner
- After every single acquisiton:
- Check that all the information is correctly aligned
- Generate the needed meshes
- Align the implants
- Export to the CAD


