Difference between revisions of "Project Tree/fr"
L.leonardi (talk | contribs) (Created page with "# Cliquer avec la touche gauche de la souris sur un élément pour le sélectionner # Cliquer avec la touche gauche de la souris en appuyant sur la touche CTRL sur un élémen...") |
L.leonardi (talk | contribs) (Created page with "Tous les éléments sélectionnés seront visualisés dans la Vue 3D et le logiciel activera des commandes dans le menu, dans la Barre d’Outils Principale...") |
||
| Line 28: | Line 28: | ||
# Cliquer avec la touche gauche de la souris à l’extérieur de la liste pour désélectionner les éléments | # Cliquer avec la touche gauche de la souris à l’extérieur de la liste pour désélectionner les éléments | ||
| − | + | Tous les éléments sélectionnés seront visualisés dans la Vue 3D et le logiciel activera des commandes dans le menu, dans la [[Main_Toolbar|Barre d’Outils Principale]] et dans les [[Support_Toolbars|Barres d’Outils Secondaires]] . | |
The information is layed out as a tree; each element can have ''children'' elements. This scheme represents the information dependency in the project. For example a single stump is part of a jaw so it's a child of the jaw and the software, when asked to '''align''' the stump to the rest of the project, will align it to its parent jaw. | The information is layed out as a tree; each element can have ''children'' elements. This scheme represents the information dependency in the project. For example a single stump is part of a jaw so it's a child of the jaw and the software, when asked to '''align''' the stump to the rest of the project, will align it to its parent jaw. | ||
Revision as of 11:41, 28 January 2016
Contents
Arbre du Projet
La fenêtre dans le coin en haut à gauche de l’interface du logiciel est le panneau de configuration du projet contenant les donnés acquises et modifiées.
Le type d’arbre du projet décrit se réfère au projet structuré et il est différent de celui d’un projet libre.
Projet Structuré
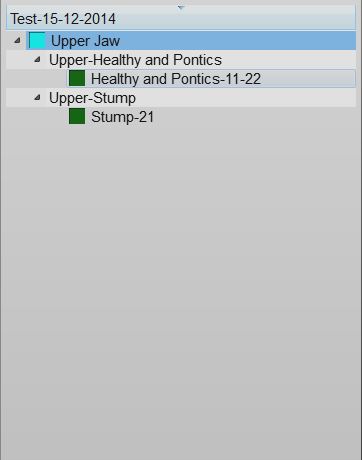
L’image ci-dessous montre un exemple de Projet Structuré.
Etat des Donnés et Sélection
Tous les objets du projet peuvent avoir 3 états différents, chacun marqué par des icônes de couleur différente.
- Aucune Donnée (icône grise) : l’élément est nécessaire pour quoi le projet soit complète mais il n’y a pas de donnés disponibles. Il faut importer ou numériser cet élément
- Acquis (icône bleue): l’objet a été acquis et il peut être aligné avec les donnés du projet, il peut être modifié ou converti en format de maille.
- Maille (icône verte): dans le projet il y a une maille de cet élément qui peut être modifiée ou exportée.
Il est possible d’interagir avec l’Arbre du Projet :
- Cliquer avec la touche gauche de la souris sur un élément pour le sélectionner
- Cliquer avec la touche gauche de la souris en appuyant sur la touche CTRL sur un élément pour l’ajouter à la sélection courante
- Cliquer avec la touche droite de la souris sur un élément pour ouvrir le "Menu Contextuel" de l’élément
- Cliquer avec la touche gauche de la souris à l’extérieur de la liste pour désélectionner les éléments
Tous les éléments sélectionnés seront visualisés dans la Vue 3D et le logiciel activera des commandes dans le menu, dans la Barre d’Outils Principale et dans les Barres d’Outils Secondaires .
The information is layed out as a tree; each element can have children elements. This scheme represents the information dependency in the project. For example a single stump is part of a jaw so it's a child of the jaw and the software, when asked to align the stump to the rest of the project, will align it to its parent jaw.
Context Menu
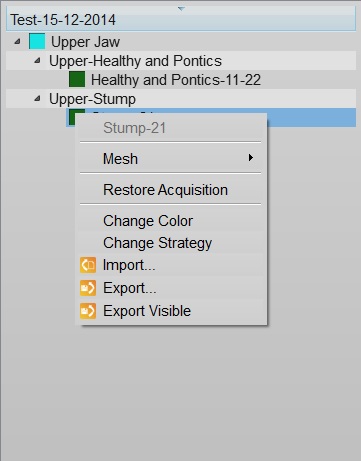
By right clicking on a Project Tree element, a context menu will appear:
The context menu shows:
- A Sub Menu with the tools for the selected element (Mesh, Acquisition)
- A Restore Acquisition button that will remove a mesh and recover the previous acquisition
- A Change Color button that will change the assigned color of this element, used in the 3D View
- A Change Strategy button that will change the scan and mesh strategy of this element
- An Import... button that will import an acquisition or mesh from the disk, in the supported formats
- An Export... button that will export the acquisition or mesh to the disk, in a supported format
- An Export Visible button that will merge and export all the current selected meshes in one single file
Drag And Drop
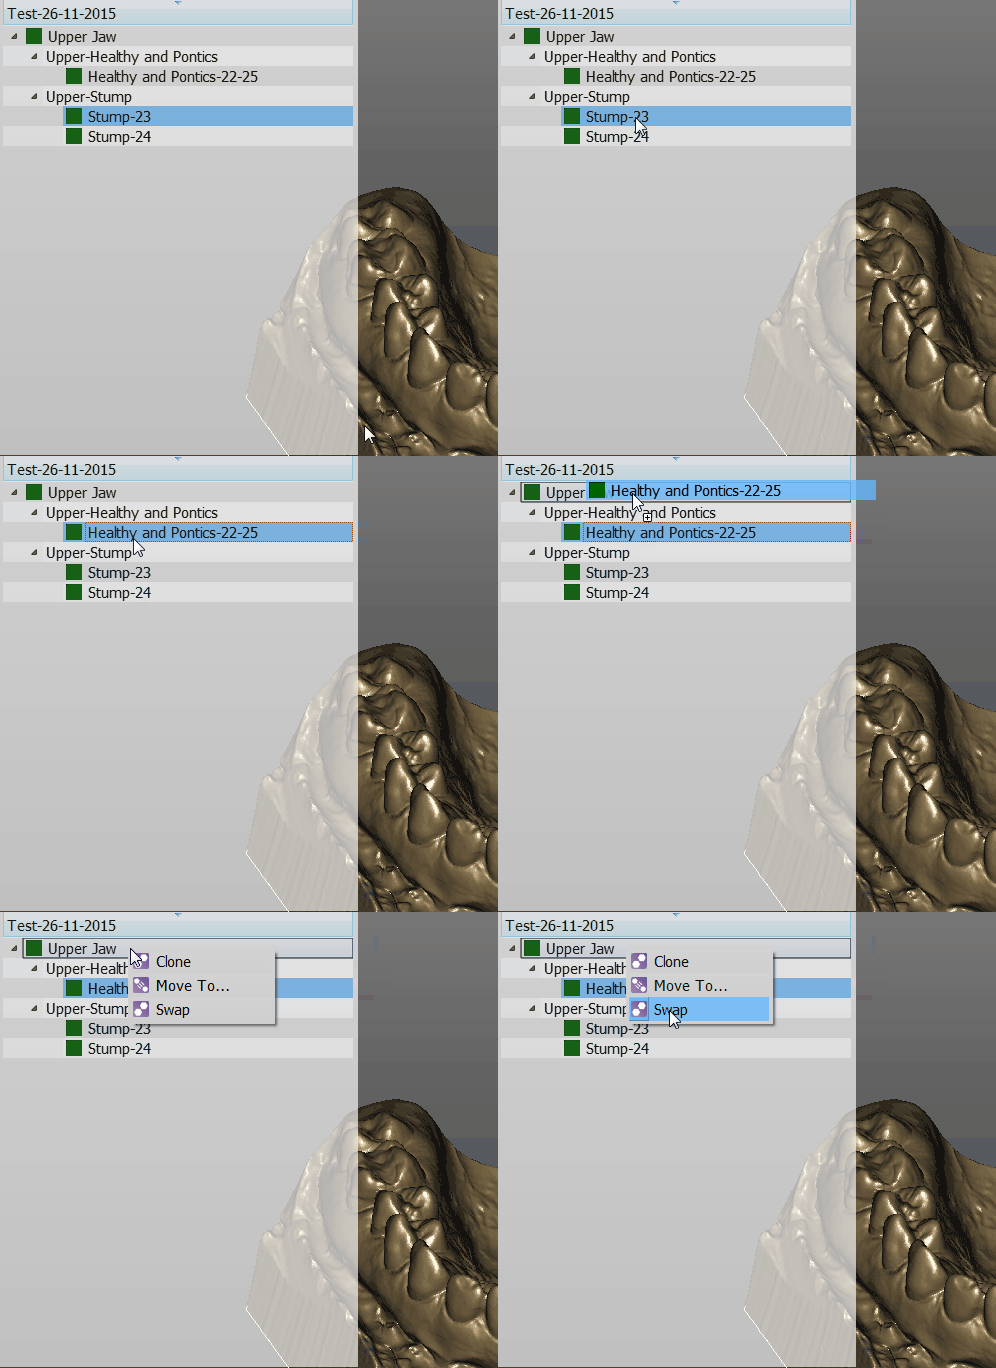
You can drag one element and drop it over a different one
The available actions will be:
- Clone to create a copy of this element
- Move To ... to clone the element and remove the original one
- Swap to swap the mesh or acquisition information of two elements
Free Project
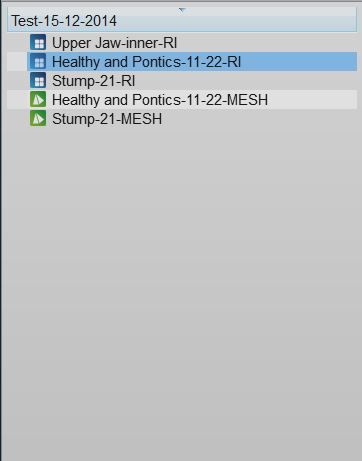
This is a screenshot of a Free Project Tree
In the Free Project mode, the software has no way of knowing the dependencies between the data. So there's no tree, no children. Only a list of objects.
The objects can be of 2 types. Acqusitions (blue icon) or Meshes (green icon).
This project type usually works as the Structured Project.
The differences are:
- To create a copy of a data, it is necessary to open the context menu and select the Clone function.
- By dragging one element above another, it is possible to choose between:
- The Direct Alignment: action to automatically align the two elements.
- The Manual Alignment: action to manually align the two elements.


