Difference between revisions of "Man StartScreen"
(Marked this version for translation) |
|||
| Line 6: | Line 6: | ||
<!--T:2--> | <!--T:2--> | ||
| − | There are two different | + | There are two different kinds of start screen. One will appear when the software is launched directly by the user, the other when the software is launched by another software, having already defined a project. |
<!--T:3--> | <!--T:3--> | ||
| − | In both cases the software will perform a System Check and show a message. If everything is ready to work and the scanner is connected correctly the screen will show the '''Scanner initialized correctly''' message. If, for any reason, the scanner is not working correctly | + | In both cases the software will perform a System Check and show a message. If everything is ready to work and the scanner is connected correctly the screen will show the '''Scanner initialized correctly''' message. If, for any reason, the scanner is not working correctly a specific error message will be displayed. |
<!--T:4--> | <!--T:4--> | ||
| Line 17: | Line 17: | ||
<!--T:9--> | <!--T:9--> | ||
| − | This is the Start Screen that appears when the software is | + | This is the Start Screen that appears when the software is launched having already set a project in an ''Invoking Software'', for example if started from the Exocad DentalDB. |
[[File:Dental_2_5_startPopUp-Exocad.jpg|upright|center]] | [[File:Dental_2_5_startPopUp-Exocad.jpg|upright|center]] | ||
| Line 24: | Line 24: | ||
<!--T:11--> | <!--T:11--> | ||
| − | * '''Unsectioned Model''' : Enable this option if the model to | + | * '''Unsectioned Model''' : Enable this option if the model to be scanned is not sectioned, the scanner will not to require a separate scan for every die |
| − | * '''Impression Scan''' : If | + | * '''Impression Scan''' : If the ''Impression Scan Module'' is enabled in the license, check this option to scan an impression and not a stone model |
| − | * '''Face Scan''' : If | + | * '''Face Scan''' : If a Real Time Scanner is available, check this Face Scan option to add the Real Time Face Scan of the patient to the project |
<!--T:6--> | <!--T:6--> | ||
| Line 38: | Line 38: | ||
<!--T:13--> | <!--T:13--> | ||
| − | This is the start screen that appears when | + | This is the start screen that appears when launching the software directly |
<!--T:14--> | <!--T:14--> | ||
| Line 55: | Line 55: | ||
<!--T:17--> | <!--T:17--> | ||
| − | Now | + | Now return to the [[Main_Page|Main Page]] or read about the [[Man_ProjectCreation|Project Creation]] |
</translate> | </translate> | ||
Revision as of 07:38, 28 August 2015
Start
The start screen is the first dialog that appears when launching the software.
There are two different kinds of start screen. One will appear when the software is launched directly by the user, the other when the software is launched by another software, having already defined a project.
In both cases the software will perform a System Check and show a message. If everything is ready to work and the scanner is connected correctly the screen will show the Scanner initialized correctly message. If, for any reason, the scanner is not working correctly a specific error message will be displayed.
In both start screens this button  to open the Options Dialog is available
Project Ready Start-Up
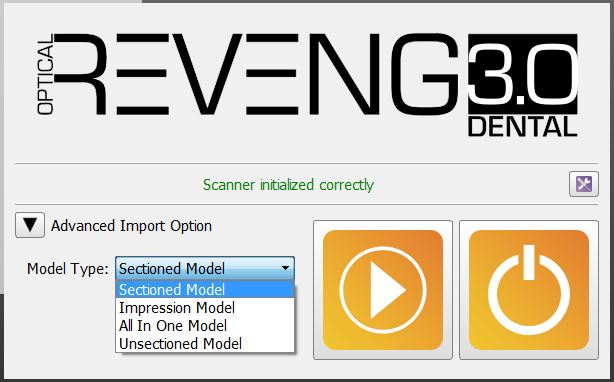
This is the Start Screen that appears when the software is launched having already set a project in an Invoking Software, for example if started from the Exocad DentalDB.
On the left are available some Advenced Import Option:
- Unsectioned Model : Enable this option if the model to be scanned is not sectioned, the scanner will not to require a separate scan for every die
- Impression Scan : If the Impression Scan Module is enabled in the license, check this option to scan an impression and not a stone model
- Face Scan : If a Real Time Scanner is available, check this Face Scan option to add the Real Time Face Scan of the patient to the project
On the right there are 2 buttons:
-
 Start Project : Will create a specific Scan Project from the data coming from the Invoking Sofware, using the selected options, and start the Step-By-Step Wizard
 -
 Close : Closes the software without starting the proejct
Direct Launch
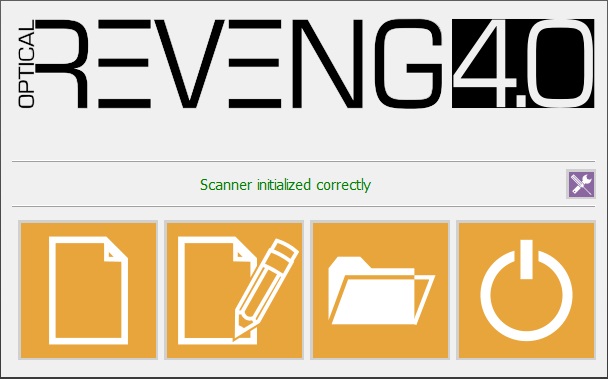
This is the start screen that appears when launching the software directly
In this case no project is ready so the software will ask to create a new project or to load a previously created project.
-
 New Free Project : This button will be present only on the scan system that have the Free Module enabled. This will allow to create a project in Free Mode
 -
 New Project : This button will allow to create a Structured Project and start a Step-By-Step Wizard
 -
 Load Project : This button will allow to load a previous project
 -
 Close : Closes the software without starting the proejct
Next
Now return to the Main Page or read about the Project Creation

