Difference between revisions of "Man ProjectCreation/pt-br"
(Created page with "=== Informação do Dente ===") |
(Created page with "A seção no canto inferior direito permite selecionar o '' Tipo de Dente '' e algumas '' Outras Opções '' para cada elemento selecionado. Os Tipos de Dentes são:") |
||
| Line 38: | Line 38: | ||
=== Informação do Dente === | === Informação do Dente === | ||
| − | + | A seção no canto inferior direito permite selecionar o '' Tipo de Dente '' e algumas '' Outras Opções '' para cada elemento selecionado. | |
| − | + | Os Tipos de Dentes são: | |
* None : this tooth is not part of the project, it will not be acquired or can be ignored | * None : this tooth is not part of the project, it will not be acquired or can be ignored | ||
Revision as of 19:18, 1 October 2015
Contents
Projeto
Ao lançar o software diretamente, se o projeto não foi definido em outro banco de dados comoExocad DentalDB, o projeto de escaneamento deve ser definido.
O software tem um diálogo Gestor de Projeto para coletar todos os dados sobre os itens a serem escaneados e para preparar um específico Assistente Passo a passo .
O gerente de projeto permitirá selecionar um dos tipos de projeto disponíveis clicando no ícone respectivo na barra à esquerda da caixa de diálogo.
Em todos os projetos, o usuário tem de definir algumas Informação Geral:
- O ID do paciente (Obrigatório)
- O ID do médico (Opcional)
- Um nome de projeto específico para salvar o projeto no disco, se não for fornecido será gerado automaticamente com base no ID do paciente
- O nome do desinhador (Opcional)
- Notas (Opcional)
Quando o projeto for definido, confirme clicando no ícone verde na parte inferior da caixa de diálogo. O software irá criar uma específica Projeto Estruturado e iniciar o Assistente passo a passo.
Projeto de Prótese Fixa
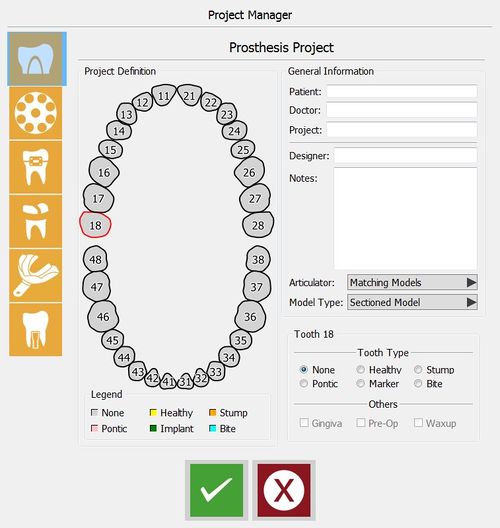
Definição do Projeto habilitado clicando no ícone de Prótese.
A seção de prótese é o mais complexo por causa da quantidade de elementos que podem ser ajustados e que requerem a definição de dente por dente.
À exceção da seção Informação Geral , este projeto mostra 2 seções adicionais
Definição do Projeto
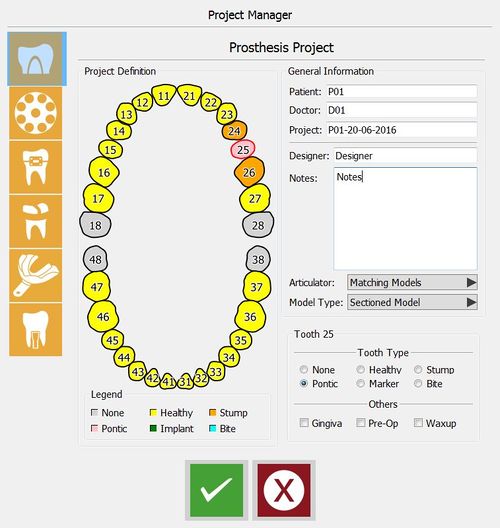
Na parte principal da janela, está disponível um odontograma que permite definir os elementos que têm de ser escaneados.
Mantendo Template:Botão inline ao clicar em um dente, o último item selecionado será copiado para o dente selecionado.
Mantendo Template:Botão inline ao clicar em um dente, os últimos parâmetros selecionados serão copiados para todos os dentes entre o último dente e aquele selecionado.
Informação do Dente
A seção no canto inferior direito permite selecionar o Tipo de Dente e algumas Outras Opções para cada elemento selecionado. Os Tipos de Dentes são:
- None : this tooth is not part of the project, it will not be acquired or can be ignored
- Healthy : this tooth is part of the main stone model, it can be acquired with the rest of the model
- Stump : this tooth is a removable die that has to be acquired alone or on the Multi-Die support
- Pontic : missing tooth in between two stumps, it will be the intermediate element of a bridge
- Implant : there is an implant in this position, therefore a Scan Body will be acquired
- Bite : this tooth is part of an occlusal bite
Every tooth type has a specific color in the project definition scheme.
The Other Options are:
- Gingiva : this element is mounted on an artificial gingiva that has to be acquired separately from the stone model
- Pre-Op: the anatomy of this element is part of an additional model that will be acquired separately and then aligned to the reference stone model
- Waxup : over this tooth position, it's possible to scan a Pre-Modelled Waxup that will be aligned to the rest of the stone model
Additional Parameters
In the general information section, there are some additional parameters:
- Face Scan : if this option is enabled and available, a Real Time Face Scan will be added to the project data
- Unsectioned Model : enable this option if the model is not sectioned and the stumps can't be acquired separately
- Impression : enable this option if, instead of a stone model, an impression needs to be scanned
If the Dynamic Articulation Module is enabled, another option is displayed.
In the Articulator section select:
- Matching models to scan the occlusion if there is no need to use the automatic positioning in Exocad's Virtual Articulator
- Articulator A to scan the Artex Articulator and to use the same in Exocad's Virtual Articulator
- Articulator S to scan the Sam Articulator and to use the same in Exocad's Virtual Articulator
- Articulator P to scan the Kavo Articulator and to use the same in Exocad's Virtual Articulator
Here below an example of a defined prosthesis project for a 3-elements bridge with a stone antagonist:
Multi-Die Project
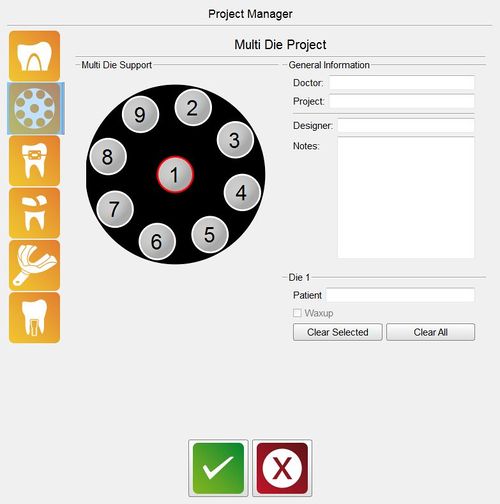
Use the Multi-Die Project to scan different dies from different patients in one single project:
To set the case, click on each multi-die position and define the name of each patient in the Patient field.
Orthodontic/Scheletric/Impression Project
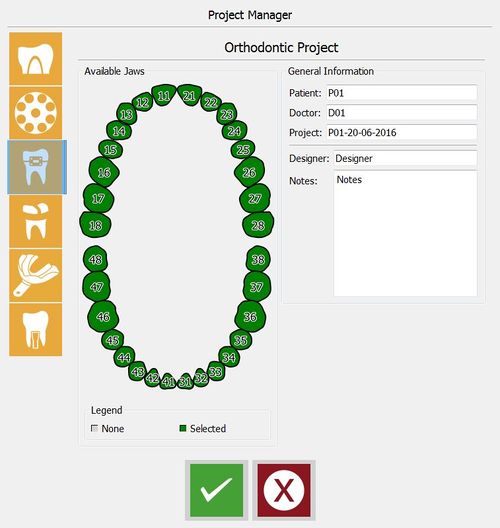
The Orthodontic, Scheletric and Impression Projects are straightforward and similar to one another.
These projects require the user to select the whole jaws instead of individual teeth.
When the project definition is confirmed, the software will prepare the Project Tree to acquire the data from the scanner.
Project Editing
If the project definition needs to be changed while already in use, it is possible to select the Edit Project tool in the File Menu or in the Project Toolbar (See Support Toolbars And Menus).
This tool will open again the Project Manager with the current project definition. It is possible to change the project definition and the parameters of every tooth.
When the editing is confirmed, the software will adapt the Project Tree. Editing an already scanned, or partially scanned, project can cause data loss.


