Step-By-Step Wizard
Revision as of 15:40, 5 November 2015 by L.Pizzoli (talk | contribs) (Created page with "* La Barra degli strumenti Principale non viene visualizzata * Invece dell' Albero Progetto, viene visualizzata la lista di Passi del Wizard...")
Procedura Guidata
Nei Progetti Strutturati, OpticalRevEng Dental offre un wizard che guida l'utente dalla pirma acquisizione fino all'esportazione dei dati.
Interfaccia del Wizard
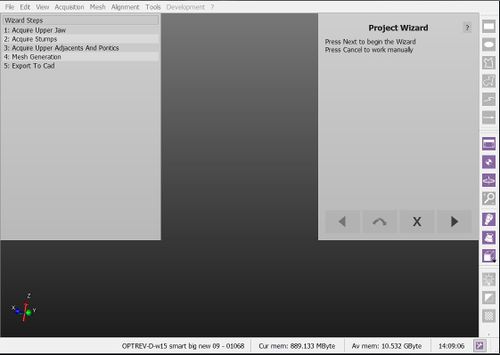
Quando si lancia la Modalità Wizard, l'interfaccia del software cambia:
- La Barra degli strumenti Principale non viene visualizzata
- Invece dell' Albero Progetto, viene visualizzata la lista di Passi del Wizard che devono essere seguiti per realizzare il progetto.
- Nell'angono in alto a destra dell'aplicazione, viene visualizzato il wizard vero e proprio che guiderà l'utente e che può essere gestito con solo 4 bottoni.
During all the wizard steps, all the other tools will be locked. All the interactions will be handled in the Wizard Panel on the top right of the screen
Wizard Sequence
The sequence of wizard steps depends on each specific project. It follows this logic:
- Acquire all the required data from the scanner
- After every single acquisiton:
- Check that all the information is correctly aligned
- Generate the needed meshes
- Align the implants
- Export to the CAD


