Project Tree
Contents
Projeto Arvore
A caixa superior esquerda da interface do software é o painel de gestão do projeto, que contém todos os dados adquiridos e modificados.
As árvores do projeto de modo estruturado e livre são diferentes.
Projeto Estruturado
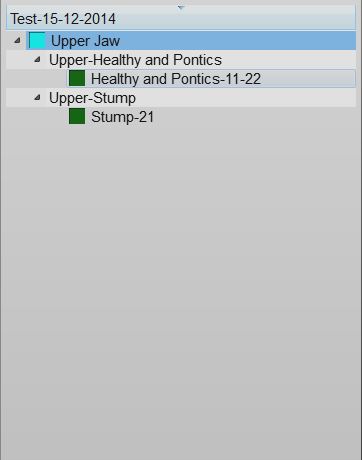
This image shows an example of a Structured Project Tree:
Data Status and Selection
There are 3 different status that define each object of the project, each status is marked by different color boxes:
- No Data (Gray Box): this element is needed for the project to be complete but no data is available. This element needs to be imported or scanned.
- Acquired (Blue Box): there is an acquisition of this element. It is possible to align this data with the rest of the project, edit it or convert it into mesh format.
- Meshed (Green Box): there is a mesh of this element. It is possible to edit this data and export it.
It is possible to interact with the Project Tree:
- Left Click on an element to select it
- Left Click keeping CTRL pressed on an element to add it to the current selection
- Right click on an element to open the Element Context Menu
- Left Click outside the list to clear the current selection
All the selected items will be visible in the 3D View and the software will activate the buttons for all the available actions of the menus, the Main Toolbar and the Support Toolbars according to the current selection.
The information is layed out as a tree; each element can have children elements. This scheme represents the information dependency in the project. For example a single stump is part of a jaw so it's a child of the jaw and the software, when asked to align the stump to the rest of the project, will align it to its parent jaw.
Context Menu
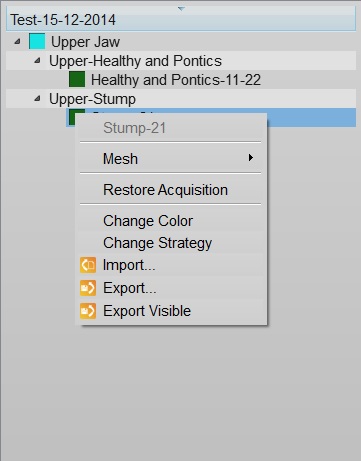
By right clicking on a Project Tree element, a context menu will appear:
The context menu shows:
- A Sub Menu with the tools for the selected element (Mesh, Acquisition)
- A Restore Acquisition button that will remove a mesh and recover the previous acquisition
- A Change Color button that will change the assigned color of this element, used in the 3D View
- A Change Strategy button that will change the scan and mesh strategy of this element
- An Import... button that will import an acquisition or mesh from the disk, in the supported formats
- An Export... button that will export the acquisition or mesh to the disk, in a supported format
- An Export Visible button that will merge and export all the current selected meshes in one single file
Drag And Drop
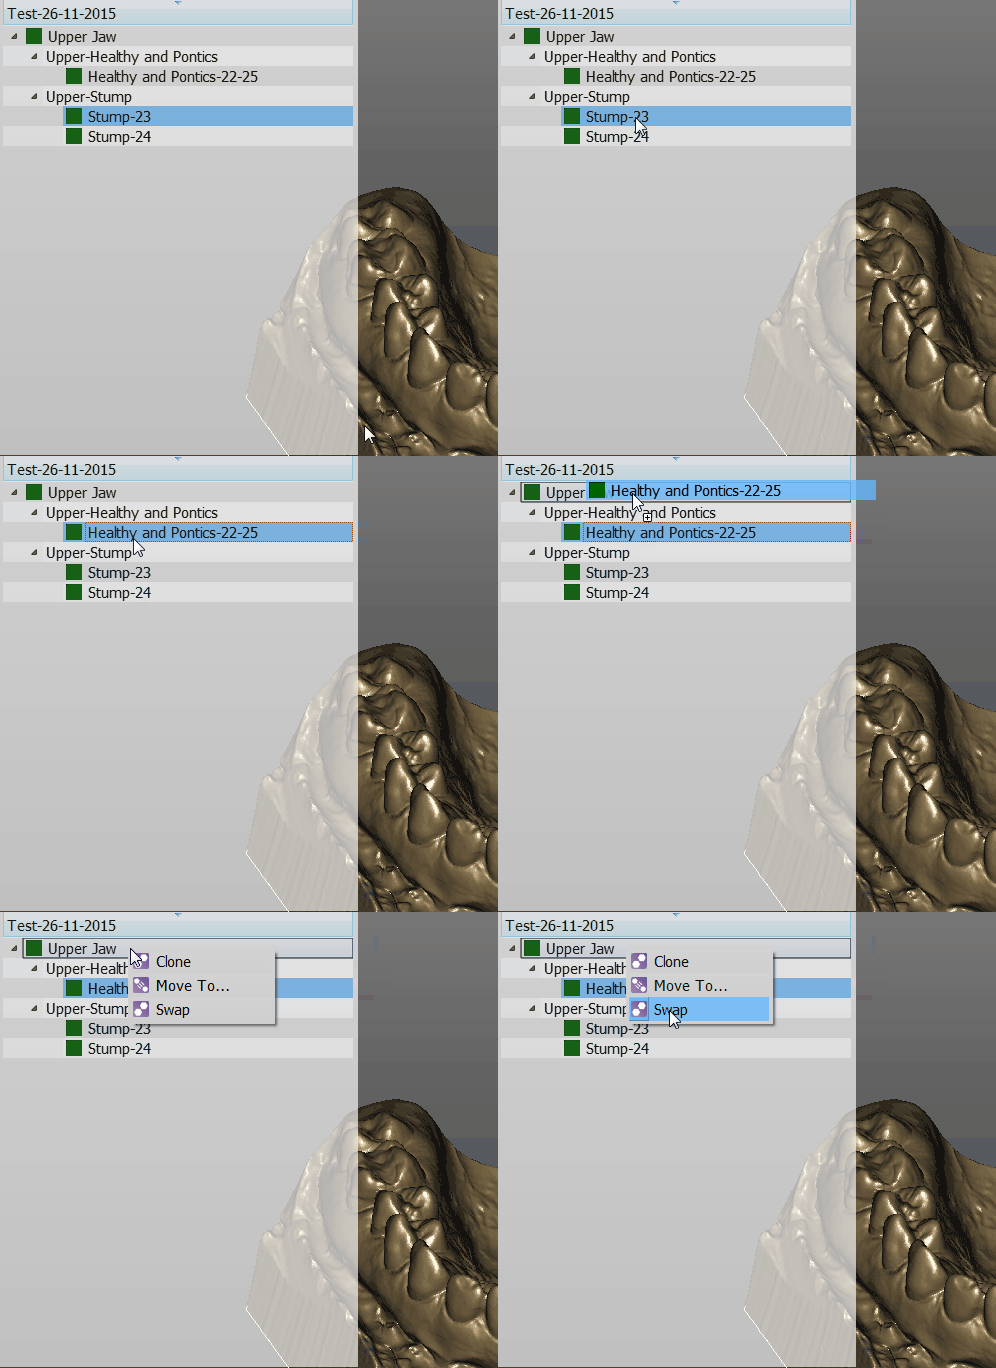
You can drag one element and drop it over a different one
The available actions will be:
- Clone to create a copy of this element
- Move To ... to clone the element and remove the original one
Free Project
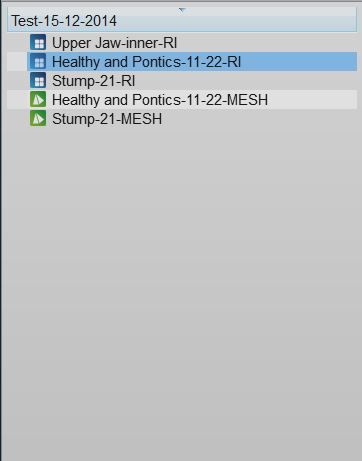
This is a screenshot of a Free Project Tree
In the Free Project mode, the software has no way of knowing the dependencies between the data. So there's no tree, no children. Only a list of objects.
The objects can be of 2 types. Acqusitions (blue icon) or Meshes (green icon).
This project type usually works as the Structured Project.
The differences are:
- To create a copy of a data, it is necessary to open the context menu and select the Clone function.
- By dragging one element above another, it is possible to choose between:
- The Direct Alignment: action to automatically align the two elements.
- The Manual Alignment: action to manually align the two elements.


