Step-By-Step Wizard
Revision as of 15:37, 5 March 2016 by Trubnikova (talk | contribs) (Created page with "При запуске ''Режима настройки'', программа меняет интерфейс:")
Пошаговый мастер настройки
При работе в Структурированном проекте, OpticalRevEng Dental запускает мастер настройки, который дает подробный инструктаж работы от первого сканирования до экспорта данных.
Интерфейс Мастера настройки
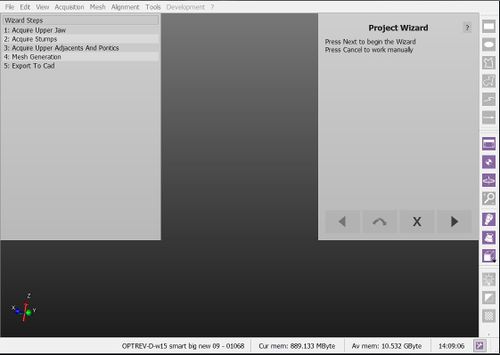
При запуске Режима настройки, программа меняет интерфейс:
- The Main Toolbar disappears
- Instead of the Project Tree, there is a Wizard Steps list that will remind the user of the completed and next steps.
- On the Top Right corner of the application, there is the Wizard itself that will guide the user and that can be handled with only 4 buttons
During all the wizard steps, all the other tools will be locked. All the interactions will be handled in the Wizard Panel on the top right of the screen
Wizard Sequence
The sequence of wizard steps depends on each specific project. It follows this logic:
- Acquire all the required data from the scanner
- After every single acquisiton:
- Check that all the information is correctly aligned
- Generate the needed meshes
- Align the implants
- Export to the CAD


