Project Tree
Contents
Дерево проекта
В верхнем левом углу интерфейса расположена панель управления проектом, которая содержит все полученные и измененные данные.
Дерево проекта структурированного и свободного типа различаются между собой.
Структурированный проект
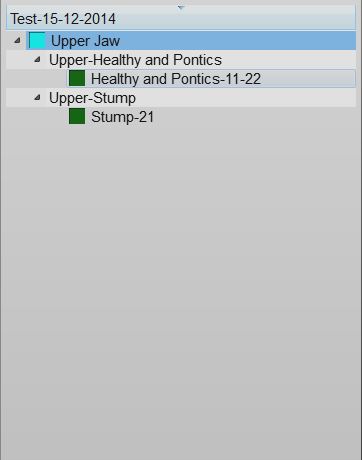
Ниже изображен пример структурированного дерева проекта:
Положение и выбор данных
Три разных статуса определяют состояние объекта в проекте, где каждый статут имеет цветовое обозначение
- Нет данных (серый значок): элемент необходим для завершения проекта, но по нему нет доступных данных. Элемент подлежит импортированию или сканированию.
- Полеченные (синий значок): элемент был получен. Теперь можно группировать данные между собой, редактировать или переводить в формат меша.
- Меш (зеленый значок): в проекте присутствует mesh элемента. Данные можно редактировать и переносить.
Можно взаимодействовать с деревом проекта:
- Left Click on an element to select it
- Left Click keeping CTRL pressed on an element to add it to the current selection
- Right click on an element to open the Element Context Menu
- Left Click outside the list to clear the current selection
All the selected items will be visible in the 3D View and the software will activate the buttons for all the available actions of the menus, the Main Toolbar and the Support Toolbars according to the current selection.
The information is layed out as a tree; each element can have children elements. This scheme represents the information dependency in the project. For example a single stump is part of a jaw so it's a child of the jaw and the software, when asked to align the stump to the rest of the project, will align it to its parent jaw.
Context Menu
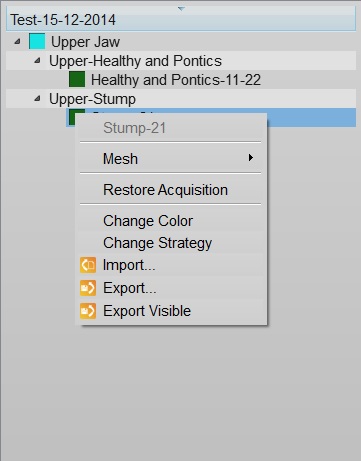
By right clicking on a Project Tree element, a context menu will appear:
The context menu shows:
- A Sub Menu with the tools for the selected element (Mesh, Acquisition)
- A Restore Acquisition button that will remove a mesh and recover the previous acquisition
- A Change Color button that will change the assigned color of this element, used in the 3D View
- A Change Strategy button that will change the scan and mesh strategy of this element
- An Import... button that will import an acquisition or mesh from the disk, in the supported formats
- An Export... button that will export the acquisition or mesh to the disk, in a supported format
- An Export Visible button that will merge and export all the current selected meshes in one single file
Drag And Drop
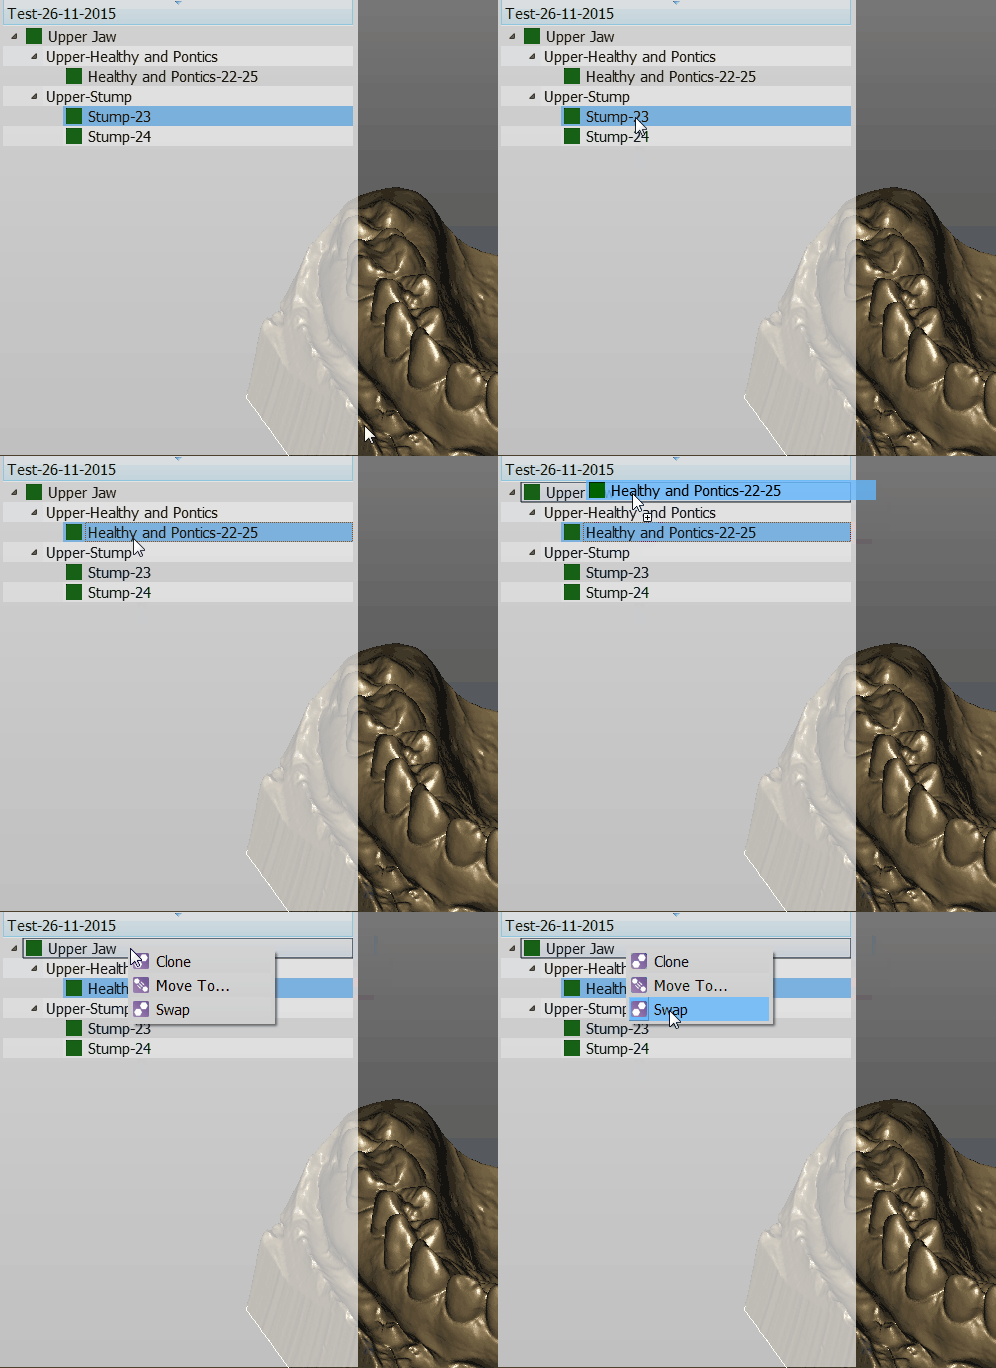
You can drag one element and drop it over a different one
The available actions will be:
- Clone to create a copy of this element
- Move To ... to clone the element and remove the original one
- Swap to swap the mesh or acquisition information of two elements
Free Project
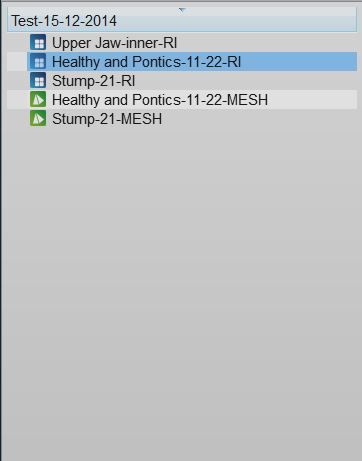
This is a screenshot of a Free Project Tree
In the Free Project mode, the software has no way of knowing the dependencies between the data. So there's no tree, no children. Only a list of objects.
The objects can be of 2 types. Acqusitions (blue icon) or Meshes (green icon).
This project type usually works as the Structured Project.
The differences are:
- To create a copy of a data, it is necessary to open the context menu and select the Clone function.
- By dragging one element above another, it is possible to choose between:
- The Direct Alignment: action to automatically align the two elements.
- The Manual Alignment: action to manually align the two elements.


