Acquisition
Contents
Acquisition
L’une des fonctions principales du logiciel est l’acquisition de donnés du scanneur et la création de représentations virtuelles en 3D d’objets.
Pour plusieurs d’informations sur l’Assistant, suivre le lien à la page Acquisition Assistée
Un Projet Structuré a 3 procedures d’acquisition de donnés, sans compter l’Assistant
Simple
C’est la façon la plus facile et utilisée pour acquérir des donnés
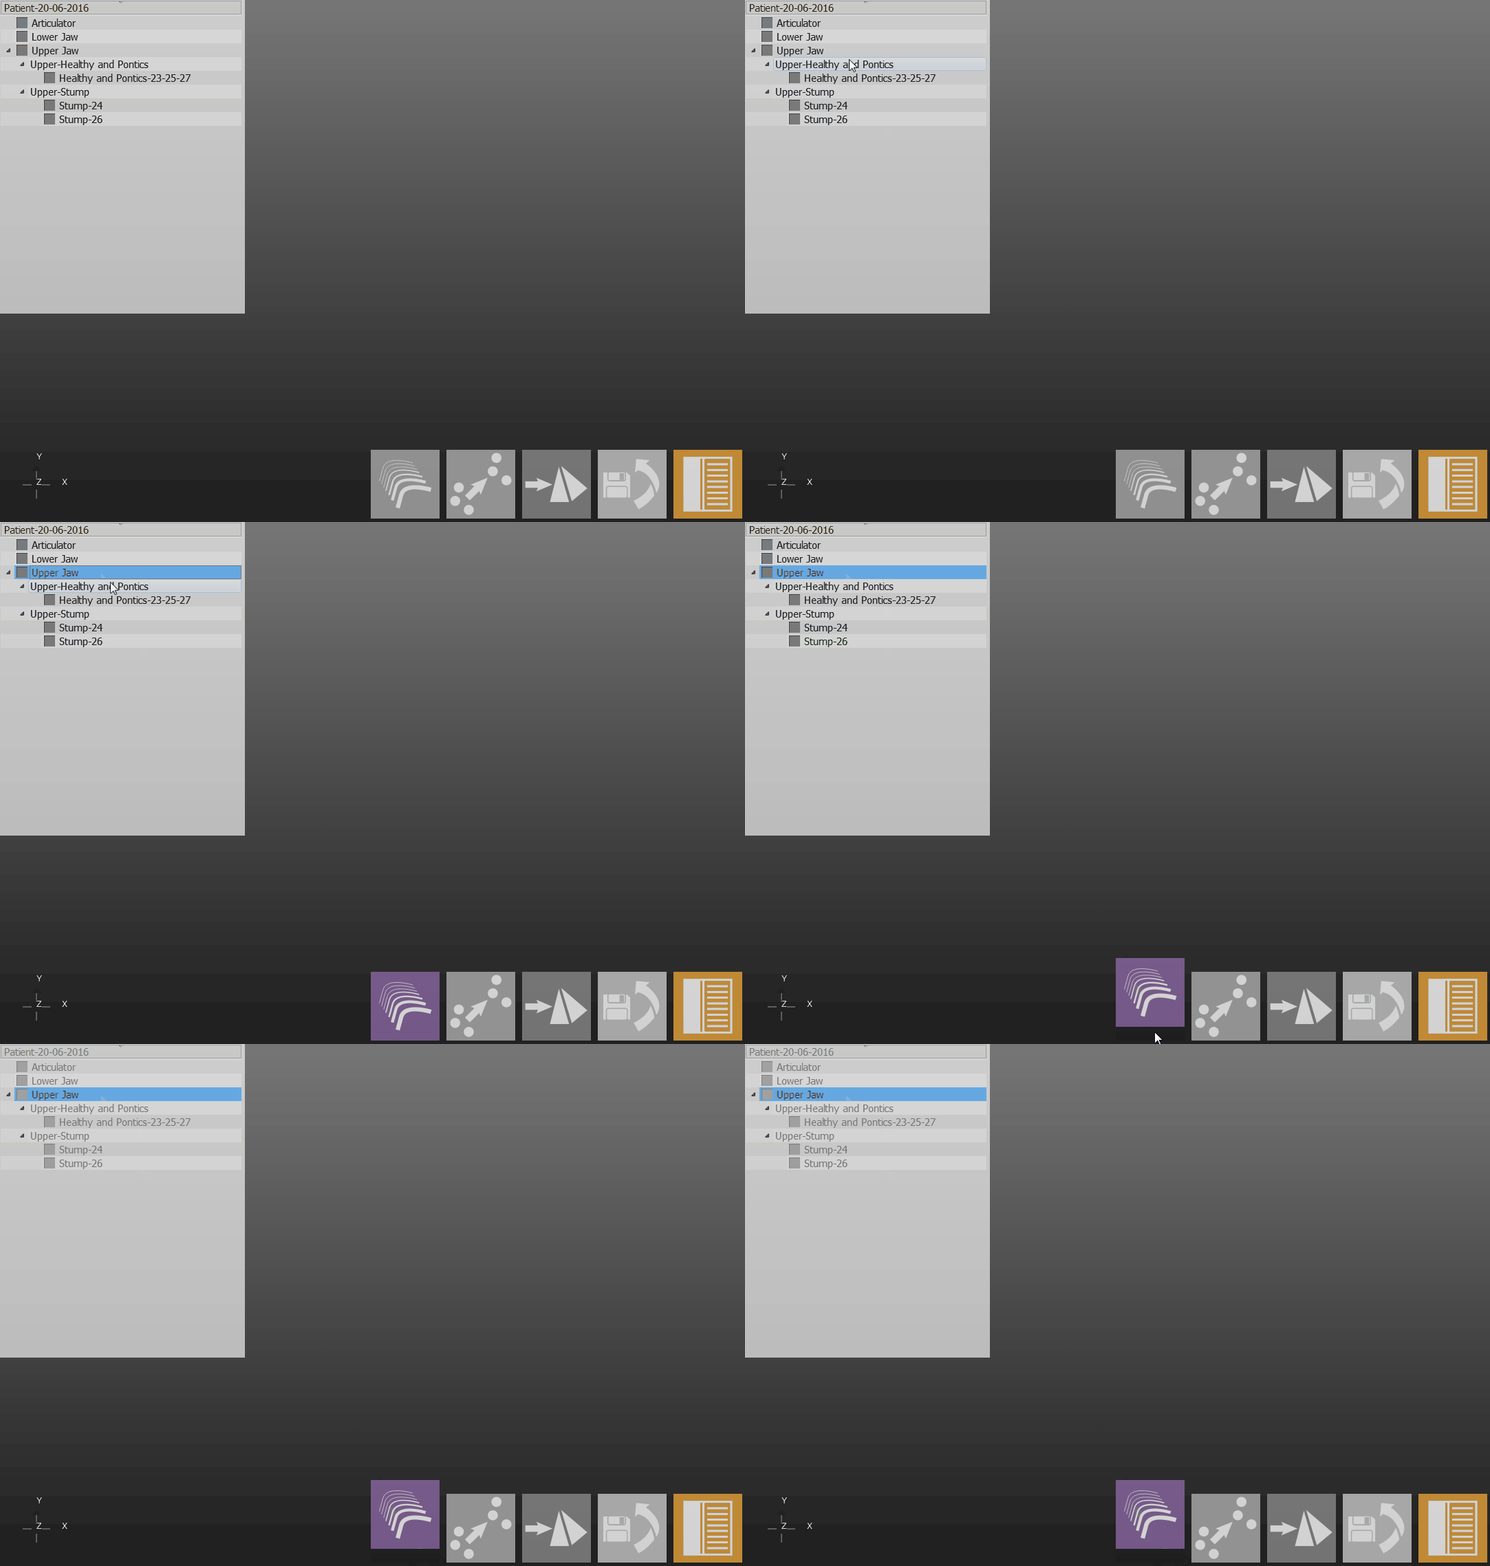
- Mettre l’objet sur le support approprié et l’insérer dans le scanneur
- Sélectionner l’objet à numériser dans l’Arbre du Projet
- Cliquer la touche Acquisition dans la Barre d’Outils Principale
Le scanneur démarre l’acquisition en utilisant la procédure choisie et il ajourne l’Arbre du Projet
Paramètres Avancés
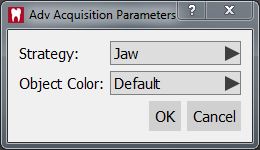
Pour utiliser un type d’acquisition différent que l'automatique, appuyer sur la touche ![]() lorsqu’on clique sur la touche Acquisition
lorsqu’on clique sur la touche Acquisition
Une fenêtre nouvelle permet de choisir une stratégie et une couleur différente pour l’objet à acquérir
Articulation Dynamique
Quand le Module d’Articulation Dynamique est activé le logiciel rappelle d’utiliser le support pour numériser l’arcade.
Le type de support change en fonction du type d’articulateur choisi dans le projet de définition.
Multi-Die
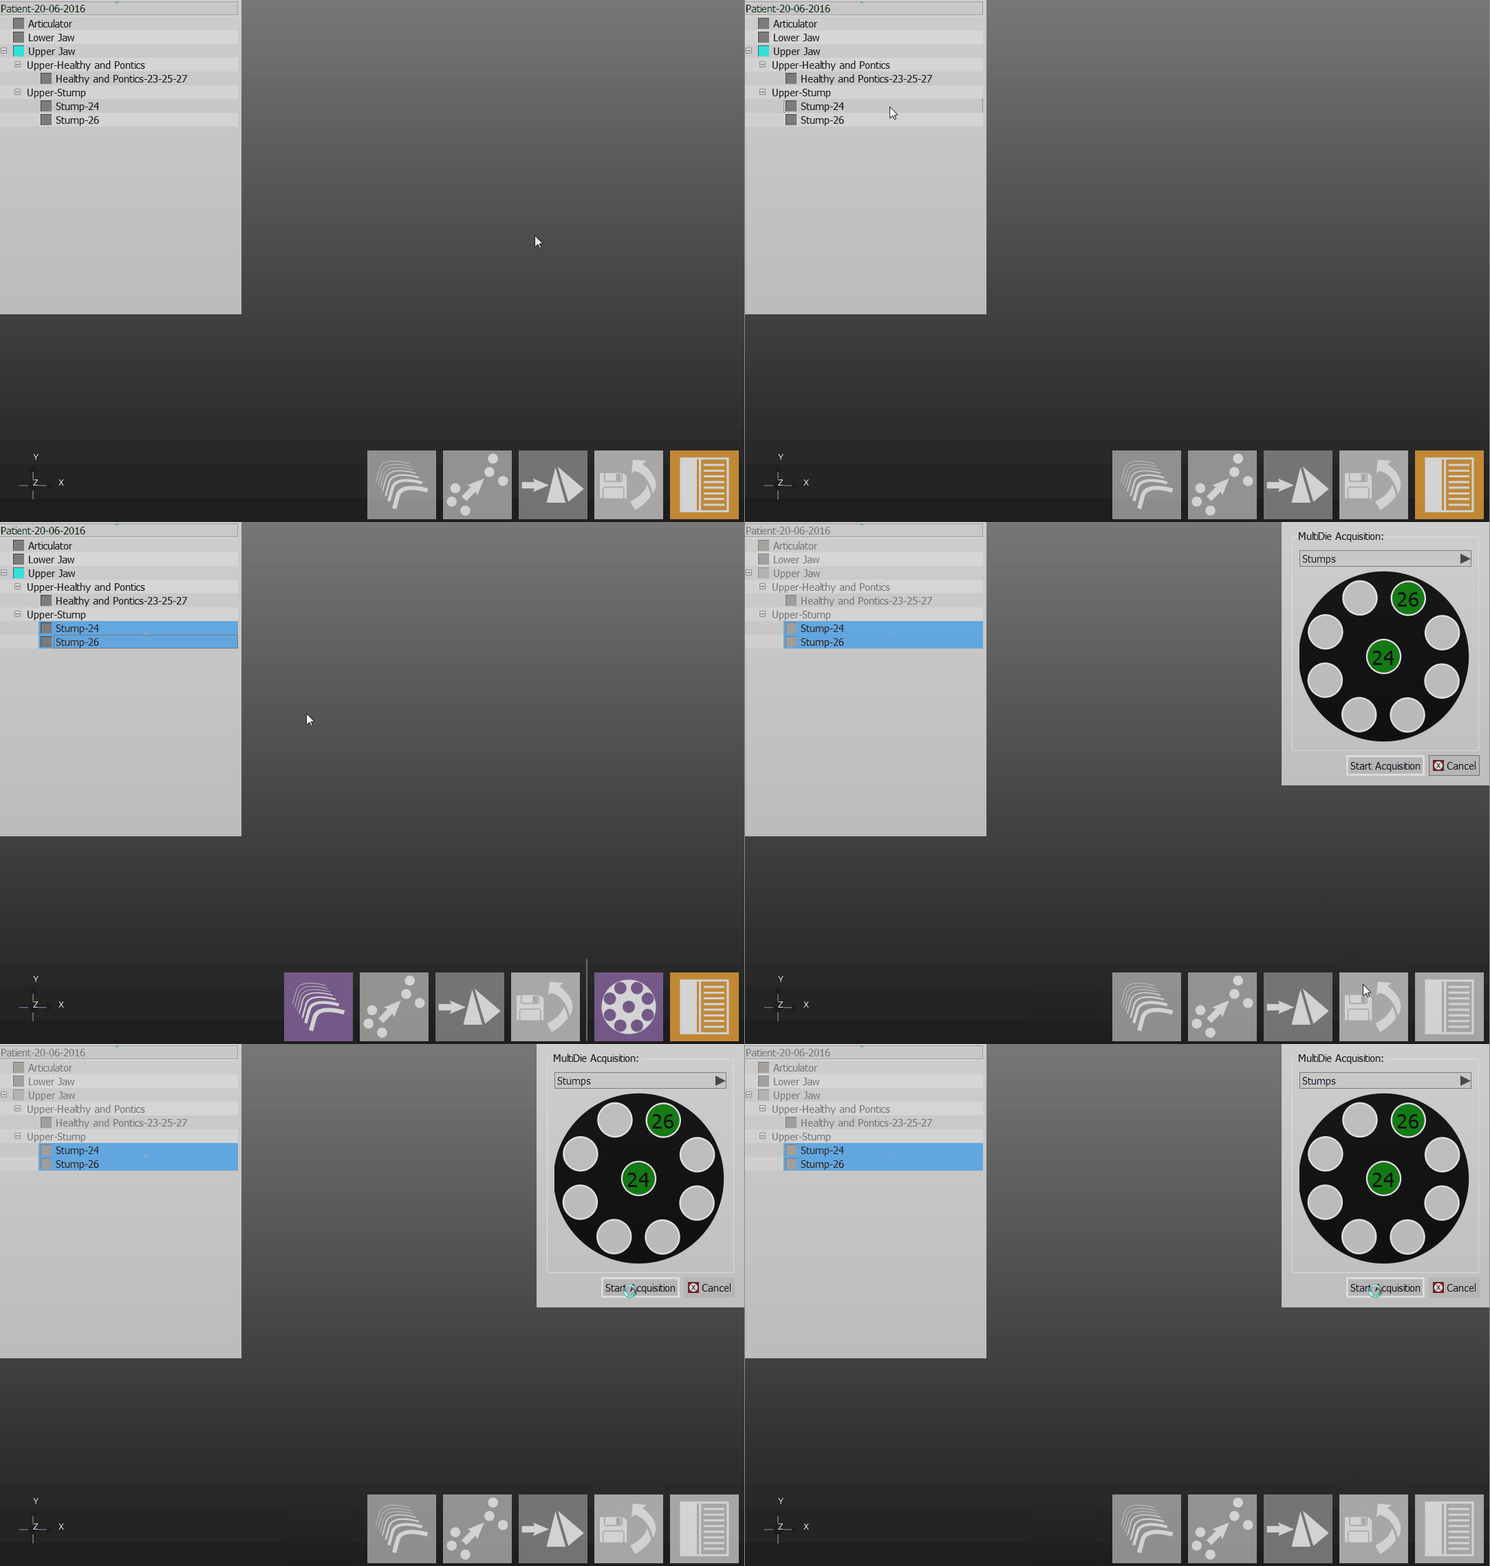
Pour acquérir plusieurs de moignons en une seule numérisation il faut utiliser le support multi-die
- Sélectionner les moignons à numériser dans l’Arbre du Projet
- Cliquer sur la touche d’Acquisition Multi-Die dans la Barre d’Outils Principale qu’apparait quand au moins dois moignons sont sélectionnés
- Placer les moignons dans le support en suivant les instructions du logiciel et mettre ensuit le Multi-die dans le scanneur
- Cliquer sur Démarrer Acquisition
Le scanneur numérise les donnés, il identifie chaque moignon et il ajourne l’Arbre du Projet
Individuelle
On peut acquérir une image 3D individuelle pour numériser l’articulateur en des scanneurs petit ou pour amener des tests, quand une reconstruction de l’objet à 360’ n’est pas nécessaire :
- Placer l’objet dans le scanneur
- Utiliser l’ Outil Acquisition Individuelle
Le logiciel démarre une acquisition individuelle, sans activer le système de déplacement
Intégration
Apres l’acquisition d’un objet, on pourrait avoir besoin d’ajouter des informations à la numérisation initiale. Par exemple si une partie de l’objet est manquant à cause d’une ombre ou si une partie n’a pas été numérisée.
Pour intégrer les informations adjonctives, cliquer sur Intégrer Acquisitions dans la Barre d’Outils Principale. La Procédure d’Intégration est démarrée avec la possibilité de choisir l’un des trois outils d’intégration. Plusieurs d’outils peuvent être utilisés à la fois. Après l’acquisition, confirmer les modifications avec Appliquer ou les rejeter avec Annuler ![]() .
.
Un nombre illimité d’acquisitions peut être ajouté mais trop des donnés peuvent ralentir le projet et augmenter les dimensions du projet sur disque
Single
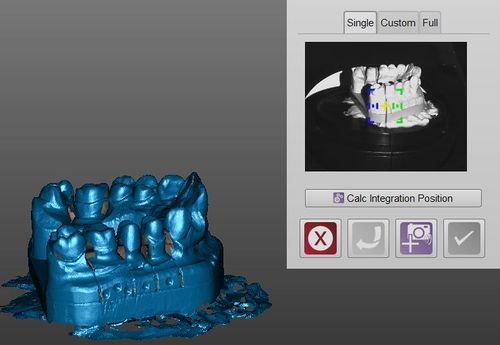
The single integration mode allows to add information from a specific point of view. To add information:
- Rotate the 3D view so that the screen will show exactly the part of the object to be integrated
- Click on the Start Integration
 icon
icon
If the last added acquisition is not good, useless or problematic, it is possible to remove it with the Undo ![]() button.
button.
If the object is not in the original scanning position, the software can not correctly integrate the information. It is possible to try to fix this problem using the Calc Integration Position button.
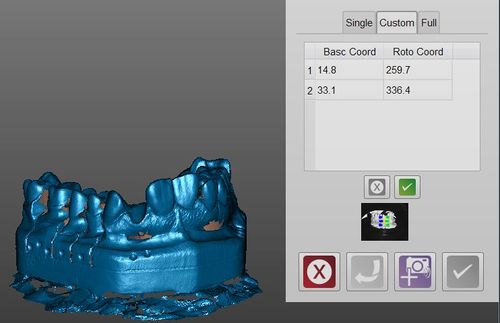
Custom
The Custom mode, instead of scanning one position at a time, allows to create a costumized sequence of positions and then the scanner will carry out all the acquisitions together.
To add a position:
- Rotate the 3D view so that the screen will show exactly the part to be integrated
- Click the Add Position
 button
To remove a position:
To start the scan, click the Start Integration ![]() button
button
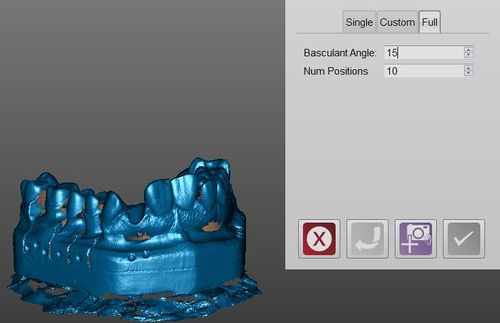
Full
The full integration is the easiest mode: it allows to select as many positions as needed and in which degree the plate must tilt to complete the image.
Then, by clicking the Start Integration ![]() button, the scanner will tilt the model and carry out a 360° acquisition using the selected number of positions.
button, the scanner will tilt the model and carry out a 360° acquisition using the selected number of positions.
Change Strategy
When the Project Tree is created, the software will select a specific strategy for every element, trying to maximize the scan quality and saving space. To change the strategy of an element of the project:
- Right click on the element in the project tree
- Select Change Strategy
- Select the new strategy from the dropdown menu
Another scan of the object will be carried out using the new strategy instead of the old one.
