Dental Service Mode
Contents
OpticalRevEng Dental установлен режим сервисной поддержки, доступный в меню Меню инструментов для устранения и диагностирования любой проблемы.
Режим Live
Этот инструмент позволяет просматривать вид с камер сканера в реальном времени.
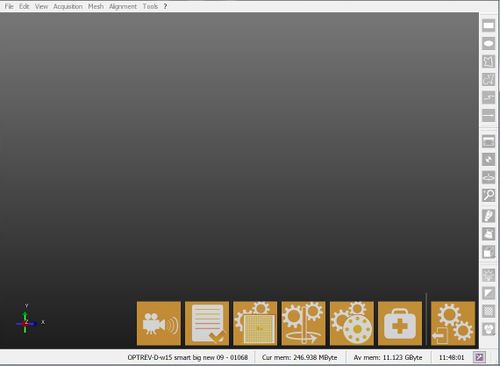
Для активация режима нажмите на кнопку
Проверка сканера
Программа проверяет соединения сканера каждый раз при его активации.
С помощью этого инструмента можно проводить проверку вручную.
Настройка оптической головки
Для запуска этого инструмента нажать на кнопку
Существует два вида калибровки:
- Перекалибровка
- переодически проводимая быстрая процедура для обновления калибровки сканера. Рекомендуема при установке сканера в другом помещении.
- Полная калибровка
- более комплексная процедура, проводимая после технического ремонта
Инструмент использует Набор для калибровки для проведения новой калибровки оптической головки сканера. Процедура включает следующие шаги:
- Поместить набор для калибровки внутрь сканера в нужном положении
- Выбрать тип калибровки из выпадающего меню
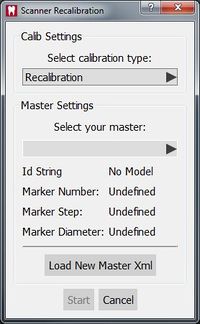
- В диалоговом окне калибровки выбрать в выпадающем меню соответсвующий выбранному мастеру калибровки файл xml
- Нажать Старт
If the calibration kit name is not available in the drop down menu, the Load New Master Xml button can be used to add a new calibration kit from the appropriate Xml description file.
The calibration procedure is automatic. Once finished, the software will show one of the following messages:
- 'Scanner Already Calibrated' : the calibration is not necessary
- 'Scanner Recalibrated Successfully' : the calibration has been completed
- 'Scanner Recalibration Failed' : calibration has to be repeated
If the calibration was successful, the Axes Calibration starts automatically.
Recalibrate Axis
This tool is used to check the movement system of the scanner. The scanner will scan an object, analyze it, and use this data to calibrate the movement system.
This tool will start automatically after a Head Recalibration or can be started manually with the button.
- Put the calibration object inside the scanner
- Click Recalibrate Axis
- Click Ok when prompted
The calibration procedure is automatic. Once it is finished, the software will show one of the following messages:
- 'Axis Recalibration Successfull' : the calibration has been completed
- 'Axis Recalibration Failed' : calibration has to be repeated
Auto Set-Up Multi-Die Parameters
This tool is used to calibrate the Multi-Die support. If the acquisitions carried out with the Multi-Die are not correctly recognized, the calibration procedure is the following:
- Clean the multi-die from excessive material or white powder, every single die position needs to be clearly separated from the others
- Put the empty multi-die support inside the scanner
- Start the tool with this button
- Click Ok when prompted
Diagnostic Acquisition
When doubting the proper functioning of the scanner, this tool carries out a specific acquisition of the object currently inside the scanner.
The software then saves all the information in a "*.diag" file that can be sent to the OpticalRevEng Dental support to diagnose possible issues.


