Dental Service Mode
Contents
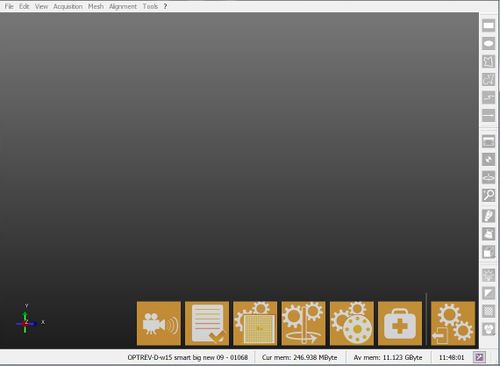
OpticalRevEng Dental verfügt über verschiedene Analyse- und Rekalibrierungswerkzeuge, die im Werkzeug-Menü zu finden sind, um den Scanner zu rekalibrieren und eine Fehlerdiagnose durchzuführen.
Live Mode
Durch dieses Werkzeug ist es möglich, eine Liveübertragung der Scannerkamera zu aktivieren.
Um diese Funktion zu aktivieren, auf klicken.
Check Scanner
Die Software überprüft, ob der Scanneranschluss in Ordnung ist jedes Mal, wenn er aktiviert wird.
Es ist durch dieses Werkzeug möglich, diese Überprüfung manuell zu starten.
Scankopf rekalibrieren
Um diese Funktion zu aktivieren, auf diesen Knopf klicken;
.
Dieses Werkzeug verwendet das Kalibrierungskit, um den optischen Scankopf zu rekalibrieren. Der Vorgang läuft wie folgt ab:
- Das Kalibrierungsmuster in den Scanner bzw. in die richtige Position einlegen
- Scankopf rekalibrieren im Werkzeug-Menü auswählen
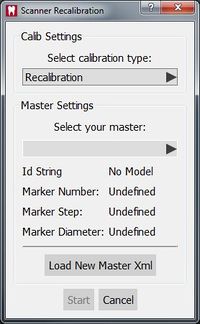
- Im Kalibrierungs-Dialogmenü, das kalibrierungsmusterspezifische .xml File vom Dropdownmenü auswählen
- Auf Start klicken
Wenn das .xml-File des Kalibrierungskit im Dropdownmenü nicht zu finden ist, ist es möglich, die Funkion Load New Master Xml zu benutzen, um das geeignete .xml-File von einem PC Ordner auszuwählen.
The calibration procedure is automatic. Once finished, the software will show one of the following messages:
- 'Scanner Already Calibrated' : the calibration is not necessary
- 'Scanner Recalibrated Successfully' : the calibration has been completed
- 'Scanner Recalibration Failed' : calibration has to be repeated
If the calibration was successful, the Axes Calibration starts automatically.
Recalibrate Axis
This tool is used to check the movement system of the scanner. The scanner will scan an object, analyze it, and use this data to calibrate the movement system.
This tool will start automatically after a Head Recalibration or can be started manually with the button.
- Put the calibration object inside the scanner
- Click Recalibrate Axis
- Click Ok when prompted
The calibration procedure is automatic. Once it is finished, the software will show one of the following messages:
- 'Axis Recalibration Successfull' : the calibration has been completed
- 'Axis Recalibration Failed' : calibration has to be repeated
Auto Set-Up Multi-Die Parameters
This tool is used to calibrate the Multi-Die support. If the acquisitions carried out with the Multi-Die are not correctly recognized, the calibration procedure is the following:
- Clean the multi-die from excessive material or white powder, every single die position needs to be clearly separated from the others
- Put the empty multi-die support inside the scanner
- Start the tool with this button
- Click Ok when prompted
Diagnostic Acquisition
When doubting the proper functioning of the scanner, this tool carries out a specific acquisition of the object currently inside the scanner.
The software then saves all the information in a "*.diag" file that can be sent to the OpticalRevEng Dental support to diagnose possible issues.


