Project Tree
Contents
Árbol de Proyecto
La ventana en la esquina inferior izquierda de la Interfaz del software es el panel de gestión del proyecto y contiene todos los datos capturados y modificados.
Los árboles de proyecto de un proyecto estructurado y de un proyecto libre se diferencian.
Proyecto Estructurado
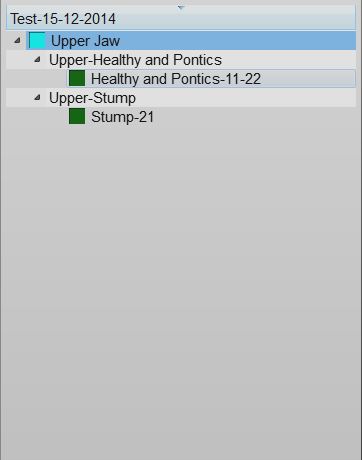
Esta imagen muestra un ejemplo de un Árbol de Proyecto Estructurado:
Estado de datos y Selección
Hay 3 estados distintos que definen cada objeto del proyecto, cada estado está marcado por casillas de diferentes colores:
- Ningun Datos (Icono Gris): este elemento es necesario para que el proyecto sea completo, pero no hay datos disponibles. Es necesario importarlo o escanearlo.
- Capturado (Icono Azul): hay una captura de este elemento. Es posible alinearlo con el proyecto, editarlo o convertirlo en un formato malla.
- Malla (Icono Verde): en este proyecto hay una malla que puede ser exportada o modificada.
Es posible interactuar con el Árbol de Proyecto:
- Hacer clic con el boton izquierdo en un elemento para seleccionarlo
- Hacer clic con el boton izquierdo, mientras se pulsa CTRL, en un elemento para añadirlo a la selección actual.
- Hacer clic con el boton derecho en un elemento para abrir el "Menu contextual del elemento"
- Hacer clic con el boton izquierdo fuera de la lista para limpiar la seleccion actual
Todos los elementos seleccionados podran ser visualizados en la Vista 3D y los botones para todas las acciones disponibles de los menus, el Barra de herramientas principal y el Barras de herramientas secundarias segun la seleccion actual.
Las informaciones están visualizadas bajo la forma de un árbol; cada elemento puede tener elementos "hijos". Este esquema representa los criterios de enlace. Por ejemplo, como un solo muñón forma parte de una arcada y es un hijo de la misma, durante el procedimiento de alineación del muñón, la arcada padre será reconocida como referencia.
Context Menu
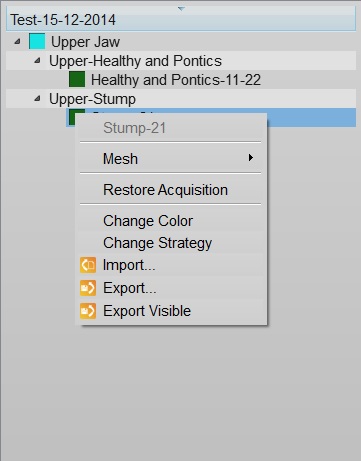
By right clicking on a Project Tree element, a context menu will appear:
The context menu shows:
- A Sub Menu with the tools for the selected element (Mesh, Acquisition)
- A Restore Acquisition button that will remove a mesh and recover the previous acquisition
- A Change Color button that will change the assigned color of this element, used in the 3D View
- A Change Strategy button that will change the scan and mesh strategy of this element
- An Import... button that will import an acquisition or mesh from the disk, in the supported formats
- An Export... button that will export the acquisition or mesh to the disk, in a supported format
- An Export Visible button that will merge and export all the current selected meshes in one single file
Drag And Drop
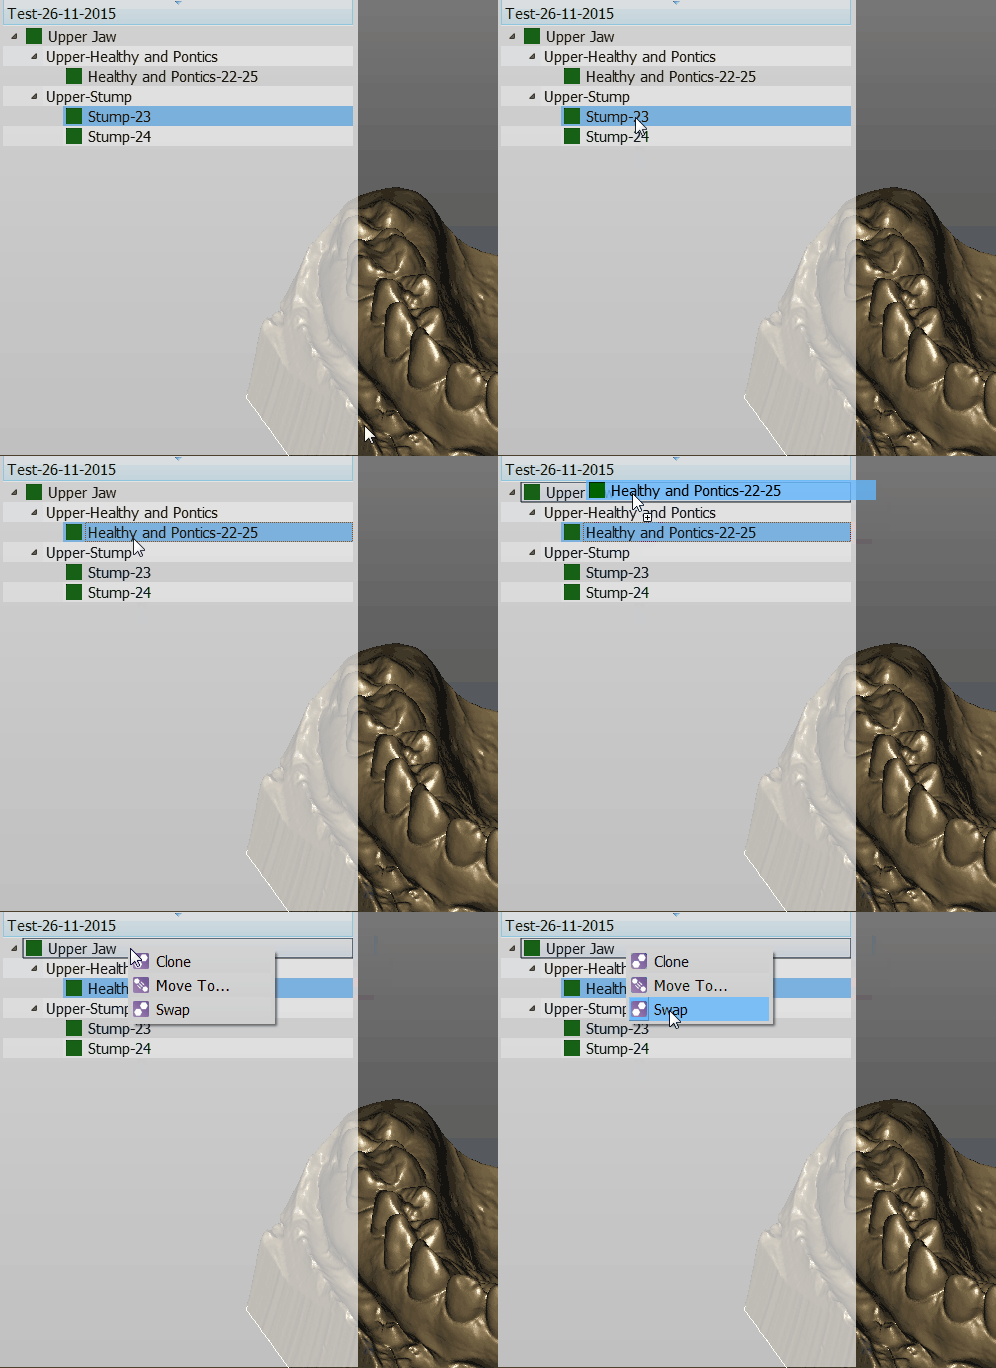
You can drag one element and drop it over a different one
The available actions will be:
- Clone to create a copy of this element
- Move To ... to clone the element and remove the original one
- Swap to swap the mesh or acquisition information of two elements
Free Project
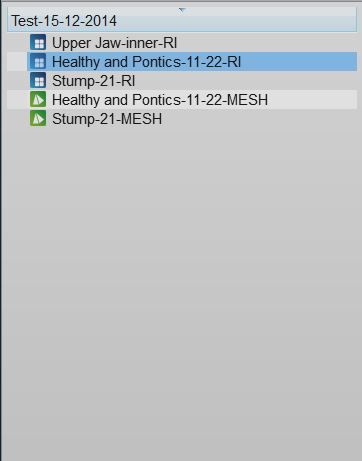
This is a screenshot of a Free Project Tree
In the Free Project mode, the software has no way of knowing the dependencies between the data. So there's no tree, no children. Only a list of objects.
The objects can be of 2 types. Acqusitions (blue icon) or Meshes (green icon).
This project type usually works as the Structured Project.
The differences are:
- To create a copy of a data, it is necessary to open the context menu and select the Clone function.
- By dragging one element above another, it is possible to choose between:
- The Direct Alignment: action to automatically align the two elements.
- The Manual Alignment: action to manually align the two elements.


