Difference between revisions of "Project Tree/ja"
(Created page with "== コンテクストメニュー ==") |
(Created page with "プロジェクトツリーの部品を右クリックすると、コンテクストメニューが表示されます:") |
||
| Line 34: | Line 34: | ||
== コンテクストメニュー == | == コンテクストメニュー == | ||
| − | + | プロジェクトツリーの部品を右クリックすると、コンテクストメニューが表示されます: | |
{{Screenshot|Dental_2_5_projectTreeMenu.jpg}} | {{Screenshot|Dental_2_5_projectTreeMenu.jpg}} | ||
Revision as of 10:58, 28 December 2015
Contents
プロジェクトツリー
ソフトウェアインターフェースの左上の箱は、プロジェクトの管理パネルで、すべての取得・修正されたデータが含まれます。
構造モードとフリーモードのプロジェクトツリーは異なります。
構造プロジェクト
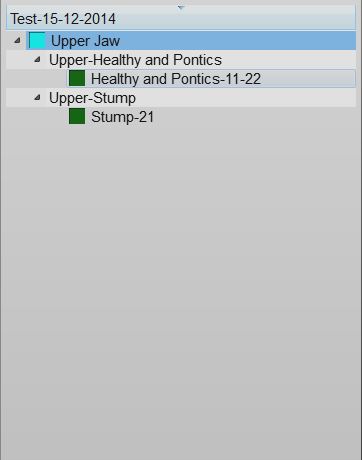
下図は構造プロジェクトツリーの一例です:
データステータスと選択
プロジェクトの各オブジェクトを定義するステータスには3つあります。各ステータスには異なる色の箱マークが付きます:
- データなし(グレー色): この部品はプロジェクトを完成させるのに必要ですが、データがありません。この部品をインポートするか、スキャンする必要する必要があります。
- 取得済み(青色): この部品の取得データがあります。このデータをプロジェクト内の残りのデータとアライメントさせたり、編集したり、またはメッシュ形式へ変換することができます。
- メッシュ(緑色): この部品のメッシュデータがあります。このデータを編集したり、エクスポートすることができます。
プロジェクトツリーは以下のように操作できます:
- 部品を左クリックで選択します
- CTRLを押したまま部品を左クリックし、現在の選択に追加します
- 部品を右クリックし、Element Context Menu(部品のコンテクストメニュー)を開きます
- リストの外側を左クリックして、現在の選択を解除します
選択されたすべての項目を3Dビューで見ることができます。また、現在の選択内容に応じて、ソフトウェアはメニュー、メインツールバーおよびサポートツールバーで利用可能なすべての操作用のボタンを有効にします。
情報はツリー構造で表示され、各部品は子部品を持つことができます。この体系はプロジェクト内の情報の依存関係を表します。例えば、単一の支台歯は顎の一部であり、顎の小部品となります。支台歯をプロジェクトの残りの部品に対してアライメントすると指示を受けた場合、ソフトウェアは親となる顎に対してアライメントします。
コンテクストメニュー
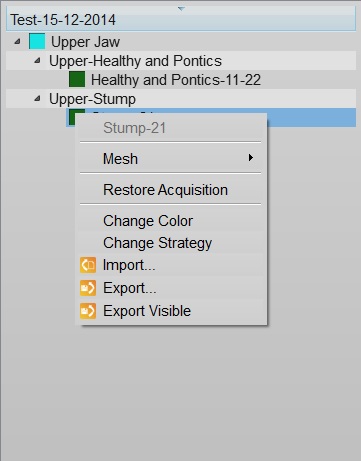
プロジェクトツリーの部品を右クリックすると、コンテクストメニューが表示されます:
The context menu shows:
- A Sub Menu with the tools for the selected element (Mesh, Acquisition)
- A Restore Acquisition button that will remove a mesh and recover the previous acquisition
- A Change Color button that will change the assigned color of this element, used in the 3D View
- A Change Strategy button that will change the scan and mesh strategy of this element
- An Import... button that will import an acquisition or mesh from the disk, in the supported formats
- An Export... button that will export the acquisition or mesh to the disk, in a supported format
- An Export Visible button that will merge and export all the current selected meshes in one single file
Drag And Drop
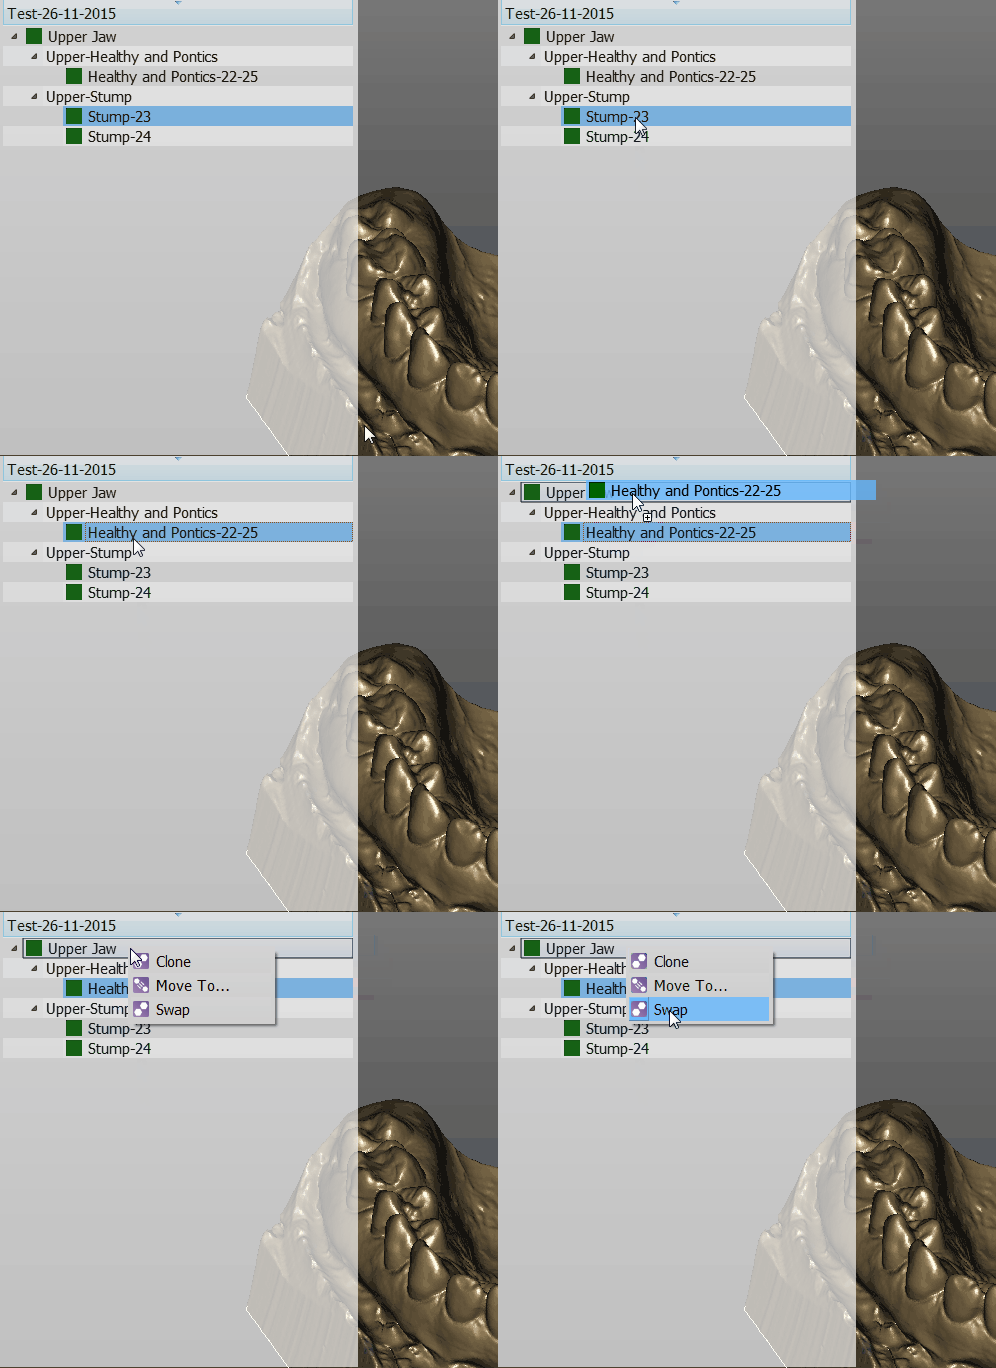
You can drag one element and drop it over a different one
The available actions will be:
- Clone to create a copy of this element
- Move To ... to clone the element and remove the original one
- Swap to swap the mesh or acquisition information of two elements
Free Project
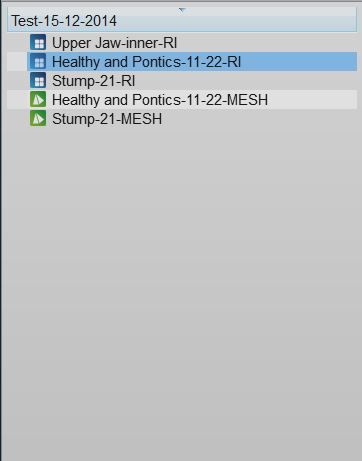
This is a screenshot of a Free Project Tree
In the Free Project mode, the software has no way of knowing the dependencies between the data. So there's no tree, no children. Only a list of objects.
The objects can be of 2 types. Acqusitions (blue icon) or Meshes (green icon).
This project type usually works as the Structured Project.
The differences are:
- To create a copy of a data, it is necessary to open the context menu and select the Clone function.
- By dragging one element above another, it is possible to choose between:
- The Direct Alignment: action to automatically align the two elements.
- The Manual Alignment: action to manually align the two elements.


