Difference between revisions of "Man ProjectCreation/it"
(Created page with "Ogni tipo di dente è rappresnetato in un colore diverso nello schema di definizione del progetto.") |
(Created page with "Le Altre Opzioni disponibili sono:") |
||
| Line 50: | Line 50: | ||
Ogni tipo di dente è rappresnetato in un colore diverso nello schema di definizione del progetto. | Ogni tipo di dente è rappresnetato in un colore diverso nello schema di definizione del progetto. | ||
| − | + | Le Altre Opzioni disponibili sono: | |
* Gingiva : this element is mounted on an artificial gingiva that has to be acquired separately from the stone model | * Gingiva : this element is mounted on an artificial gingiva that has to be acquired separately from the stone model | ||
Revision as of 10:53, 12 October 2015
Contents
Progetto
Quando si lancia il software direttamente, se il progetto non fosse stato definito in un database esterno come il DentalDB di Exocad, è necessario definire il progetto di Scansione.
Il software ha una finestra di Definizione del Progetto in cui vengono immesse tutte le informazioni necessarie a proposito degli elementi da scansionare. Il tipo di informazione immessa definisce poi la Procedura Guidata.
Durante la definizione si possono selezionare uno dei tipi di progetto disponibili cliccando sulle relative icone riportate nella barra sulla sinistra della finestra.
Tutti i tipi di progetto richiedono alcune Informazioni Generali:
- Il nome del Paziente (Obbligatorio)
- Il numero del Dottore (Opzionale)
- Un nome progetto specifico per il salvataggio sul disco; qualora non venisse stabilito, il nome progetto si genererà automaticamente sulla base del ID del paziente
- Il nome del Tecnico (Opzionale)
- Note (Opzionali)
Per confermare la definizione del progetto, fare click sull'icona verde nella parte inferiore della finestra. Il software creerà un Progetto Strutturato e avvierà la Procedura Guidata.
Progetto Protesi
Cliccando sull'icona si abilita la definizione di un Progetto di Protesi.
La sezione di Protesi è la più complessa perchè può essere immesso un numero di informazioni molto maggiore rispetto a qualsiasi altro progetto. Per questo è necessario definire un dente alla volta.
Oltre alle Informazioni Generali, il progetto Protesi presenta altre due sezioni
Definizione Progetto
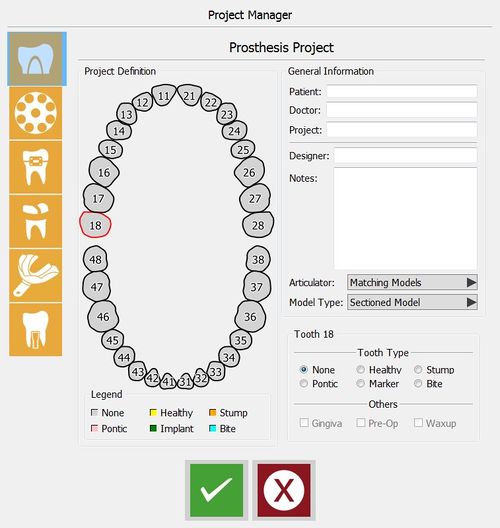
La parte più estesa della finestra presenta un odontogramma che permette di definire quali elementi è necessario scansionare.
Per copiare il tipo di elemento, e tutti i parametri stabiliti, a un altro dente è necessario cliccare sul numero corrispondente tenendo premuto ![]()
Per copiare il tipo di elemento, e tutti i parametri stabiliti, a una sequenza di denti consecutivi è necessario cliccare sul numero corrispondente tenendo premuto ![]()
Informazioni Elemento
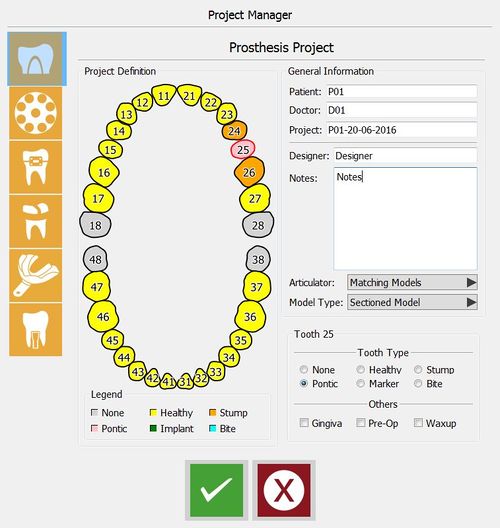
Per ogni elemento, la sezione in basso a destra permette di selezionare il Tipo di Dente e alcune informazioni aggiuntive in Altro. I tipi disponibili sono:
- Nessuno : questo dente non fa parte del progetto, non verrà scansionato o verrà ignorato
- Sano : questo dente è parte del modello principale e verrà scansionato insieme alle altre parti del modello
- Moncone : Questo dente è un moncone removibile e verrà scansionato individualmente o sul supporto Multi-Die
- Intermedio : dente mancante tra due monconi, diventerà un elemento intermedio di un ponte
- Scan body : in questa posizione è stato messo un impianto, si acquisirà uno scanbody per leggerne l'informazione
- Morso : questo dente fa parte di un morso occlusale
Ogni tipo di dente è rappresnetato in un colore diverso nello schema di definizione del progetto.
Le Altre Opzioni disponibili sono:
- Gingiva : this element is mounted on an artificial gingiva that has to be acquired separately from the stone model
- Pre-Op: the anatomy of this element is part of an additional model that will be acquired separately and then aligned to the reference stone model
- Waxup : over this tooth position, it's possible to scan a Pre-Modelled Waxup that will be aligned to the rest of the stone model
Additional Parameters
In the general information section, there are some additional parameters:
- Face Scan : if this option is enabled and available, a Real Time Face Scan will be added to the project data
- Unsectioned Model : enable this option if the model is not sectioned and the stumps can't be acquired separately
- Impression : enable this option if, instead of a stone model, an impression needs to be scanned
If the Dynamic Articulation Module is enabled, another option is displayed.
In the Articulator section select:
- Matching models to scan the occlusion if there is no need to use the automatic positioning in Exocad's Virtual Articulator
- Articulator A to scan the Artex Articulator and to use the same in Exocad's Virtual Articulator
- Articulator S to scan the Sam Articulator and to use the same in Exocad's Virtual Articulator
- Articulator P to scan the Kavo Articulator and to use the same in Exocad's Virtual Articulator
Here below an example of a defined prosthesis project for a 3-elements bridge with a stone antagonist:
Multi-Die Project
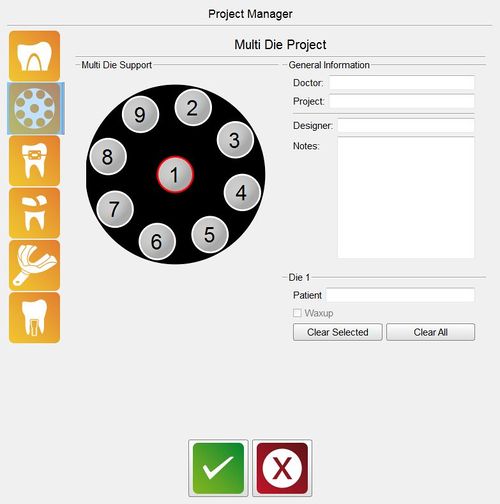
Use the Multi-Die Project to scan different dies from different patients in one single project:
To set the case, click on each multi-die position and define the name of each patient in the Patient field.
Orthodontic/Scheletric/Impression Project
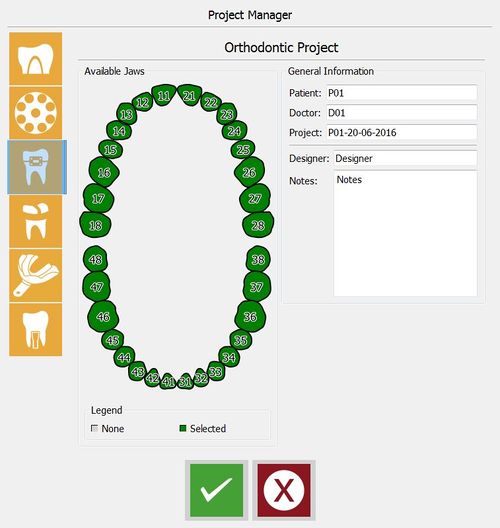
The Orthodontic, Scheletric and Impression Projects are straightforward and similar to one another.
These projects require the user to select the whole jaws instead of individual teeth.
When the project definition is confirmed, the software will prepare the Project Tree to acquire the data from the scanner.
Project Editing
If the project definition needs to be changed while already in use, it is possible to select the Edit Project tool in the File Menu or in the Project Toolbar (See Support Toolbars And Menus).
This tool will open again the Project Manager with the current project definition. It is possible to change the project definition and the parameters of every tooth.
When the editing is confirmed, the software will adapt the Project Tree. Editing an already scanned, or partially scanned, project can cause data loss.


