Difference between revisions of "Project Tree/it"
(Updating to match new version of source page) |
|||
| Line 3: | Line 3: | ||
=Albero Progetto= | =Albero Progetto= | ||
| − | + | The top left box of the software Interface is the management panel of the project, it contains all the acquired and modified data. | |
| − | + | The project trees of the structured and free mode are different. | |
==Progetto Strutturato== | ==Progetto Strutturato== | ||
| − | + | This image shows an example of a Structured Project Tree: | |
| − | + | {{Screenshot|Dental 2 5 projectTree.jpg}} | |
===Stato dei Dati e Selezione=== | ===Stato dei Dati e Selezione=== | ||
Revision as of 14:23, 6 October 2015
Contents
Albero Progetto
The top left box of the software Interface is the management panel of the project, it contains all the acquired and modified data.
The project trees of the structured and free mode are different.
Progetto Strutturato
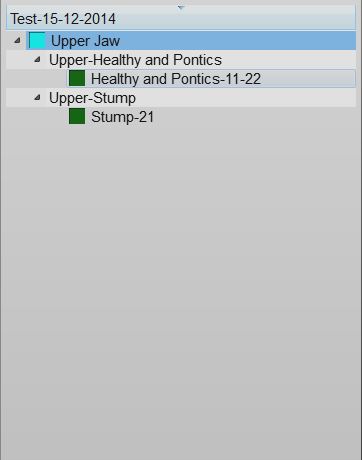
This image shows an example of a Structured Project Tree:
Stato dei Dati e Selezione
Ogni oggetto presente nel progetto può essere definito da 3 tipi di stato, ognuno dei quali è segnalato da icone di colori diversi:
- Nessun Dato (Icona grigia): questo elemento è necessario perchè il progetto sia completo, ma nel progetto non ci sono dati che gli corrispondono.
- Aquisito (Icona Blu): l'oggetto è stato acquisito e può essere allineato agli altri dati presenti nel progetto, modificato o convertito in formato mesh.
- Mesh (Icona Verde): nel progetto è presente una mesh di questo elementoche può essere modificata o esportata.
È possibile interagire con l'Albero Progetto:
- Fare click con il tasto sinistro del Mouse su un elemento per selezionarlo
- Fare click con il tasto sinistro del Mouse tenendo premuto il tasto CTRL su un elemento per aggiungerlo alla selezione attuale
- Fare click con il tasto destro del Mouse su un elemento per aprire il Menù contestuale dell'elemento
- Fare click con il tasto sinistro del Mouse fuori dalla lista per deselezionare gli elementi
All the selected items will be visible in the 3D View and the software will activate the buttons for all the available actions of the menus, the Main Toolbar and the Support Toolbars according to the current selection.
The information is layed out as a tree; each element can have children elements. This scheme represents the information dependency in the project. For example a single stump is part of a jaw so it's a child of the jaw and the software, when asked to align the stump to the rest of the project, will align it to its parent jaw.
Context Menu
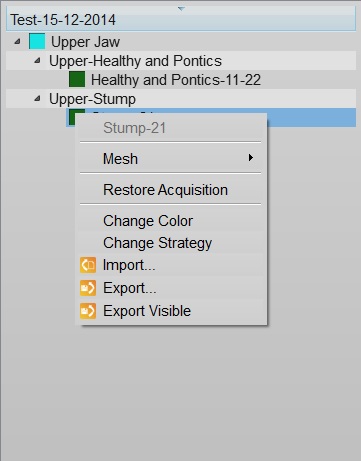
By right clicking on a Project Tree element, a context menu will appear:
The context menu shows:
- A Sub Menu with the tools for the selected element (Mesh, Acquisition)
- A Restore Acquisition button that will remove a mesh and recover the previous acquisition
- A Change Color button that will change the assigned color of this element, used in the 3D View
- A Change Strategy button that will change the scan and mesh strategy of this element
- An Import... button that will import an acquisition or mesh from the disk, in the supported formats
- An Export... button that will export the acquisition or mesh to the disk, in a supported format
- An Export Visible button that will merge and export all the current selected meshes in one single file
Drag And Drop
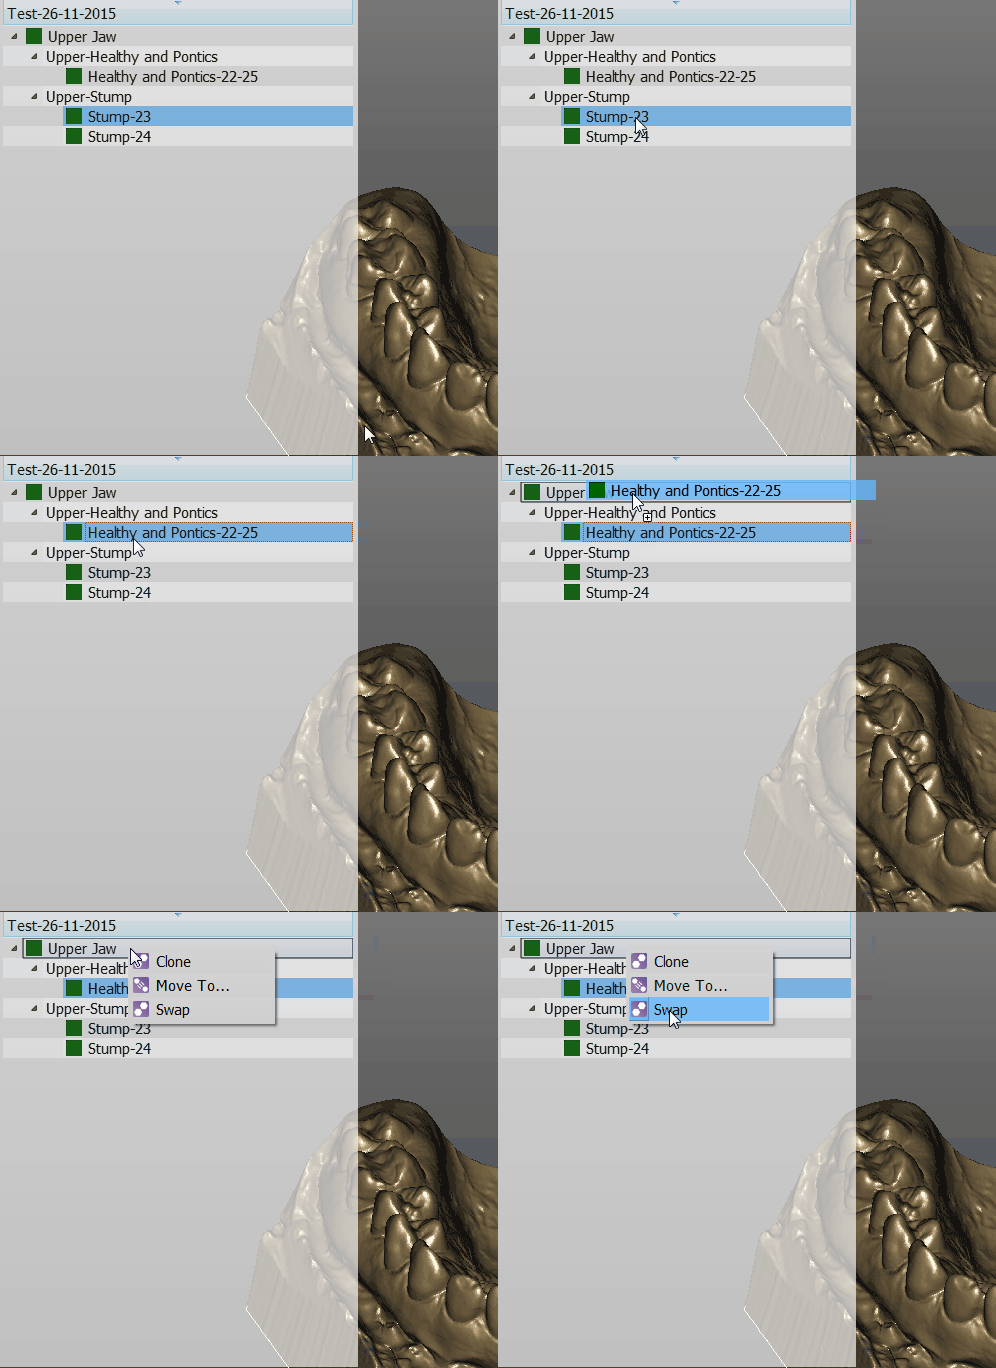
You can drag one element and drop it over a different one
The available actions will be:
- Clone to create a copy of this element
- Move To ... to clone the element and remove the original one
Free Project
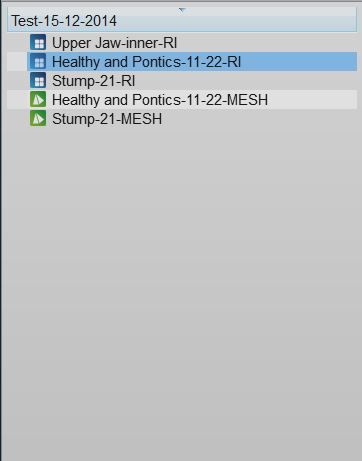
This is a screenshot of a Free Project Tree
In the Free Project mode, the software has no way of knowing the dependencies between the data. So there's no tree, no children. Only a list of objects.
The objects can be of 2 types. Acqusitions (blue icon) or Meshes (green icon).
This project type usually works as the Structured Project.
The differences are:
- To create a copy of a data, it is necessary to open the context menu and select the Clone function.
- By dragging one element above another, it is possible to choose between:
- The Direct Alignment: action to automatically align the two elements.
- The Manual Alignment: action to manually align the two elements.


