Difference between revisions of "Dental Service Tools/zh-hant"
Democenter (talk | contribs) (Created page with "如果校正組件名稱不在下拉選單中,'''裝載新的主XML'''按鈕可用於從相應的XML描述文件中添加一個新的校正組件。") |
Democenter (talk | contribs) (Created page with "校準過程是自動的。一旦完成後,軟件會顯示以下信息之一:") |
||
| Line 38: | Line 38: | ||
{{Small image|Calib-dlg.jpg}} | {{Small image|Calib-dlg.jpg}} | ||
| − | + | 校準過程是自動的。一旦完成後,軟件會顯示以下信息之一: | |
*'Scanner Already Calibrated' : the calibration is not necessary | *'Scanner Already Calibrated' : the calibration is not necessary | ||
Revision as of 06:48, 3 July 2016
Contents
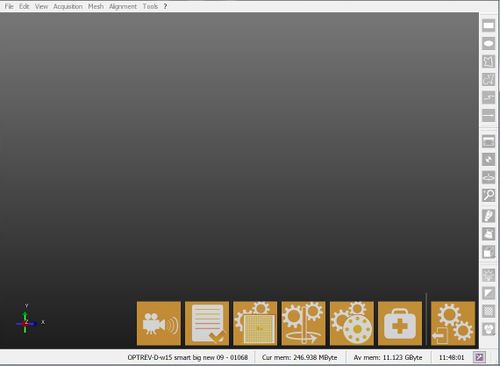
OpticalRevEng Dental 提供服務模式, 可從主工具列打開, 以校準和診斷可能出現的問題
直播模式
此工具可以用來檢查的掃描儀攝像機的實時視圖。
檢查掃描儀
該軟體被啟用會檢查掃描儀每一刻的連接。
校準頭
有2種類型的校準:
- 重新校準
- 快速定期更新掃描器校準或當掃描器移動到任何其他位置時執行
- 全面校準
- 硬體修理之後執行的更複雜過程
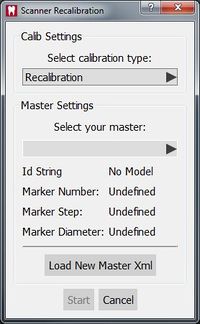
此工具使用校正組件 開展掃描儀的光學頭新的校準. 以下是該過程:
- 把校準套件置入掃描儀內正確的位置
- 從下拉菜單中選擇校準類型
- 在校準對話框中,從下拉菜單中準確校準套件名稱選擇
- 點擊啟動
如果校正組件名稱不在下拉選單中,裝載新的主XML按鈕可用於從相應的XML描述文件中添加一個新的校正組件。
校準過程是自動的。一旦完成後,軟件會顯示以下信息之一:
- 'Scanner Already Calibrated' : the calibration is not necessary
- 'Scanner Recalibrated Successfully' : the calibration has been completed
- 'Scanner Recalibration Failed' : calibration has to be repeated
If the calibration was successful, the Axes Calibration starts automatically.
Recalibrate Axis
This tool is used to check the movement system of the scanner. The scanner will scan an object, analyze it, and use this data to calibrate the movement system.
This tool will start automatically after a Head Recalibration or can be started manually with the button.
- Put the calibration object inside the scanner
- Click Recalibrate Axis
- Click Ok when prompted
The calibration procedure is automatic. Once it is finished, the software will show one of the following messages:
- 'Axis Recalibration Successfull' : the calibration has been completed
- 'Axis Recalibration Failed' : calibration has to be repeated
Auto Set-Up Multi-Die Parameters
This tool is used to calibrate the Multi-Die support. If the acquisitions carried out with the Multi-Die are not correctly recognized, the calibration procedure is the following:
- Clean the multi-die from excessive material or white powder, every single die position needs to be clearly separated from the others
- Put the empty multi-die support inside the scanner
- Start the tool with this button
- Click Ok when prompted
Diagnostic Acquisition
When doubting the proper functioning of the scanner, this tool carries out a specific acquisition of the object currently inside the scanner.
The software then saves all the information in a "*.diag" file that can be sent to the OpticalRevEng Dental support to diagnose possible issues.


