Difference between revisions of "Project Tree/zh-hant"
Democenter (talk | contribs) (Created page with "您可以在專案樹狀圖上操作這些:") |
Democenter (talk | contribs) (Created page with "# 在元件上左擊點選 # 按下 CTRL 並左擊以增加點選元件 # 在點選元件上右擊以打開 ''元件背景選單'' # 在表外左擊以清除目前選項") |
||
| Line 23: | Line 23: | ||
您可以在專案樹狀圖上操作這些: | 您可以在專案樹狀圖上操作這些: | ||
| − | # | + | # 在元件上左擊點選 |
| − | # | + | # 按下 CTRL 並左擊以增加點選元件 |
| − | # | + | # 在點選元件上右擊以打開 ''元件背景選單'' |
| − | # | + | # 在表外左擊以清除目前選項 |
All the selected items will be visible in the 3D View and the software will activate the buttons for all the available actions of the menus, the [[Main_Toolbar|Main Toolbar]] and the [[Support_Toolbars|Support Toolbars]] according to the current selection. | All the selected items will be visible in the 3D View and the software will activate the buttons for all the available actions of the menus, the [[Main_Toolbar|Main Toolbar]] and the [[Support_Toolbars|Support Toolbars]] according to the current selection. | ||
Revision as of 07:46, 28 January 2016
專案樹狀圖
軟體介面的左上角是該專案的管理面板,它包含所有獲取和修改的數據。
結構化與自由模式的專案樹狀圖是不同的.
結構化專案
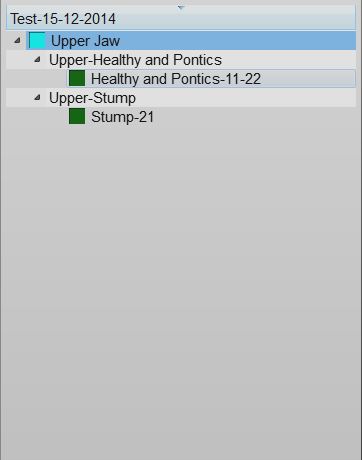
這張圖片顯示一個結構化樹狀圖的例子:
數據狀態與選擇
專案的每個物件都有3種不同的狀態,每種狀態都有不同的顏色框標記:
- 沒有數據 (灰框): 這個元件是專案要完成的但沒有可用的數據. 這個元件需要導入或掃描.
- 已獲得 (籃框): 這是一個 已獲得 的元件. 可以將此數據與該專案的其他部分對齊,編輯或轉換成網格格式.
- 網格化 (綠框): 這是一個 已轉換成網格 的元件. 可以編輯此數據並導出.
您可以在專案樹狀圖上操作這些:
- 在元件上左擊點選
- 按下 CTRL 並左擊以增加點選元件
- 在點選元件上右擊以打開 元件背景選單
- 在表外左擊以清除目前選項
All the selected items will be visible in the 3D View and the software will activate the buttons for all the available actions of the menus, the Main Toolbar and the Support Toolbars according to the current selection.
The information is layed out as a tree; each element can have children elements. This scheme represents the information dependency in the project. For example a single stump is part of a jaw so it's a child of the jaw and the software, when asked to align the stump to the rest of the project, will align it to its parent jaw.
Context Menu
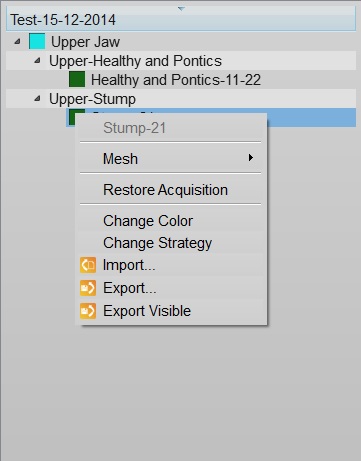
By right clicking on a Project Tree element, a context menu will appear:
The context menu shows:
- A Sub Menu with the tools for the selected element (Mesh, Acquisition)
- A Restore Acquisition button that will remove a mesh and recover the previous acquisition
- A Change Color button that will change the assigned color of this element, used in the 3D View
- A Change Strategy button that will change the scan and mesh strategy of this element
- An Import... button that will import an acquisition or mesh from the disk, in the supported formats
- An Export... button that will export the acquisition or mesh to the disk, in a supported format
- An Export Visible button that will merge and export all the current selected meshes in one single file
Drag And Drop
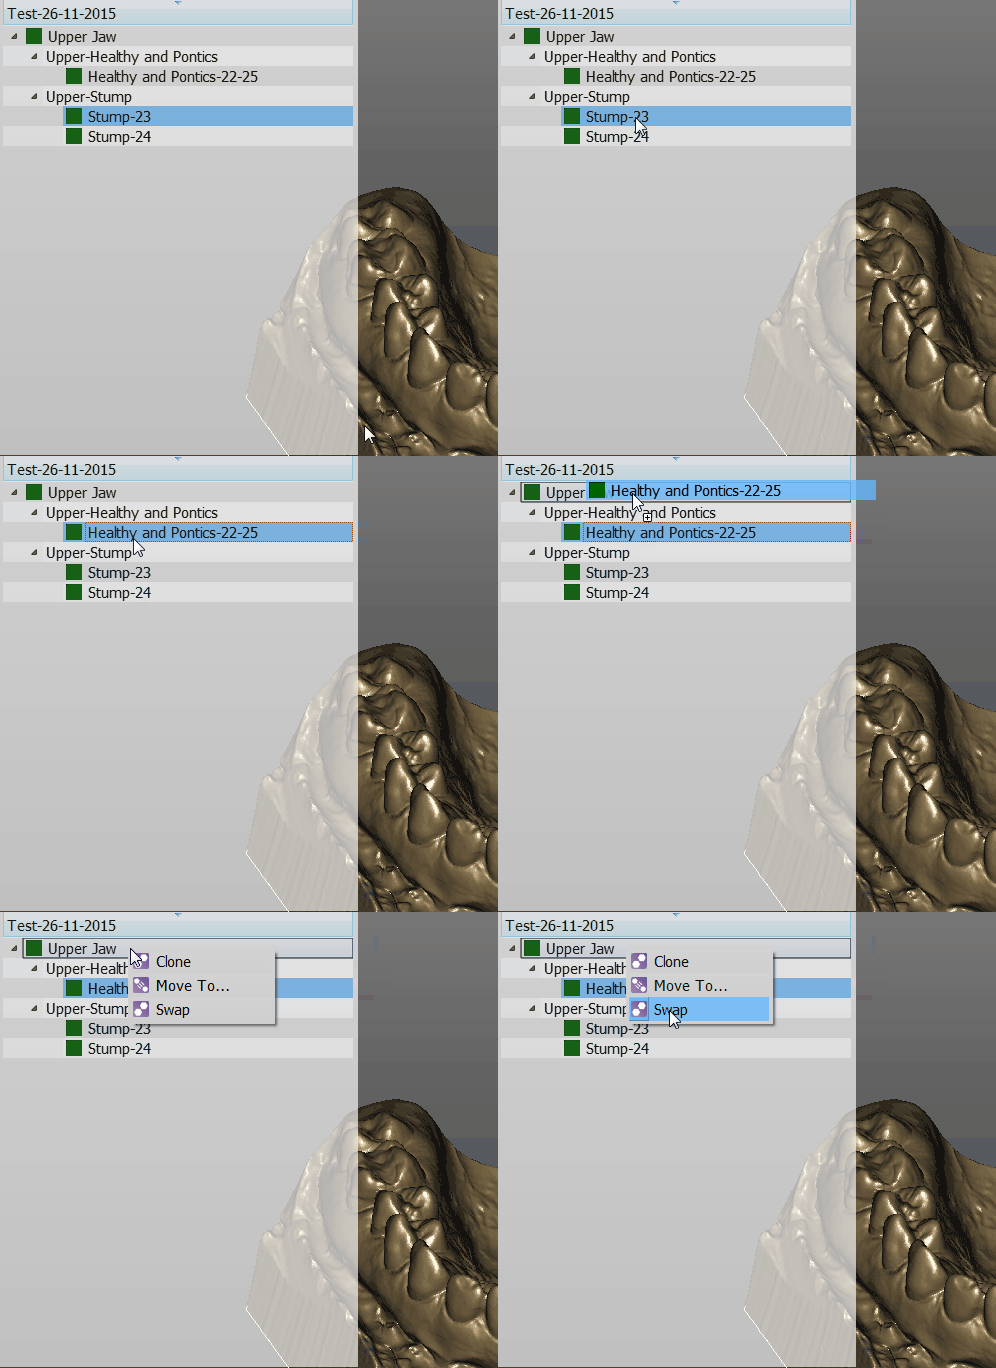
You can drag one element and drop it over a different one
The available actions will be:
- Clone to create a copy of this element
- Move To ... to clone the element and remove the original one
- Swap to swap the mesh or acquisition information of two elements
Free Project
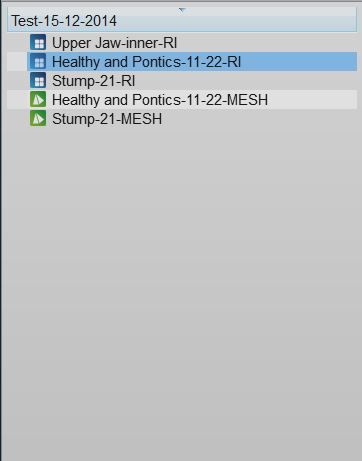
This is a screenshot of a Free Project Tree
In the Free Project mode, the software has no way of knowing the dependencies between the data. So there's no tree, no children. Only a list of objects.
The objects can be of 2 types. Acqusitions (blue icon) or Meshes (green icon).
This project type usually works as the Structured Project.
The differences are:
- To create a copy of a data, it is necessary to open the context menu and select the Clone function.
- By dragging one element above another, it is possible to choose between:
- The Direct Alignment: action to automatically align the two elements.
- The Manual Alignment: action to manually align the two elements.


