Difference between revisions of "Project Tree/de"
(Created page with "# Linker Mausklick auf einen Gegenstand, um ihn auszuwählen # STRG-Taste + Linker Mausklick auf einen Gegenstand, um ihn zur aktuellen Auswahl hinzuzufügen # Rechter Mauskli...") |
(Created page with "Alle ausgewählten Elemente werden in der 3D-Ansicht angezeigt. Bei der Elementauswahl stellt die Software einige Funktionen in den Menüs, in der Main_Toolbar|Hauptwerkzeug...") |
||
| Line 28: | Line 28: | ||
#Linker Mausklick im freien Feld (nicht auf der Liste), um die Elementauswahl aufzuheben. | #Linker Mausklick im freien Feld (nicht auf der Liste), um die Elementauswahl aufzuheben. | ||
| − | + | Alle ausgewählten Elemente werden in der 3D-Ansicht angezeigt. Bei der Elementauswahl stellt die Software einige Funktionen in den Menüs, in der [[Main_Toolbar|Hauptwerkzeugleiste]] und den [[Support_Toolbars|Nebenwerkzeugleisten]] zur Verfügung. | |
The information is layed out as a tree; each element can have ''children'' elements. This scheme represents the information dependency in the project. For example a single stump is part of a jaw so it's a child of the jaw and the software, when asked to '''align''' the stump to the rest of the project, will align it to its parent jaw. | The information is layed out as a tree; each element can have ''children'' elements. This scheme represents the information dependency in the project. For example a single stump is part of a jaw so it's a child of the jaw and the software, when asked to '''align''' the stump to the rest of the project, will align it to its parent jaw. | ||
Revision as of 11:00, 25 January 2016
Contents
Projektbaum
Die Maske oben links im Softwareinterface ist die Steuerkonsole des aktuellen Projektes mit allen aufgenommenen und bearbeiteten Daten.
Der Projektbaum eines Strukturprojektes unterscheidet sich von jenem eines Freiprojektes.
Strukturprojekt
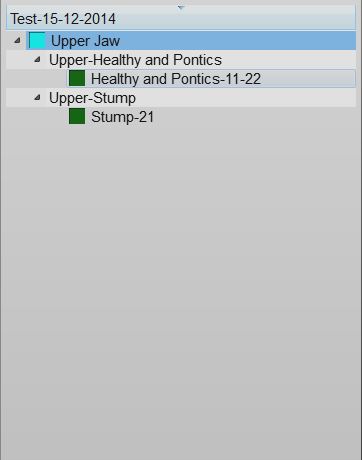
Das untere Bild zeig ein Beispiel vom Projektbaum eines Strukturprojektes:
Datenstand und -Auswahl
Jedes Projektobjekt wird mit dem jeweiligen Status angezeigt, in 3 Icons mit verschiedenen Farben:
- "Keine Daten (graues Icon)": Dieses Element wird zur Vollständigkeit des Projekts benötigt, aber enthält an sich keine Daten.
- "Erfasst (blaues Icon)": Der Gegenstand wurde gescannt und kann mit den anderen Projektdaten ausgerichtet, bearbeitet und in eine Meshdatei konvertiert werden.
- "Mesh (grünes Icon)": Im Projekt existiert ein Mesh dieses Elementes, das bearbeitet oder exportiert werden kann.
Man kann folgendermaßen mit dem Projektbaum interagieren:
- Linker Mausklick auf einen Gegenstand, um ihn auszuwählen
- STRG-Taste + Linker Mausklick auf einen Gegenstand, um ihn zur aktuellen Auswahl hinzuzufügen
- Rechter Mausklick auf einen Gegenstand um dessen Kontextmenü zu öffnen
- Linker Mausklick im freien Feld (nicht auf der Liste), um die Elementauswahl aufzuheben.
Alle ausgewählten Elemente werden in der 3D-Ansicht angezeigt. Bei der Elementauswahl stellt die Software einige Funktionen in den Menüs, in der Hauptwerkzeugleiste und den Nebenwerkzeugleisten zur Verfügung.
The information is layed out as a tree; each element can have children elements. This scheme represents the information dependency in the project. For example a single stump is part of a jaw so it's a child of the jaw and the software, when asked to align the stump to the rest of the project, will align it to its parent jaw.
Context Menu
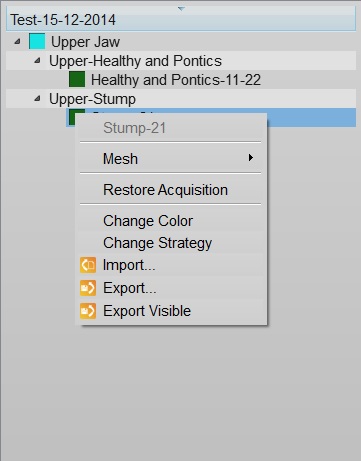
By right clicking on a Project Tree element, a context menu will appear:
The context menu shows:
- A Sub Menu with the tools for the selected element (Mesh, Acquisition)
- A Restore Acquisition button that will remove a mesh and recover the previous acquisition
- A Change Color button that will change the assigned color of this element, used in the 3D View
- A Change Strategy button that will change the scan and mesh strategy of this element
- An Import... button that will import an acquisition or mesh from the disk, in the supported formats
- An Export... button that will export the acquisition or mesh to the disk, in a supported format
- An Export Visible button that will merge and export all the current selected meshes in one single file
Drag And Drop
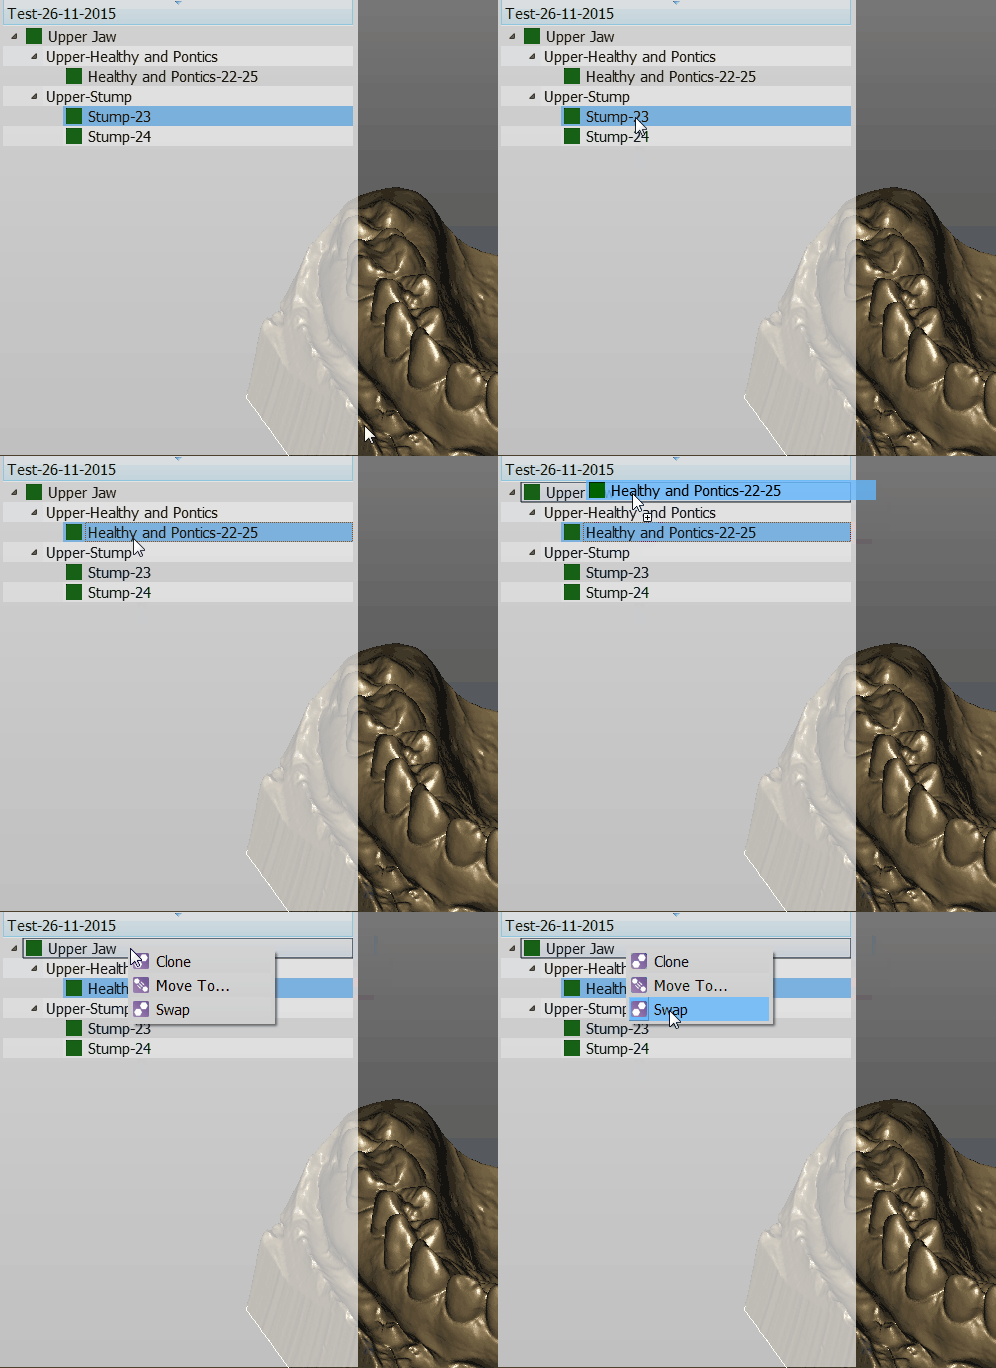
You can drag one element and drop it over a different one
The available actions will be:
- Clone to create a copy of this element
- Move To ... to clone the element and remove the original one
- Swap to swap the mesh or acquisition information of two elements
Free Project
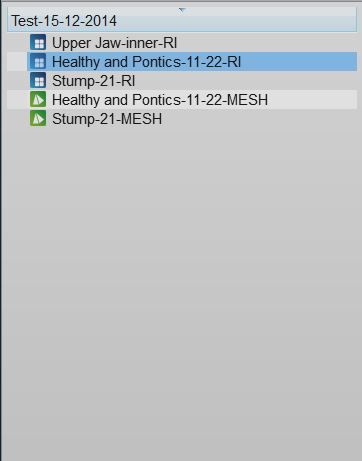
This is a screenshot of a Free Project Tree
In the Free Project mode, the software has no way of knowing the dependencies between the data. So there's no tree, no children. Only a list of objects.
The objects can be of 2 types. Acqusitions (blue icon) or Meshes (green icon).
This project type usually works as the Structured Project.
The differences are:
- To create a copy of a data, it is necessary to open the context menu and select the Clone function.
- By dragging one element above another, it is possible to choose between:
- The Direct Alignment: action to automatically align the two elements.
- The Manual Alignment: action to manually align the two elements.


