Difference between revisions of "Project Tree/pt-br"
(Created page with "# Clicar à Esquerda em um elemento para selecioná-lo # Clicar à Esquerda mantendo a tecla CTRL pressionada sobre um elemento para adicioná-lo à seleção atual # Botão...") |
(Created page with "Todos os itens selecionados serão visíveis na Vista 3D e o software irá ativar os botões para todas as ações disponíveis dos menus, o Main_Toolbar | Barra de Ferramen...") |
||
| Line 28: | Line 28: | ||
# Clicar à Esquerda fora da lista para desmarcar a seleção atual | # Clicar à Esquerda fora da lista para desmarcar a seleção atual | ||
| − | + | Todos os itens selecionados serão visíveis na Vista 3D e o software irá ativar os botões para todas as ações disponíveis dos menus, o [[Main_Toolbar | Barra de Ferramentas Principal]] e os [[Support_Toolbars | barras de ferramentas de suporte]] de acordo com a corrente seleção. | |
The information is layed out as a tree; each element can have ''children'' elements. This scheme represents the information dependency in the project. For example a single stump is part of a jaw so it's a child of the jaw and the software, when asked to '''align''' the stump to the rest of the project, will align it to its parent jaw. | The information is layed out as a tree; each element can have ''children'' elements. This scheme represents the information dependency in the project. For example a single stump is part of a jaw so it's a child of the jaw and the software, when asked to '''align''' the stump to the rest of the project, will align it to its parent jaw. | ||
Revision as of 22:06, 1 October 2015
Contents
Projeto Arvore
A caixa superior esquerda da interface do software é o painel de gestão do projeto, que contém todos os dados adquiridos e modificados.
As árvores do projeto de modo estruturado e livre são diferentes.
Projeto Estruturado
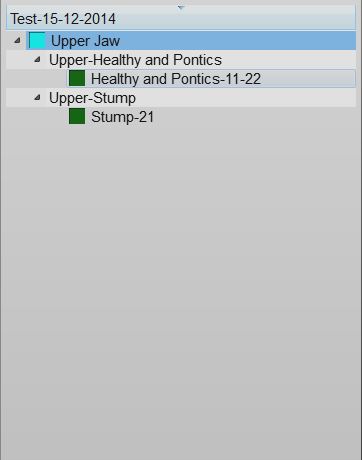
Esta imagem mostra um exemplo de uma árvore de projeto estruturado:
Status de dados e Seleção
Existem três diferentes status que definem cada objeto do projeto, cada status é marcado por diferentes caixas de cor:
- Não Data (Caixa Cinza) : este elemento é necessário para que o projeto seja completo, mas não há dados disponíveis. Este elemento precisa ser importado ou digitalizado.
- Adquirida (Caixa Azul) : há uma aquisição deste elemento. É possível alinhar estes dados com o resto do projeto, editá-lo ou convertê-lo em formato de malha.
- Mahas (Caixa Verde) : há uma malha deste elemento. É possível editar esses dados e exportá-lo.
É possível interagir com a árvore do projeto:
- Clicar à Esquerda em um elemento para selecioná-lo
- Clicar à Esquerda mantendo a tecla CTRL pressionada sobre um elemento para adicioná-lo à seleção atual
- Botão direito do mouse em um elemento para abrir o Menu Contexto Elemento
- Clicar à Esquerda fora da lista para desmarcar a seleção atual
Todos os itens selecionados serão visíveis na Vista 3D e o software irá ativar os botões para todas as ações disponíveis dos menus, o Barra de Ferramentas Principal e os barras de ferramentas de suporte de acordo com a corrente seleção.
The information is layed out as a tree; each element can have children elements. This scheme represents the information dependency in the project. For example a single stump is part of a jaw so it's a child of the jaw and the software, when asked to align the stump to the rest of the project, will align it to its parent jaw.
Context Menu
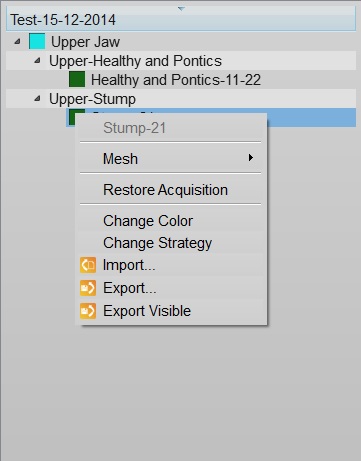
By right clicking on a Project Tree element, a context menu will appear:
The context menu shows:
- A Sub Menu with the tools for the selected element (Mesh, Acquisition)
- A Restore Acquisition button that will remove a mesh and recover the previous acquisition
- A Change Color button that will change the assigned color of this element, used in the 3D View
- A Change Strategy button that will change the scan and mesh strategy of this element
- An Import... button that will import an acquisition or mesh from the disk, in the supported formats
- An Export... button that will export the acquisition or mesh to the disk, in a supported format
- An Export Visible button that will merge and export all the current selected meshes in one single file
Drag And Drop
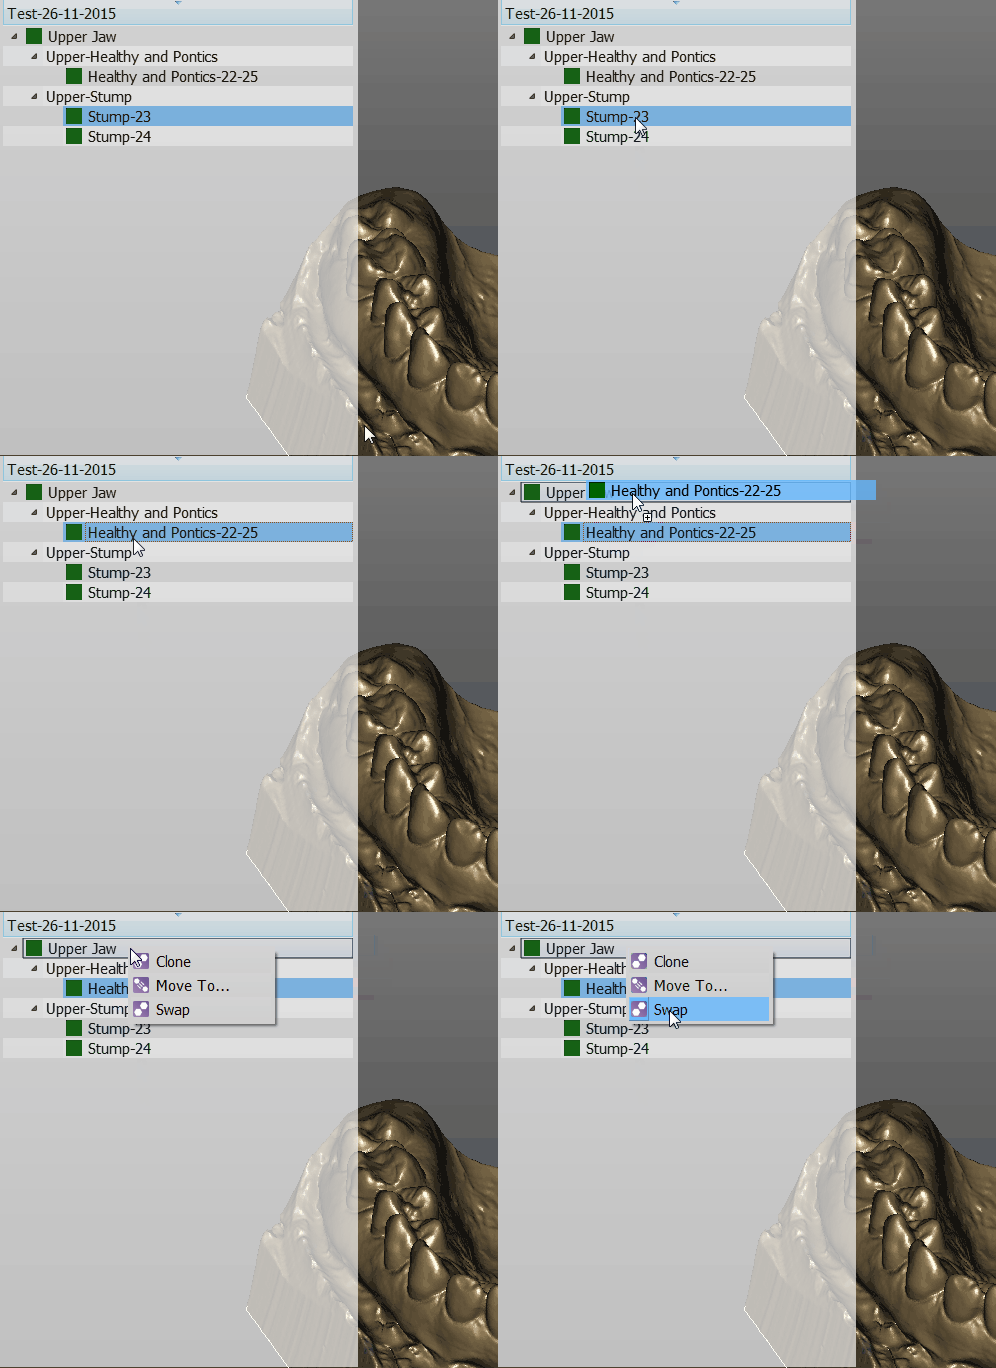
You can drag one element and drop it over a different one
The available actions will be:
- Clone to create a copy of this element
- Move To ... to clone the element and remove the original one
Free Project
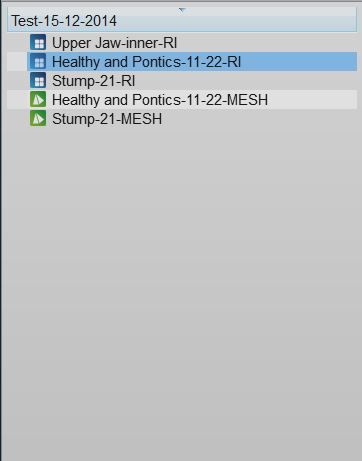
This is a screenshot of a Free Project Tree
In the Free Project mode, the software has no way of knowing the dependencies between the data. So there's no tree, no children. Only a list of objects.
The objects can be of 2 types. Acqusitions (blue icon) or Meshes (green icon).
This project type usually works as the Structured Project.
The differences are:
- To create a copy of a data, it is necessary to open the context menu and select the Clone function.
- By dragging one element above another, it is possible to choose between:
- The Direct Alignment: action to automatically align the two elements.
- The Manual Alignment: action to manually align the two elements.


