Difference between revisions of "Project Tree/ro"
(Created page with "# Faceți clic stânga pe un element pentru al selecta # Clic stânga menținând CTRL apăsat pe un element pentru al adăuga la selecția curentă # Faceți clic dreapta pe...") |
(Created page with "Toate elementele selectate vor fi vizibile în vizualizarea 3D și software-ul va activa butoanele pentru toate acțiunile disponibile ale meniurilor, Main_Toolbar|Main Tool...") |
||
| Line 28: | Line 28: | ||
# Faceți clic pe stânga în afara listei pentru a șterge selecția curentă | # Faceți clic pe stânga în afara listei pentru a șterge selecția curentă | ||
| − | + | Toate elementele selectate vor fi vizibile în vizualizarea 3D și software-ul va activa butoanele pentru toate acțiunile disponibile ale meniurilor, [[Main_Toolbar|Main Toolbar]] și [[Support_Toolbars|Support Toolbars]] în funcție de actuala selecţie. | |
The information is layed out as a tree; each element can have ''children'' elements. This scheme represents the information dependency in the project. For example a single stump is part of a jaw so it's a child of the jaw and the software, when asked to '''align''' the stump to the rest of the project, will align it to its parent jaw. | The information is layed out as a tree; each element can have ''children'' elements. This scheme represents the information dependency in the project. For example a single stump is part of a jaw so it's a child of the jaw and the software, when asked to '''align''' the stump to the rest of the project, will align it to its parent jaw. | ||
Revision as of 06:05, 24 September 2017
Contents
Arborele proiectului
Caseta din stânga sus a interfeței software este panoul de gestionare al proiectului, conține toate datele achiziționate și modificate.
Arborii proiectului din modul structurat și liber sunt diferiți.
Proiect structurat
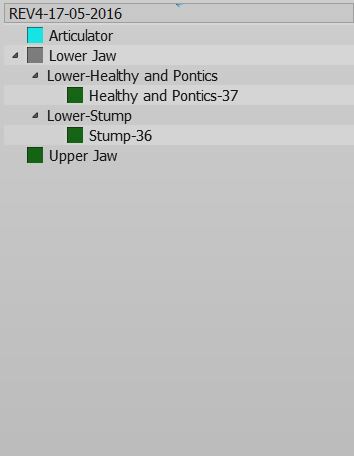
Această imagine prezintă un exemplu de arbore structurat al proiectului:
Starea și selecția datelor
Există 3 stări diferite care definesc fiecare obiect al proiectului, fiecare stare fiind marcată de diferite casete de culoare:
- No Data (Grey Box) : acest element este necesar pentru ca proiectul să fie complet, dar nu există date disponibile. Acest element trebuie importat sau scanat.
- Acquired (Blue Box): există o achiziție a acestui element. Este posibil să aliniați aceste date cu restul proiectului, să îl editați sau să îl convertiți în format de mesh.
- Meshed (Green Box) : există "" meshuri "" a acestui element. Este posibil să editați aceste date și să le exportați.
Este posibil să interacționați cu Arborele proiectului:
- Faceți clic stânga pe un element pentru al selecta
- Clic stânga menținând CTRL apăsat pe un element pentru al adăuga la selecția curentă
- Faceți clic dreapta pe un element pentru a deschide meniul "Element Context Menu"
- Faceți clic pe stânga în afara listei pentru a șterge selecția curentă
Toate elementele selectate vor fi vizibile în vizualizarea 3D și software-ul va activa butoanele pentru toate acțiunile disponibile ale meniurilor, Main Toolbar și Support Toolbars în funcție de actuala selecţie.
The information is layed out as a tree; each element can have children elements. This scheme represents the information dependency in the project. For example a single stump is part of a jaw so it's a child of the jaw and the software, when asked to align the stump to the rest of the project, will align it to its parent jaw.
Context Menu
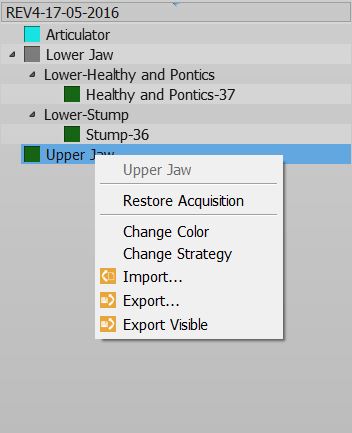
By right clicking on a Project Tree element, a context menu will appear:
The context menu shows:
- A Sub Menu with the tools for the selected element (Mesh, Acquisition)
- A Restore Acquisition button that will remove a mesh and recover the previous acquisition
- A Change Color button that will change the assigned color of this element, used in the 3D View
- A Change Strategy button that will change the scan and mesh strategy of this element
- An Import... button that will import an acquisition or mesh from the disk, in the supported formats
- An Export... button that will export the acquisition or mesh to the disk, in a supported format
- An Export Visible button that will merge and export all the current selected meshes in one single file
Drag And Drop
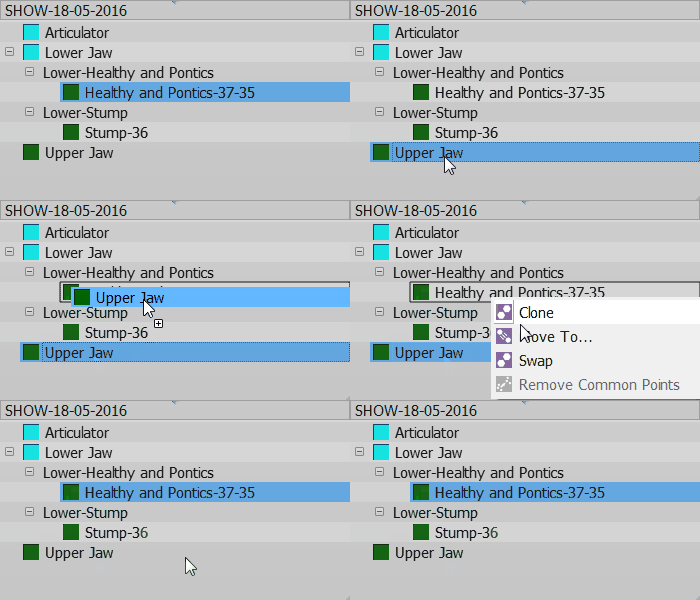
You can drag one element and drop it over a different one
The available actions will be:
- Clone to create a copy of this element
- Move To ... to clone the element and remove the original one
- Swap to swap the mesh or acquisition information of two elements
- Remove Common Points to automatically remove the common points from a Range Image
Free Project
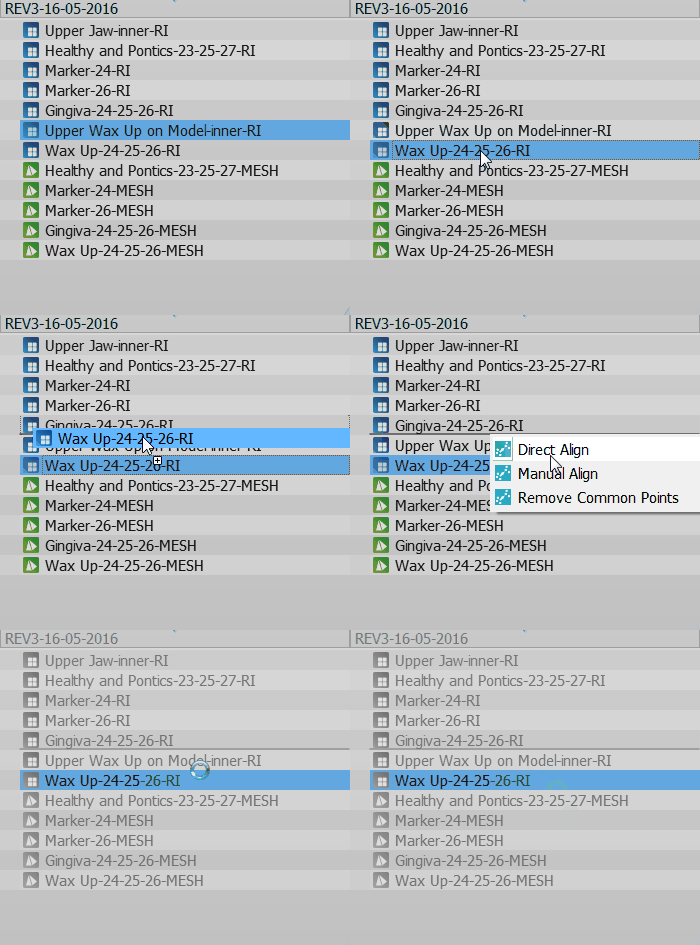
This is a screenshot of a Free Project Tree
In the Free Project mode, the software has no way of knowing the dependencies between the data. So there's no tree, no children. Only a list of objects.
The objects can be of 2 types. Acqusitions (blue icon) or Meshes (green icon).
This project type usually works as the Structured Project.
The differences are:
- To create a copy of a data, it is necessary to open the context menu and select the Clone function.
- By dragging one element above another, it is possible to choose between:
- The Direct Alignment: action to automatically align the two elements.
- The Manual Alignment: action to manually align the two elements.
- The Remove Common Points: action to automatically remove common parts from a Range Image


