Difference between revisions of "Man Acquisition/es"
(Created page with "Es posible capturar una imagen 3D singula en cambio de una reconstruccion a 360° de un objeto para escanear una articulacion a en un escaner pequeno") |
(Created page with "# Poner el objeto dentro del escaner, del mejor modo posible # Utilizar la herramienta Captura Singula") |
||
| Line 56: | Line 56: | ||
Es posible capturar una imagen 3D singula en cambio de una reconstruccion a 360° de un objeto para escanear una articulacion a en un escaner pequeno | Es posible capturar una imagen 3D singula en cambio de una reconstruccion a 360° de un objeto para escanear una articulacion a en un escaner pequeno | ||
| − | # | + | # Poner el objeto dentro del escaner, del mejor modo posible |
| − | # | + | # Utilizar la herramienta [[Support_Toolbars_And_Menus#Tools|Captura Singula]] |
The software will carry out a single acquisition without moving the motors system | The software will carry out a single acquisition without moving the motors system | ||
Revision as of 14:57, 4 January 2016
Contents
Capturas
Capturar datos del escaner y crear una representacion virtual 3D de un objeto es la funcion principal del software OpticalRevEng Dental.
Para mas informacion sobre el Asistente Paso a Paso, visite la pagina Asistente.
En un "Proyecto Estructurado sin asistente, hay 3 proceduras para capturar datos del escaner:
Simple
Esta es la manera mas facil para capturar datos y la mas utilizada:
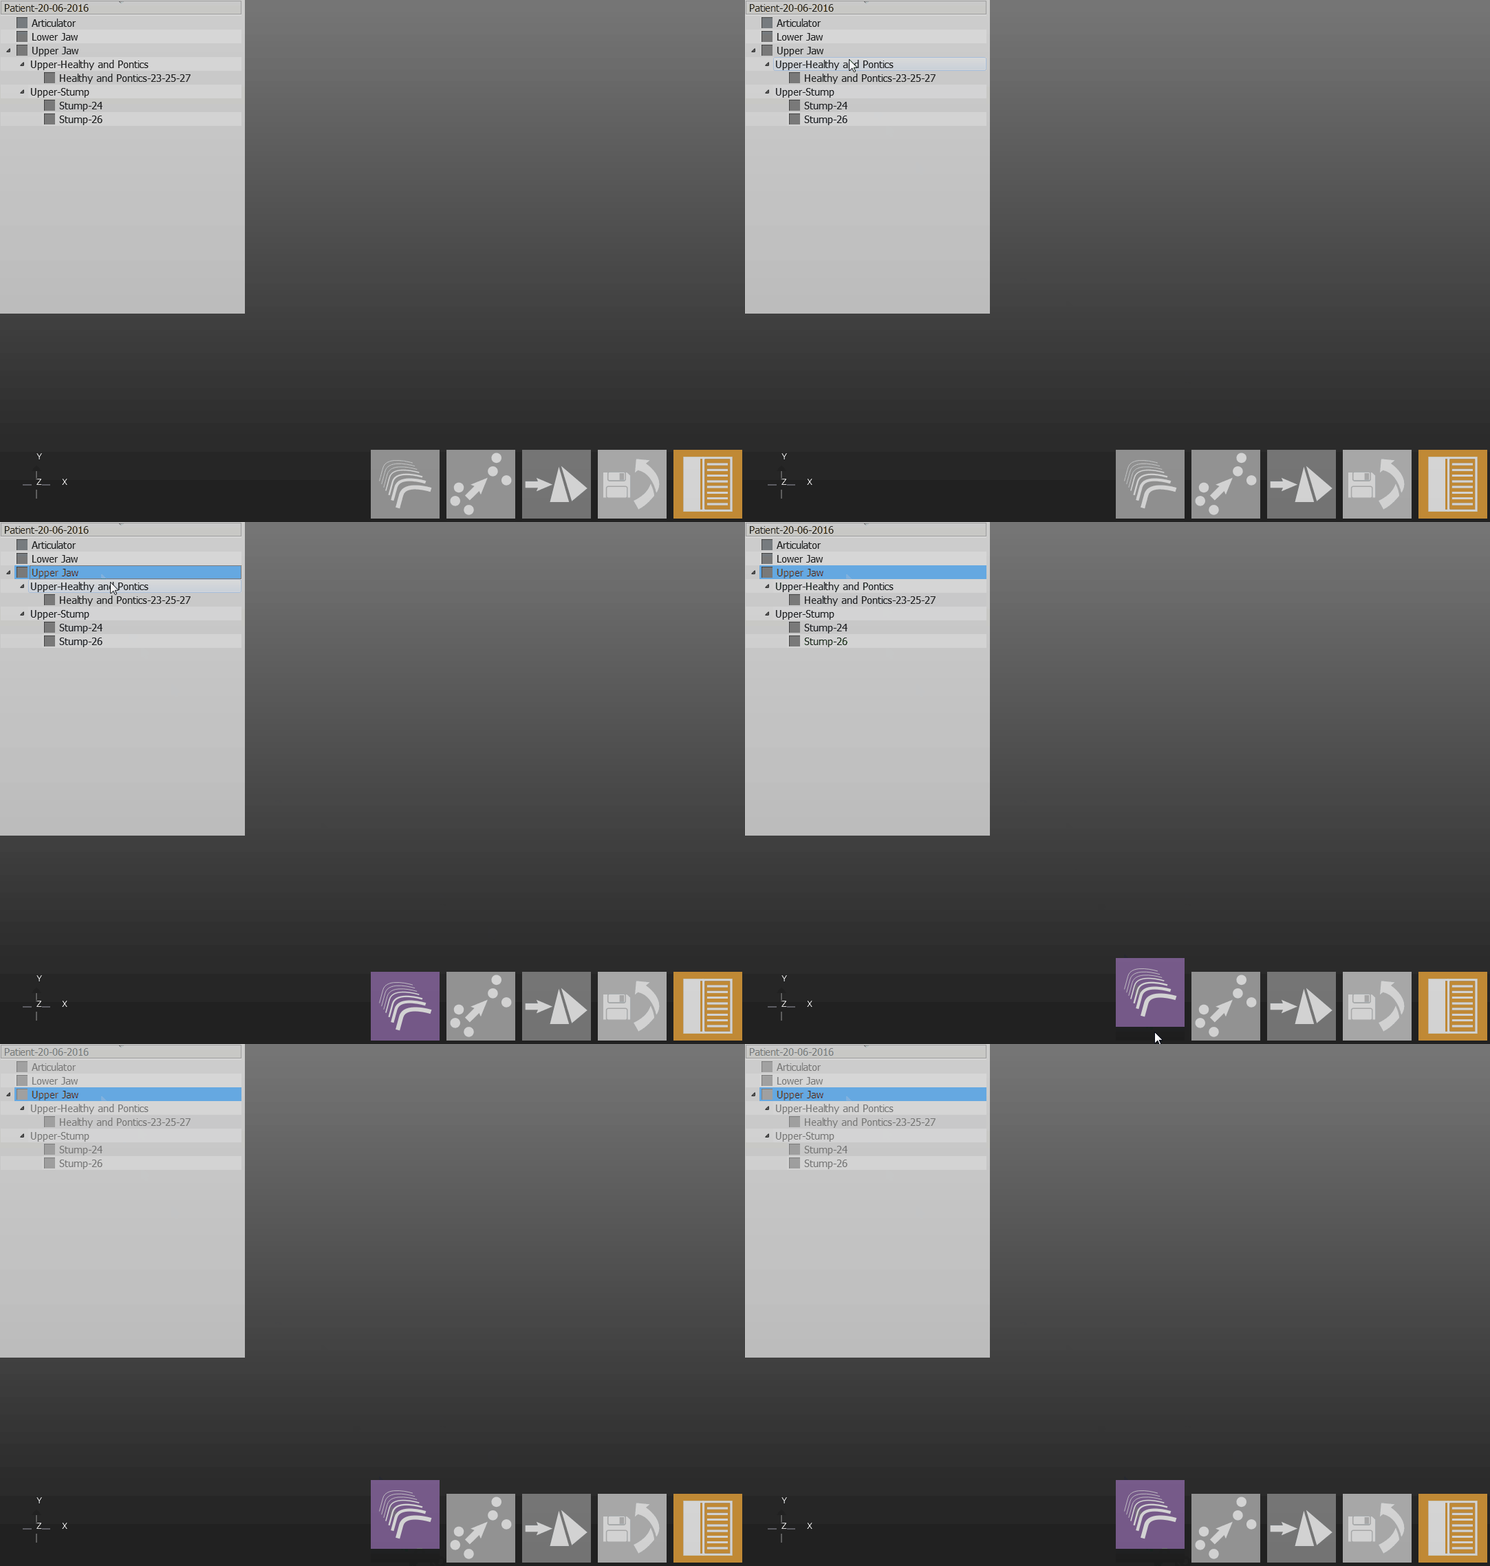
- Poner el objeto sobre el portamodelos y dentro del escaner
- Seleccionar el objeto a escanear en el "Arbol de Proyecto"
- Hacer clic en el icono Captura en la Barra de las Herramientas
El escaner capturara el objeto utilizando la estrategia del elemento seleccionado y el estado del "Arbol de Proyecto" serà actualizado.
Parametros Avanzados
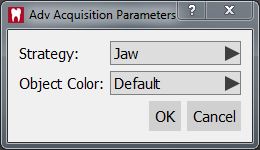
Para utilizar una estrategia de captura diferente, pulsar el boton ![]() cuando se hace clic en el icono Captura.
cuando se hace clic en el icono Captura.
Una ventana adicional permitira elegir una estrategia diferente y un color para el objeto que se quiere capturar.
Articulacion Dinamica
Si el "Modulo de Articulacion Dinamica" esta habilitado, el software recordara al usuario escanear la arcada sobre la platina adecuada.
La platina utilizada depende del "tipo de articulador" elegido durante la definicion del proyecto.
Multi-Die
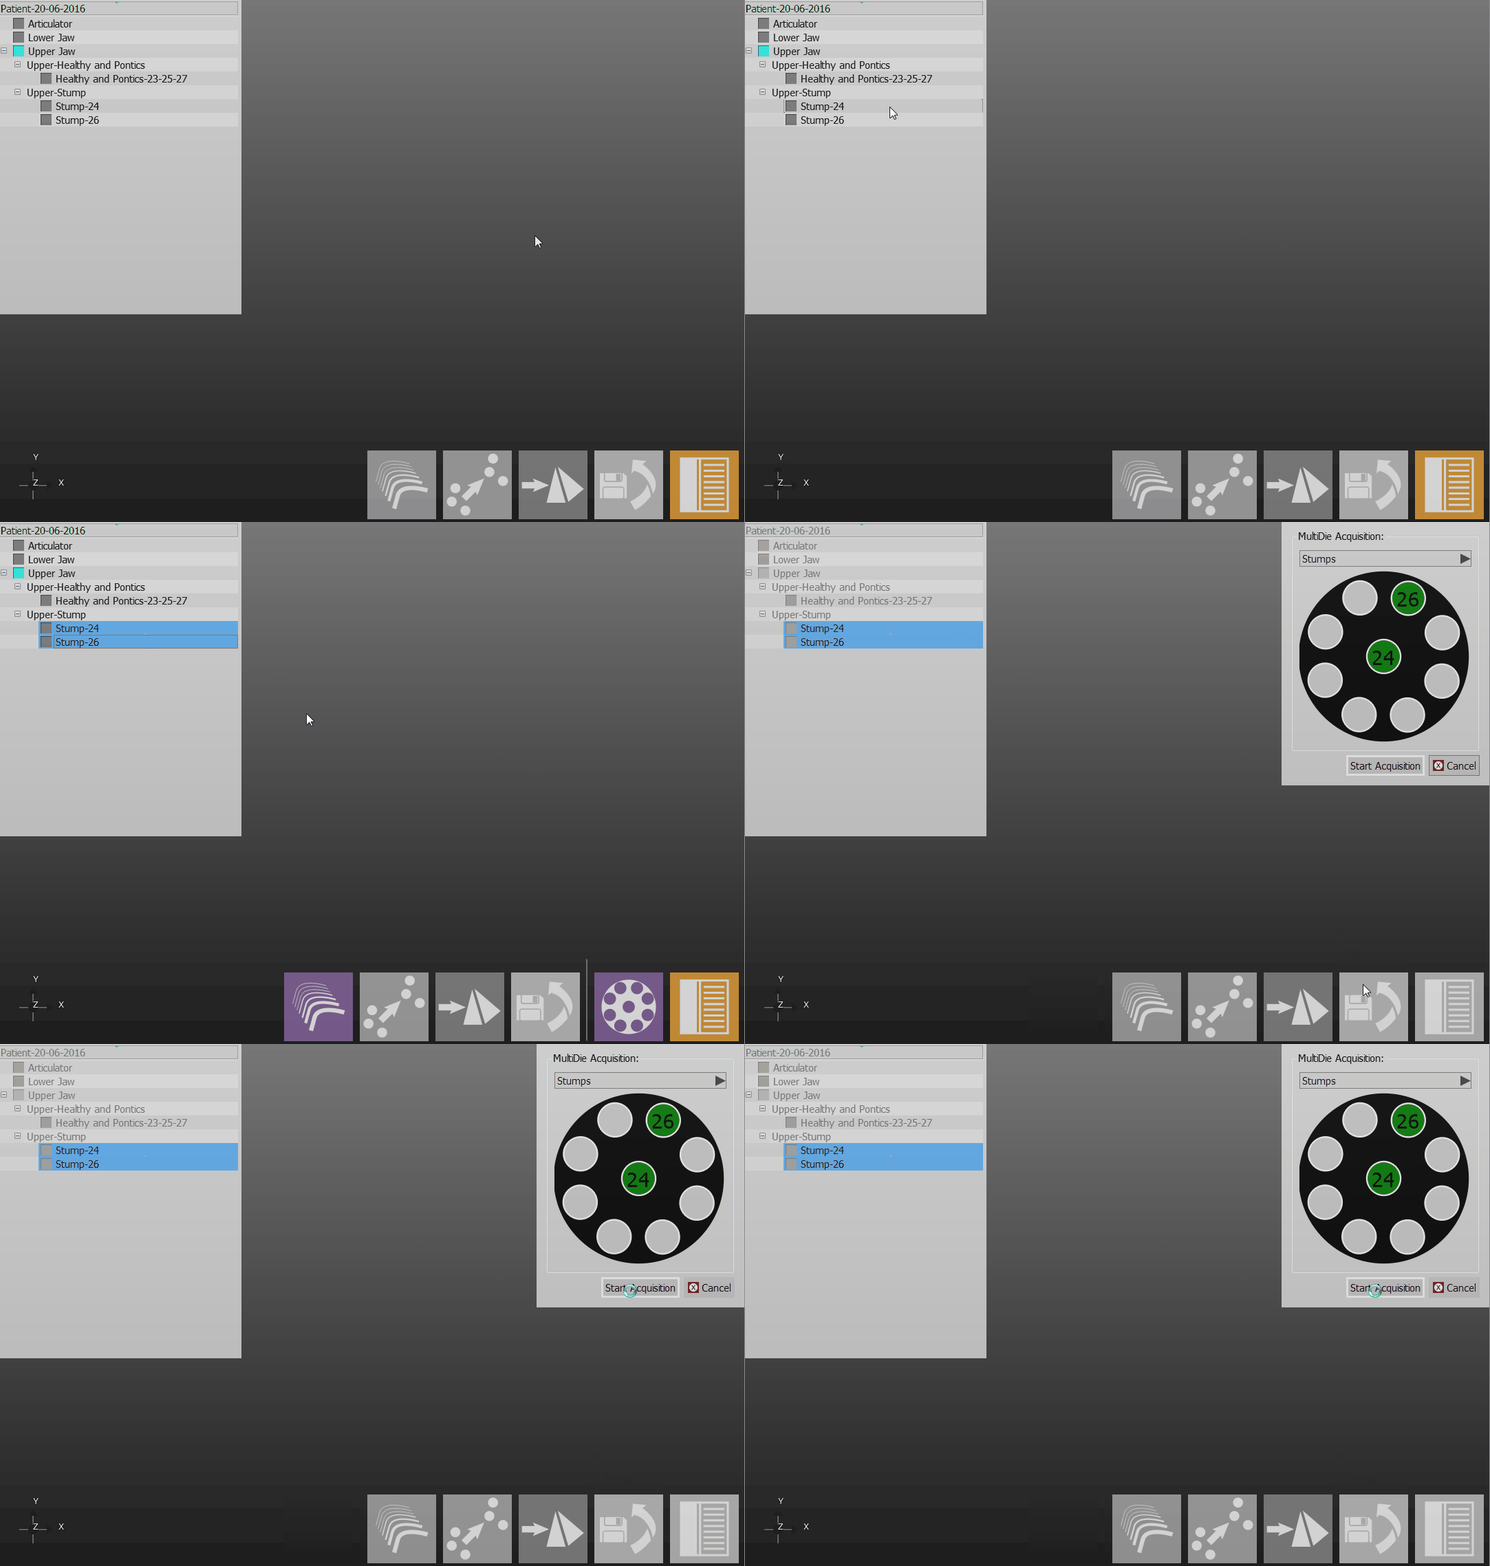
Para capturar munones multiples con un solo escaneo, utilizar el soporte multi-die:
- Seleccionar del "Arbol de Proyecto" los munones a escanear
- Hacer clic en boton Captura Multi-Die Click the Multi-Die en la Barra de las Herramientas. Deben ser seleccionados al menos 2 munones
- Poner los munones en los espacios del soporte siguiendo las istrucciones del software y poner el soporte Multi-Die dentro del escaner
- Hacer clic en el boton Inicio Captura
El escaner capturara los datos, identificando cada munon y actualizando el estado del "Arbol de Proyecto"
Singula
Es posible capturar una imagen 3D singula en cambio de una reconstruccion a 360° de un objeto para escanear una articulacion a en un escaner pequeno
- Poner el objeto dentro del escaner, del mejor modo posible
- Utilizar la herramienta Captura Singula
The software will carry out a single acquisition without moving the motors system
Integration
After an object has been acquired in the scanner, there could be the need to add further information to the starting scan. For example, part of the object may be missing due to shadows or because the acquisition strategy has not covered a specific point of view.
In order to integrate additional information, use the Integrate Acquisition button on the Main Toolbar. This will launch the Integration Mode, providing 3 different integration tools. It is possible to switch from one tool to another. Confirm the modification with the Apply ![]() button or discard it with the Cancel
button or discard it with the Cancel ![]() button.
button.
It is possible to add an unlimited number of acquisitions but adding to much data could slow down the project and increase the project disk size.
Single
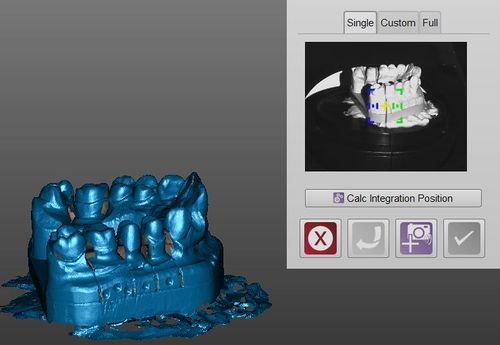
The single integration mode allows to add information from a specific point of view. To add information:
- Rotate the 3D view so that the screen will show exactly the part of the object to be integrated
- Click on the Start Integration
 icon
icon
If the last added acquisition is not good, useless or problematic, it is possible to remove it with the Undo ![]() button.
button.
If the object is not in the original scanning position, the software can not correctly integrate the information. It is possible to try to fix this problem using the Calc Integration Position button.
Custom
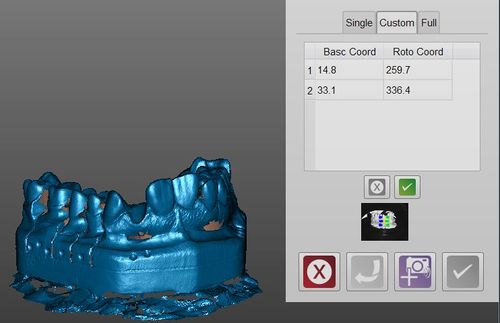
The Custom mode, instead of scanning one position at a time, allows to create a costumized sequence of positions and then the scanner will carry out all the acquisitions together.
To add a position:
- Rotate the 3D view so that the screen will show exactly the part to be integrated
- Click the Add Position
 button
To remove a position:
To start the scan, click the Start Integration ![]() button
button
Full
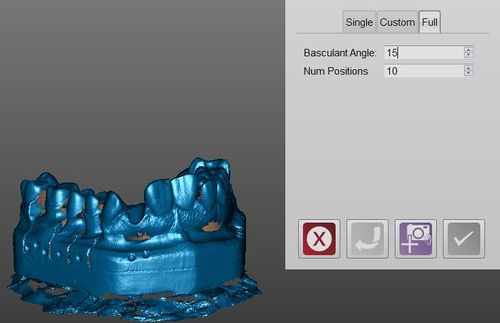
The full integration is the easiest mode: it allows to select as many positions as needed and in which degree the plate must tilt to complete the image.
Then, by clicking the Start Integration ![]() button, the scanner will tilt the model and carry out a 360° acquisition using the selected number of positions.
button, the scanner will tilt the model and carry out a 360° acquisition using the selected number of positions.
Change Strategy
When the Project Tree is created, the software will select a specific strategy for every element, trying to maximize the scan quality and saving space. To change the strategy of an element of the project:
- Right click on the element in the project tree
- Select Change Strategy
- Select the new strategy from the dropdown menu
Another scan of the object will be carried out using the new strategy instead of the old one.
