Difference between revisions of "Man Acquisition/ja"
(Updating to match new version of source page) |
|||
| (2 intermediate revisions by 2 users not shown) | |||
| Line 20: | Line 20: | ||
[[File:Denta_2_5_simpleAcquisition.gif]] | [[File:Denta_2_5_simpleAcquisition.gif]] | ||
| + | |||
| + | If the models are prepared to be mounted in an articulator, they could be too tall to be mounted on the tall model holder and be properly focused by the scanner. For this reason, the model holder base can be detached from the plate itself to allow the user to scan taller models on the low support. | ||
| + | |||
| + | [[File:piattello-da-staccare.jpg]] | ||
| + | [[File:piattello-staccato.jpg]] | ||
=== ●アドバンス設定 === | === ●アドバンス設定 === | ||
| Line 65: | Line 70: | ||
スキャナーでオブジェクトを取得した後、開始中のスキャンへさらに情報を追加する必要がある場合があります。例えば、影が原因でオブジェクトの一部が欠けていたり、取得計画で特定の観点がカバーされていなかったりという場合です。 | スキャナーでオブジェクトを取得した後、開始中のスキャンへさらに情報を追加する必要がある場合があります。例えば、影が原因でオブジェクトの一部が欠けていたり、取得計画で特定の観点がカバーされていなかったりという場合です。 | ||
| − | + | In order to integrate additional information, use the '''Integrate Acquisition''' button on the [[Main_Toolbar|Main Toolbar]]. This will launch the ''Integration Mode'', providing 3 different integration tools. It is possible to switch from one tool to another. Confirm the modification with the '''Apply''' {{Inline button|AcceptButton.jpg}} button or discard it with the '''Cancel''' {{Inline button|Dental_2_5_cancelButton.png}} button. | |
追加できる取得数には制限はありませんが、'''多量のデータを追加することで、プロジェクトの動作が遅くなり、プロジェクトのディスク上のサイズも大きくなることがあります'''。 | 追加できる取得数には制限はありませんが、'''多量のデータを追加することで、プロジェクトの動作が遅くなり、プロジェクトのディスク上のサイズも大きくなることがあります'''。 | ||
| Line 92: | Line 97: | ||
# Rotate the 3D view to identify the holes, and left click on the ones that need to be closed | # Rotate the 3D view to identify the holes, and left click on the ones that need to be closed | ||
| − | # Click the {{Inline button|Dental_2_5_startIntegrationButton.png} button to start the integration sequence | + | # Click the {{Inline button|Dental_2_5_startIntegrationButton.png}} button to start the integration sequence |
The images will be added to the scan and then aligned all together at the end of the acquisition | The images will be added to the scan and then aligned all together at the end of the acquisition | ||
Latest revision as of 10:37, 7 September 2016
Contents
3、取得
スキャナーからデータを取得し、オブジェクトの3D表示を作成することは、スキャニングソフトウェアの主要な機能となります。
ステップバイステップウィザードに関する詳しい情報は、ウィザード取得のページを参照して下さい。
ウィザード外の構造プロジェクトでは、スキャナーからデータを取得するのに、下記の3つの手順があります。
〇シンプル
これはデータを取得するのに最も簡単な方法で、よく使われる方法です。
- オブジェクトを適切なモデルホルダーに置き、スキャナーへ入れます。
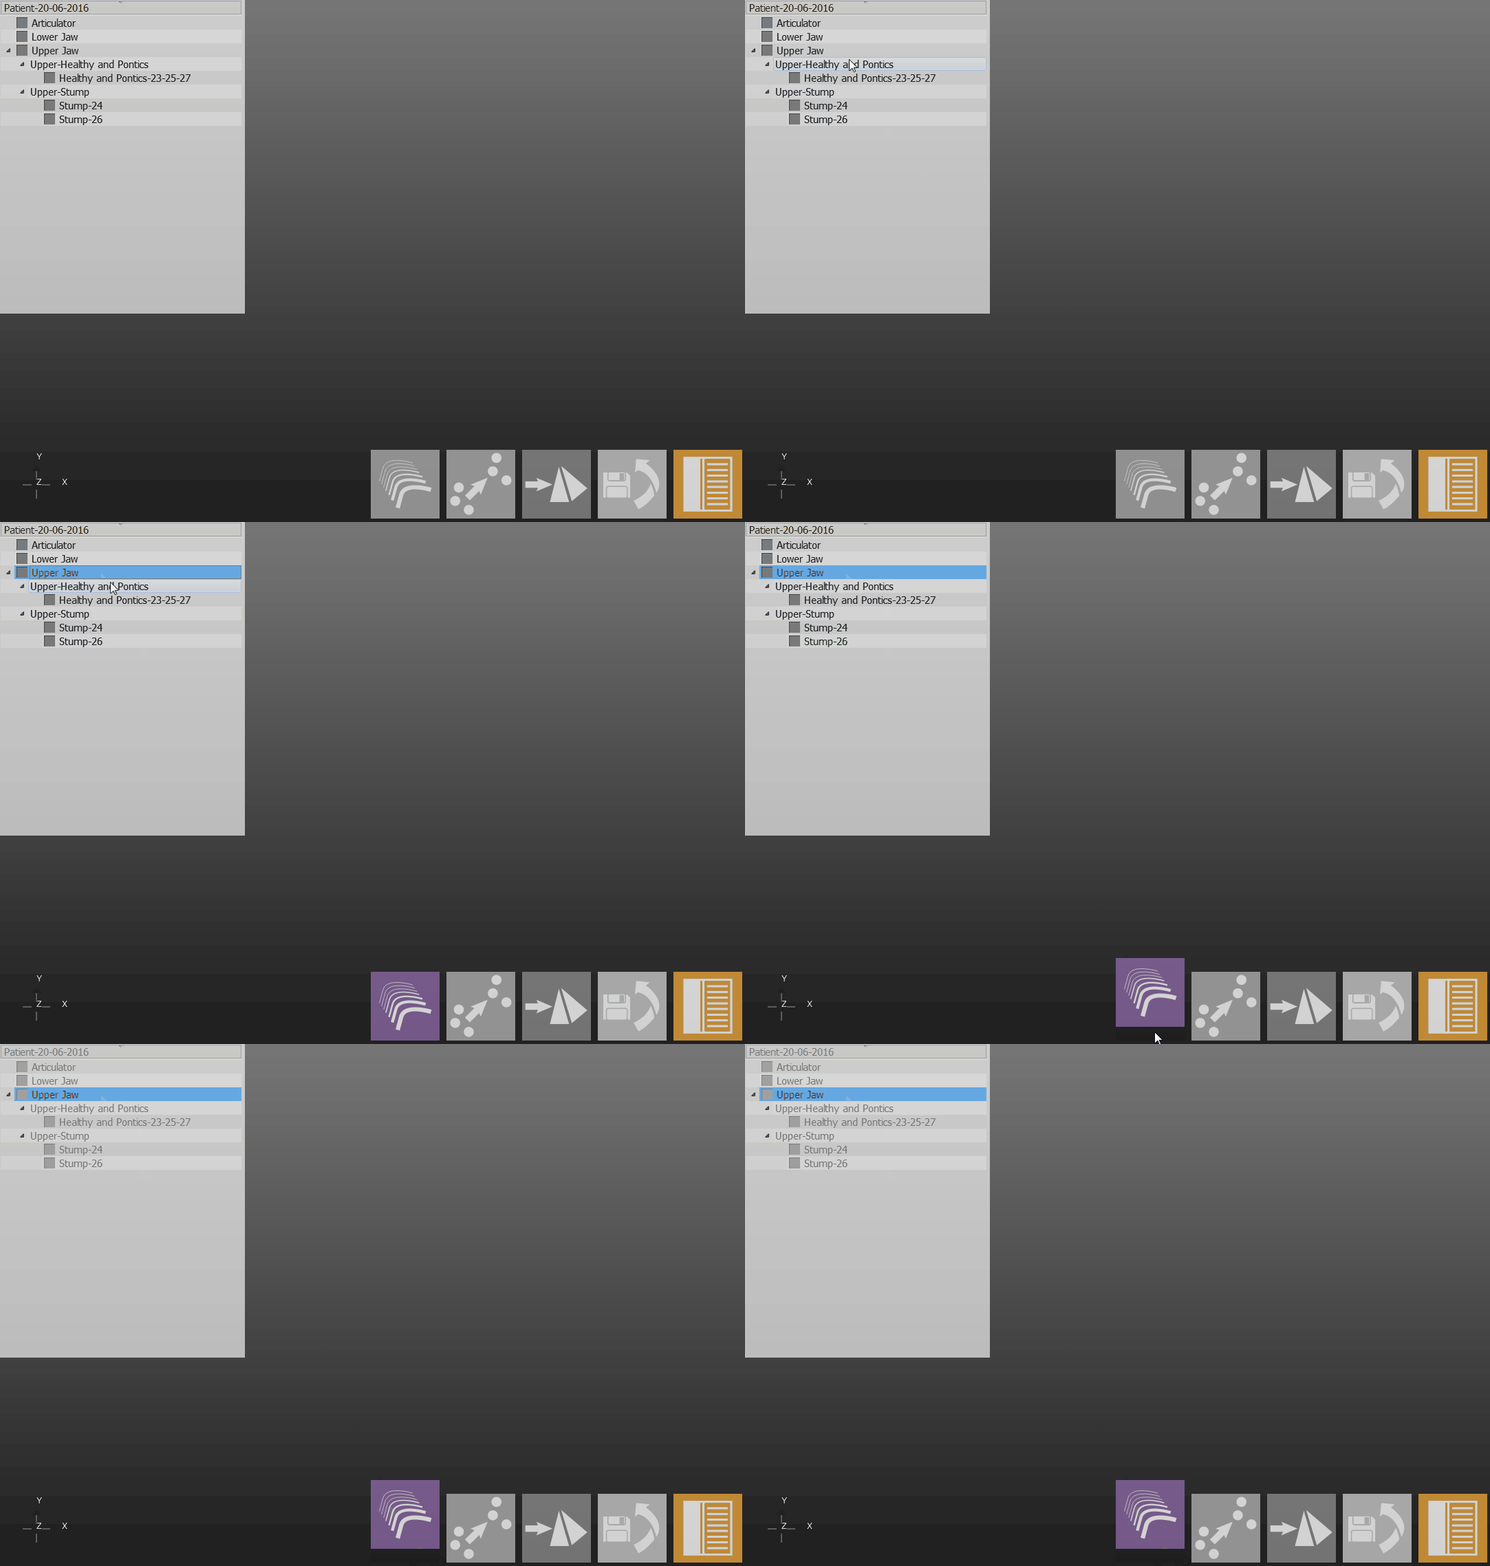
- プロジェクトツリーで、スキャンするオブジェクトを選択します。
- メインツールバーで取得アイコンをクリックします。
スキャナーは、選択されている部品の計画を使ってオブジェクトを取得し、プロジェクトツリーのステータスが更新されます。
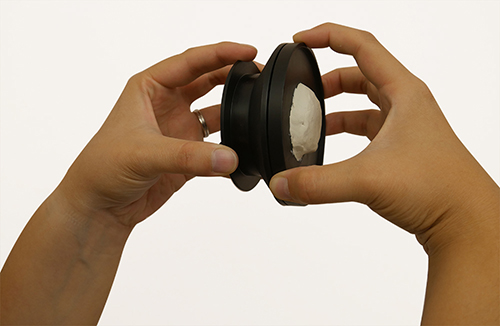
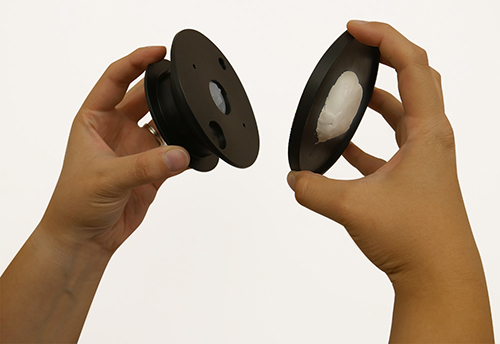
If the models are prepared to be mounted in an articulator, they could be too tall to be mounted on the tall model holder and be properly focused by the scanner. For this reason, the model holder base can be detached from the plate itself to allow the user to scan taller models on the low support.
●アドバンス設定
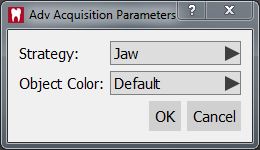
デフォルトとは異なる取得計画を使用する場合は、![]() ボタンを押しながら、取得アイコンをクリックします。
ボタンを押しながら、取得アイコンをクリックします。
追加のダイアログ画面で、異なる計画と、取得が必要なオブジェクトの色を選択します。
●ダイナミックアーティキュレーション
ダイナミックアーティキュレーションモジュールが有効で、使用されている場合、正しいベースの上で顎をスキャンするよう、ソフトウェアから確認メッセージが表示されます。
使用されるベースは、プロジェクト定義で選択されている咬合器のタイプにより異なります。
〇マルチダイ
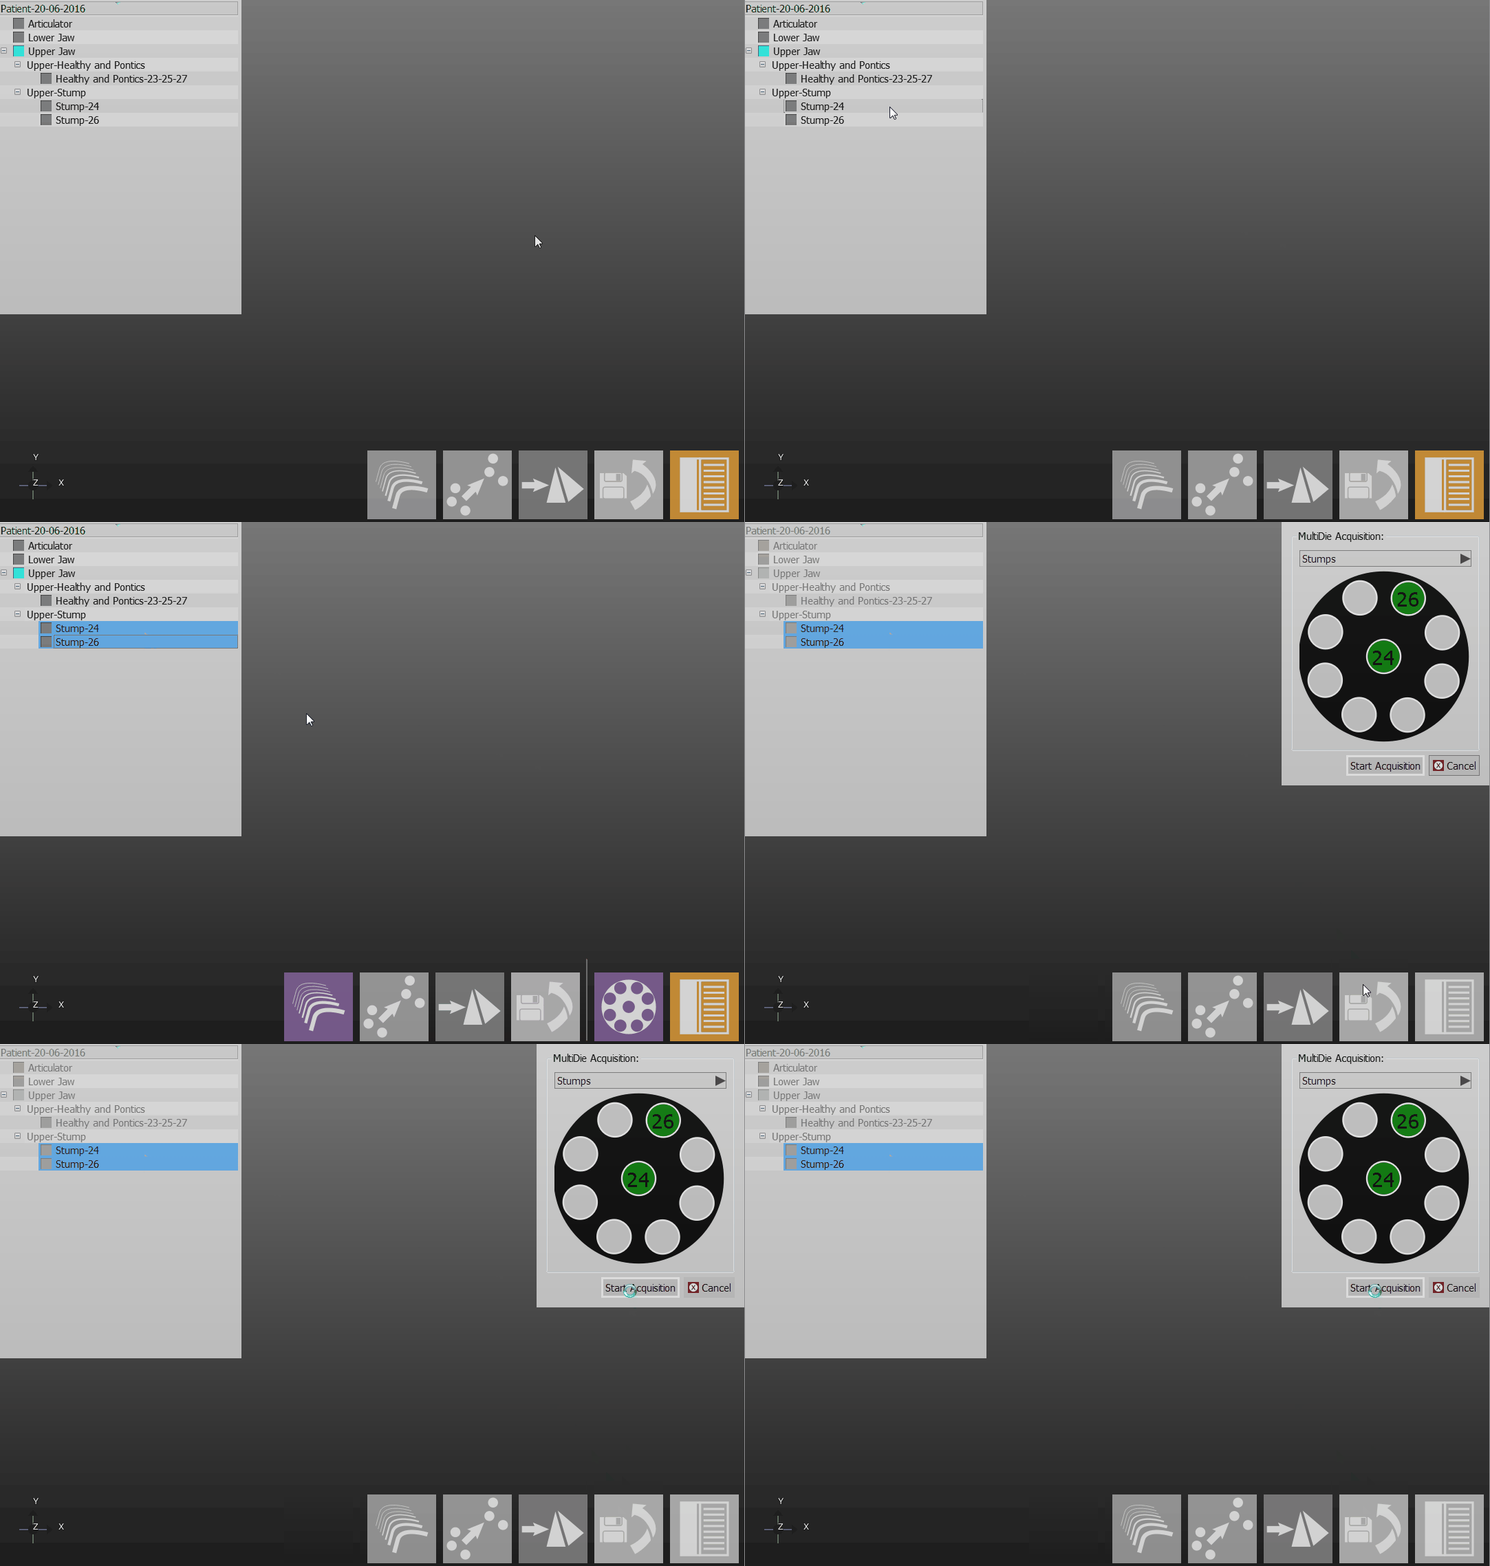
1回のスキャンで複数の歯型を取得するには、マルチダイサポートを使用します。
- プロジェクトツリーからスキャンする歯型をすべて選択します。
- メインツールバーに表示されるマルチダイ取得ボタンをクリックします。プロジェクトツリーで、少なくとも2つの歯型を選択している必要があります。
- ソフトウェアの画面右上に表示されるように、サポートの各スペースに歯型を置き、マルチダイサポートをスキャナーに置きます。
- 取得開始ボタンをクリックします。
スキャナーはデータを取得し、それぞれの歯型を特定し、プロジェクトツリーのステータスを更新します。
〇シングル
360度のオブジェクトの再構築ではなく、単一の3D画像を取得する。(テスト目的や、小型スキャナーで大きな咬合器を取得する場合など。)
- オブジェクトを、最適な方法でスキャナーへ入れます。
- 単一取得ツールを使います。
ソフトウェアは、モーターシステムを駆動させずに単一取得を実施します。
〇統合
スキャナーでオブジェクトを取得した後、開始中のスキャンへさらに情報を追加する必要がある場合があります。例えば、影が原因でオブジェクトの一部が欠けていたり、取得計画で特定の観点がカバーされていなかったりという場合です。
In order to integrate additional information, use the Integrate Acquisition button on the Main Toolbar. This will launch the Integration Mode, providing 3 different integration tools. It is possible to switch from one tool to another. Confirm the modification with the Apply ![]() button or discard it with the Cancel
button or discard it with the Cancel ![]() button.
button.
追加できる取得数には制限はありませんが、多量のデータを追加することで、プロジェクトの動作が遅くなり、プロジェクトのディスク上のサイズも大きくなることがあります。
●Single(シングル)
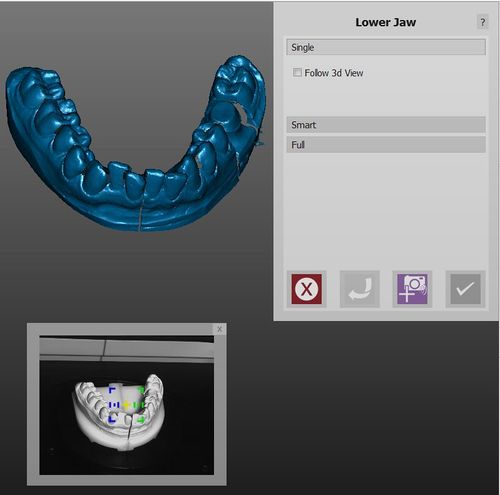
シングル統合モードで、ある特定の観点から情報を追加することができます。
情報の追加方法:
If you wish for the plate to replicate the virtual movements you apply to the image, check the Follow 3d View Box
・最後に追加した取得が十分でなかったり、問題がある場合、元に戻す ![]() ボタンで削除することができます。
ボタンで削除することができます。
・オブジェクトが元のスキャン位置に置かれていない場合、ソフトウェアは正しく情報を統合できません。Calc Integration Position(統合位置計算)ボタンを使って、この問題の修正を試みることが可能です。
Smart
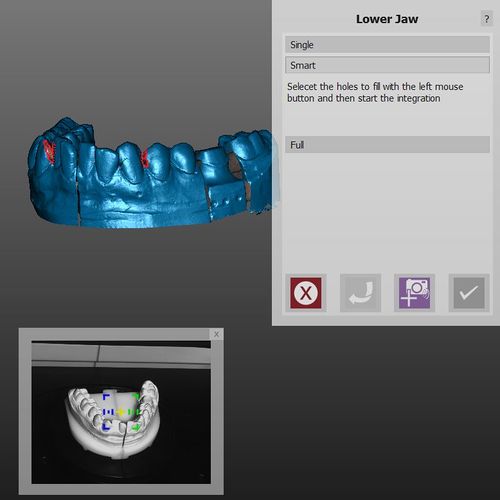
The Smart mode, instead of scanning one position at a time, allows to identify the holes on the virtual model and, if possible, close them with a scanning sequence.
位置の追加方法:
- Rotate the 3D view to identify the holes, and left click on the ones that need to be closed
- Click the
 button to start the integration sequence
The images will be added to the scan and then aligned all together at the end of the acquisition
〇Full(フル)
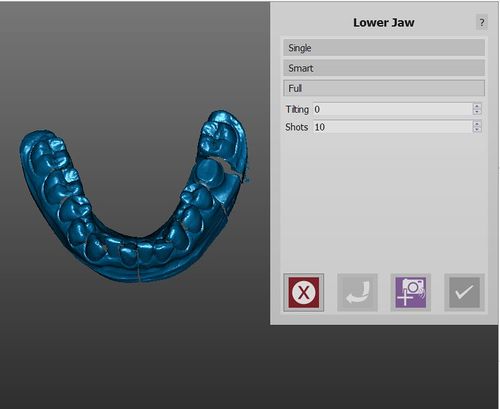
フル統合は最も簡単なモードで、画像を完成させるのに必要なすべての位置を選択でき、プレートの傾斜角度も設定できます。
設定後、統合開始![]() ボタンをクリックすると、スキャナーは模型を傾け、選択した位置の数を使って、360度取得を実行します。
ボタンをクリックすると、スキャナーは模型を傾け、選択した位置の数を使って、360度取得を実行します。
〇計画変更
プロジェクトツリーが作成されると、ソフトウェアは各部品に対して特定の計画を選択し、スキャン品質と保存領域を最適化させようとします。
プロジェクト部品の計画の変更方法:
- プロジェクトツリーの部品を右クリックします。
- Change Strategy(計画変更)を選択します。
- ドロップダウンメニューから新しい計画を選択します。
新しい計画を使ったオブジェクトのスキャンが再度実行されます。
