Difference between revisions of "Man Acquisition/ru"
Trubnikova (talk | contribs) (Created page with "После завершения сканирования объекта может понадобиться дополнительная информация к уже пол...") |
Trubnikova (talk | contribs) |
||
| Line 63: | Line 63: | ||
= Интеграция = | = Интеграция = | ||
| − | После завершения сканирования объекта может понадобиться дополнительная информация к уже полученному изображению. Например, часть объекта может быть нечеткой из-за тени или потому что стратегия сканирования не сработала | + | После завершения сканирования объекта может понадобиться дополнительная информация к уже полученному изображению. Например, часть объекта может быть нечеткой из-за тени или потому что стратегия сканирования не сработала на отдельной поверхности. |
In order to integrate additional information, use the '''Integrate Acquisition''' button on the [[Main_Toolbar|Main Toolbar]]. This will launch the ''Integration Mode'', providing 3 different integration tools. It is possible to switch from one tool to another. Confirm the modification with the '''Apply''' {{Inline button|Dental_2_5_confirmButton.png}} button or discard it with the '''Cancel''' {{Inline button|Dental_2_5_cancelButton.png}} button. | In order to integrate additional information, use the '''Integrate Acquisition''' button on the [[Main_Toolbar|Main Toolbar]]. This will launch the ''Integration Mode'', providing 3 different integration tools. It is possible to switch from one tool to another. Confirm the modification with the '''Apply''' {{Inline button|Dental_2_5_confirmButton.png}} button or discard it with the '''Cancel''' {{Inline button|Dental_2_5_cancelButton.png}} button. | ||
Revision as of 20:18, 19 February 2016
Contents
Получение данных
Главной функцией программы OpticalRevEng Dental является получение данных со сканера и создание виртуального 3D изображение объекта
Для получения дополнительной информации из пошаговой инструкции следует обратиться к странице Инструкция по получению данных
В Структурированном проекте используются три процедуры получения данных со сканера без отсылки к пошаговой инструкции.
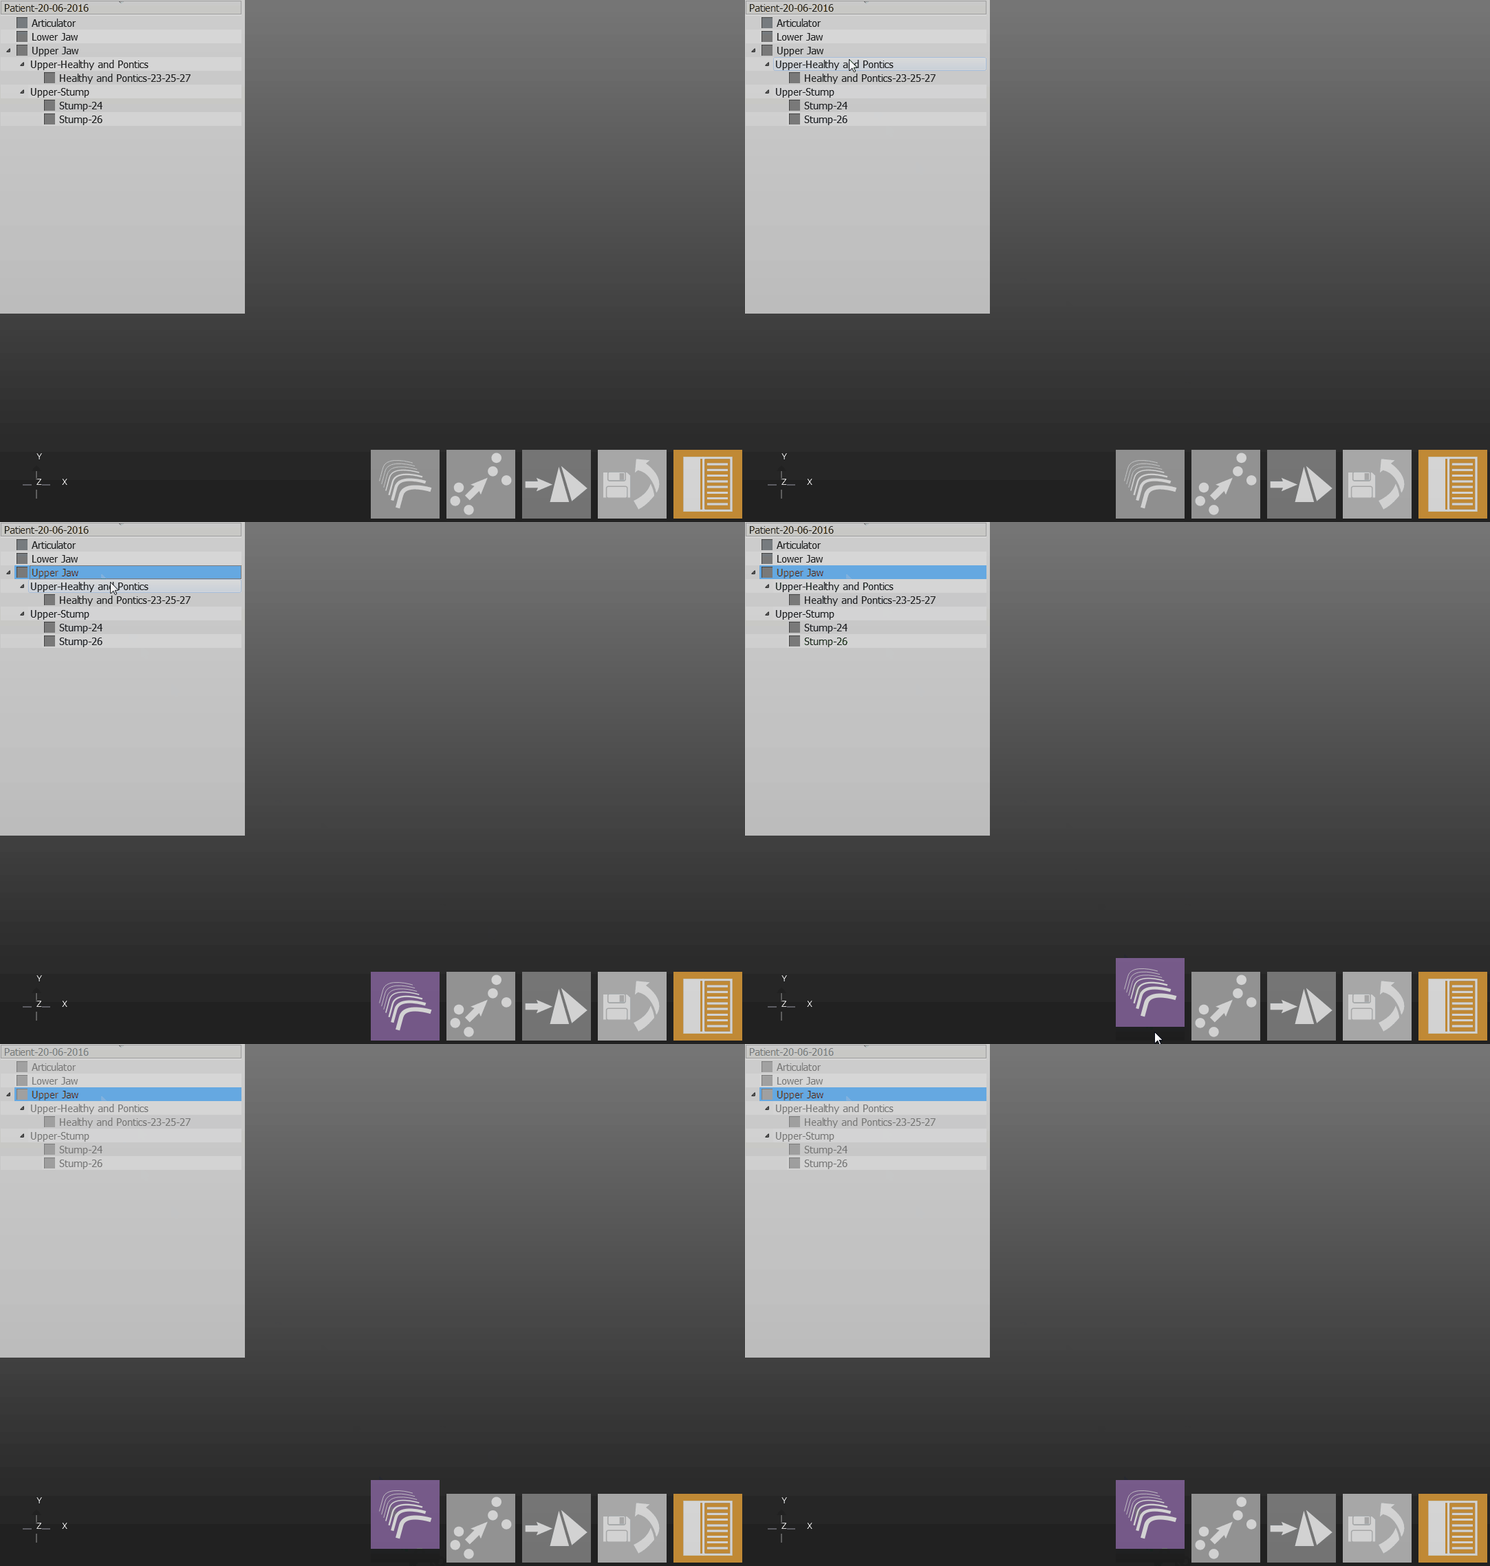
Простая процедура
Это самый простой и наиболее востребованный способ получения данных:
- Поместить предмет внутри сканера на соответсвующий держатель модели
- В Дереве проекта, выбрать элемент для сканирования
- Нажать на значок Получение в Панели управления
Сканер получит данные от объекта, используя стратегию для выбранного элемента, после чего будет обновлен статус Дерева проекта
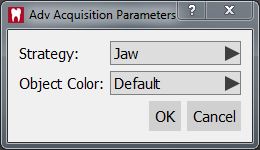
Усовершенствованные параметры
Чтобы использовать стратегию получения данных, отличную от стандартной, следует нажать одновременно кнопку ![]() и значок Получения.
и значок Получения.
Дополнительное окно позволит выбрать другую стратегию и цвет для сканированного объекта
Динамическая артикуляция
Если включен Модуль динамической артикуляции', программа напомнит пользователю о сканировании дуги на соответствующей подставке.
Использованная основа зависит от выбранного Типа артикулятора при формировании проекта.
Multi-Die
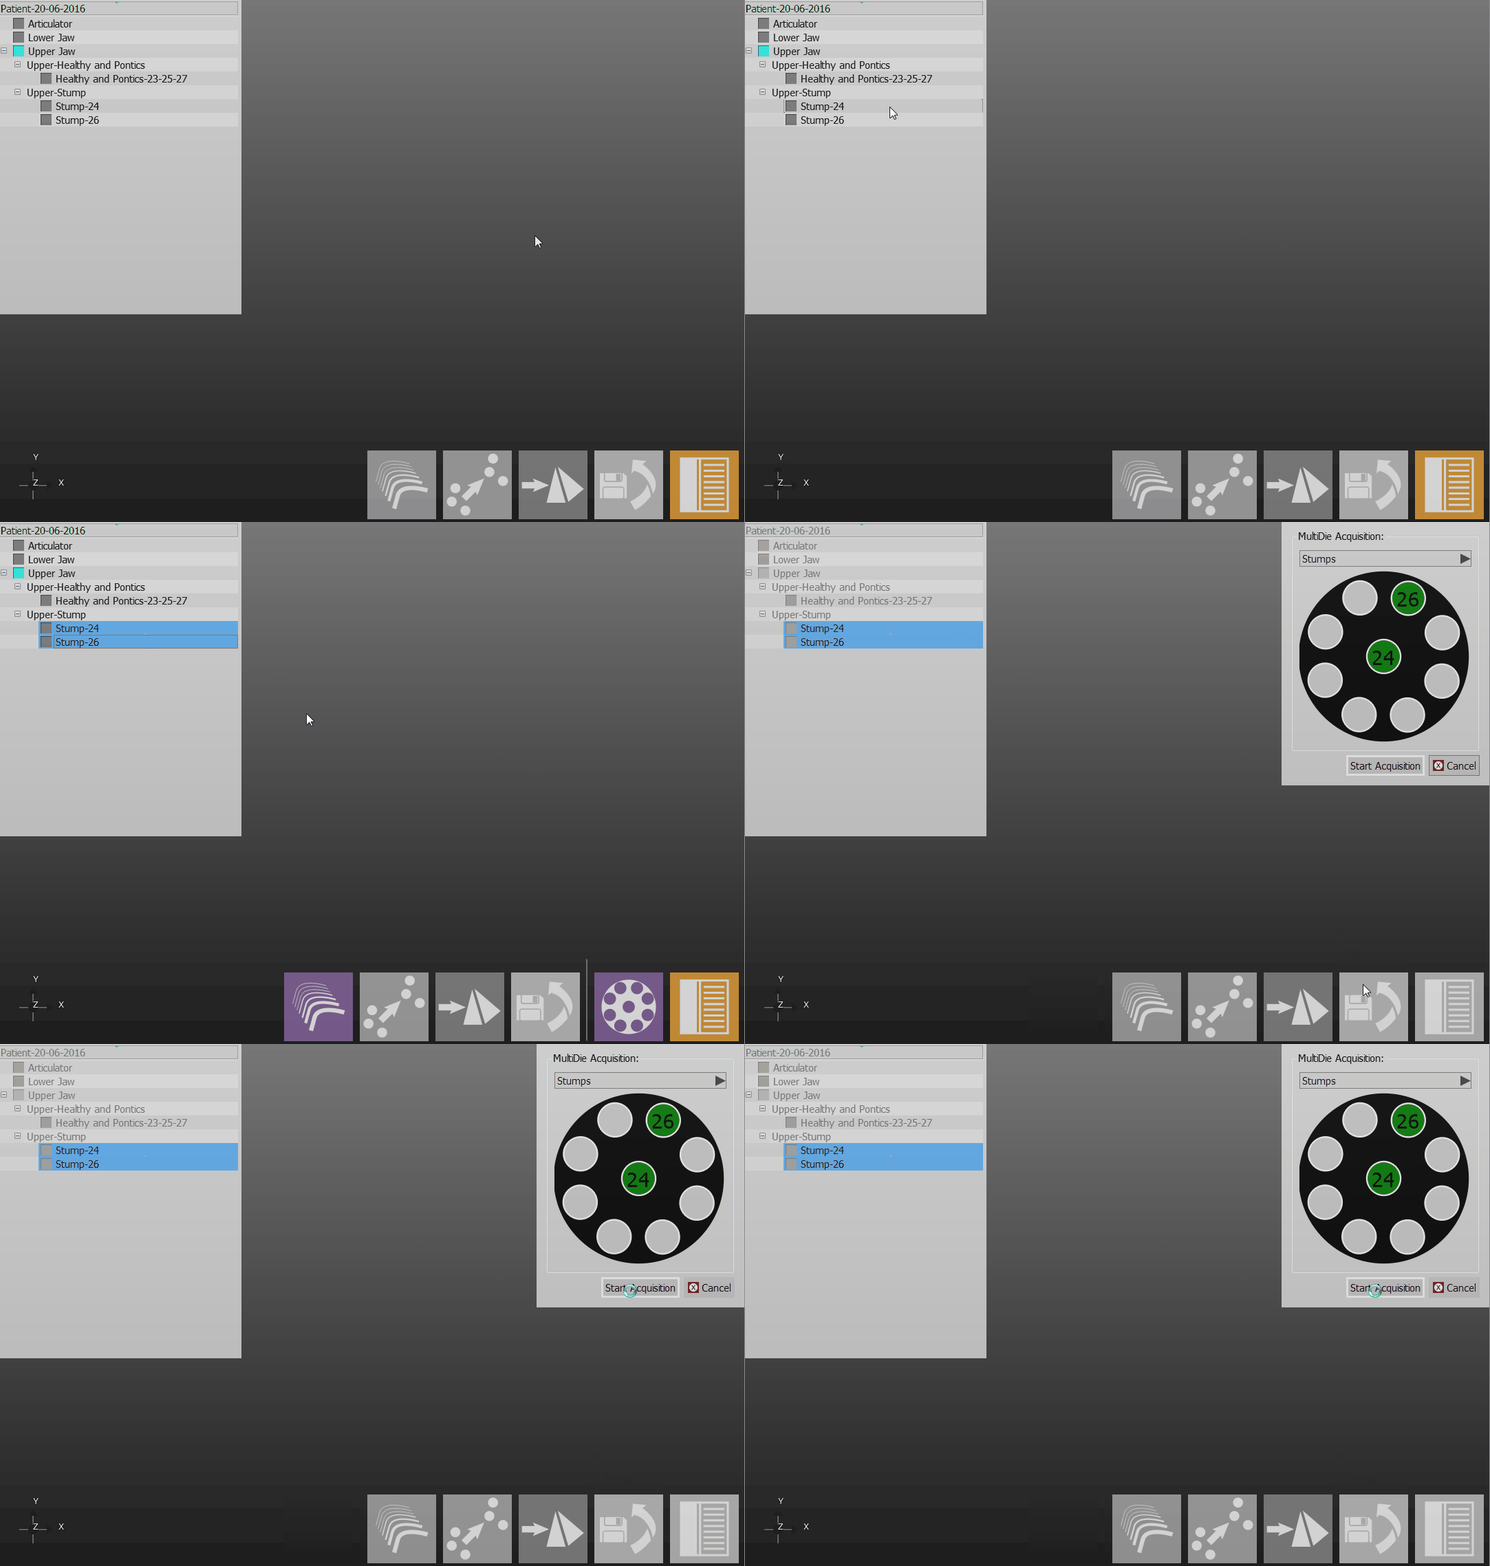
Инструмент multi-die позволяет получить данные о слепках с обеих дуг при одном сканировании
- Выбрать из Дерева проекта все штифты, подлежащие сканированию
- Нажать на кнопку Получение данных multi-die, которая появится на Панели управления. Минимум два штифта должно быть выделено в Дереве проекта
- Положить штифты в каждое из углублений, как показано программой в верхнем правом окне, после чего поместить держатель multi-die в сканер
- Нажать на кнопку Начать получение
Сканер начнет передавать данные, определяя статус каждого отдельного штифта и обновляя данные в Дереве проекта
Отдельное изображение
Для получение отдельного 3D изображения, при котором не требуется реконструкции объекта на 360° (для тестирования или для получения артикуляции в маленьком сканере)
- Поместить предмет максимально аккуратно внутрь сканера
- Использовать инструмент Единичное получение
Программа произведет единичное сканирование, не запуская систему перемещения
Интеграция
После завершения сканирования объекта может понадобиться дополнительная информация к уже полученному изображению. Например, часть объекта может быть нечеткой из-за тени или потому что стратегия сканирования не сработала на отдельной поверхности.
In order to integrate additional information, use the Integrate Acquisition button on the Main Toolbar. This will launch the Integration Mode, providing 3 different integration tools. It is possible to switch from one tool to another. Confirm the modification with the Apply ![]() button or discard it with the Cancel
button or discard it with the Cancel ![]() button.
button.
It is possible to add an unlimited number of acquisitions but adding to much data could slow down the project and increase the project disk size.
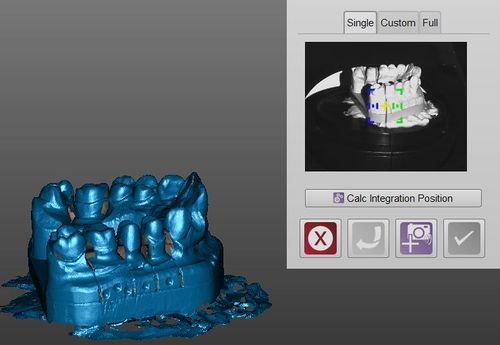
Single
The single integration mode allows to add information from a specific point of view. To add information:
- Rotate the 3D view so that the screen will show exactly the part of the object to be integrated
- Click on the Start Integration
 icon
icon
If the last added acquisition is not good, useless or problematic, it is possible to remove it with the Undo ![]() button.
button.
If the object is not in the original scanning position, the software can not correctly integrate the information. It is possible to try to fix this problem using the Calc Integration Position button.
Custom
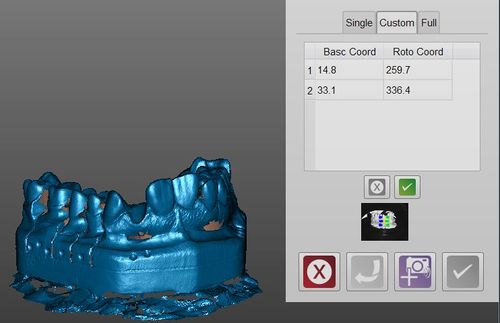
The Custom mode, instead of scanning one position at a time, allows to create a costumized sequence of positions and then the scanner will carry out all the acquisitions together.
To add a position:
- Rotate the 3D view so that the screen will show exactly the part to be integrated
- Click the Add Position
 button
To remove a position:
To start the scan, click the Start Integration ![]() button
button
Full
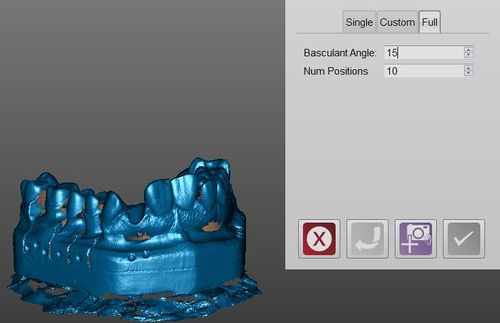
The full integration is the easiest mode: it allows to select as many positions as needed and in which degree the plate must tilt to complete the image.
Then, by clicking the Start Integration ![]() button, the scanner will tilt the model and carry out a 360° acquisition using the selected number of positions.
button, the scanner will tilt the model and carry out a 360° acquisition using the selected number of positions.
Change Strategy
When the Project Tree is created, the software will select a specific strategy for every element, trying to maximize the scan quality and saving space. To change the strategy of an element of the project:
- Right click on the element in the project tree
- Select Change Strategy
- Select the new strategy from the dropdown menu
Another scan of the object will be carried out using the new strategy instead of the old one.
