Difference between revisions of "Man Acquisition/de"
(Created page with "Der Scanner erfasst die Daten, identifiziert die einzelnen Zahnstümpfe und updatet den Projektbaumstatus.") |
(Created page with "== Einzeln ==") |
||
| Line 52: | Line 52: | ||
[[File:Dental_2_5_multiDieAcquisition.gif]] | [[File:Dental_2_5_multiDieAcquisition.gif]] | ||
| − | == | + | == Einzeln == |
To acquire a single 3D image, and not a 360° object reconstruction (for testing or to acquire a big articulation in a small scanner): | To acquire a single 3D image, and not a 360° object reconstruction (for testing or to acquire a big articulation in a small scanner): | ||
Revision as of 10:59, 26 January 2016
Contents
Erfassung
Die Datenerfassung mit der Erstellung einer 3D-Version des Gegenstands ist die Hauptfunktion der OpticalRevEng Dental Software.
Für weitere Informationen über den geleiteten Prozess siehe Seite "Wizard".
Bei einem Strukturprojekt gibt es drei verschiedene Wege, um Informationen ohne den geleiteten Prozess zu erfassen.
Einfach
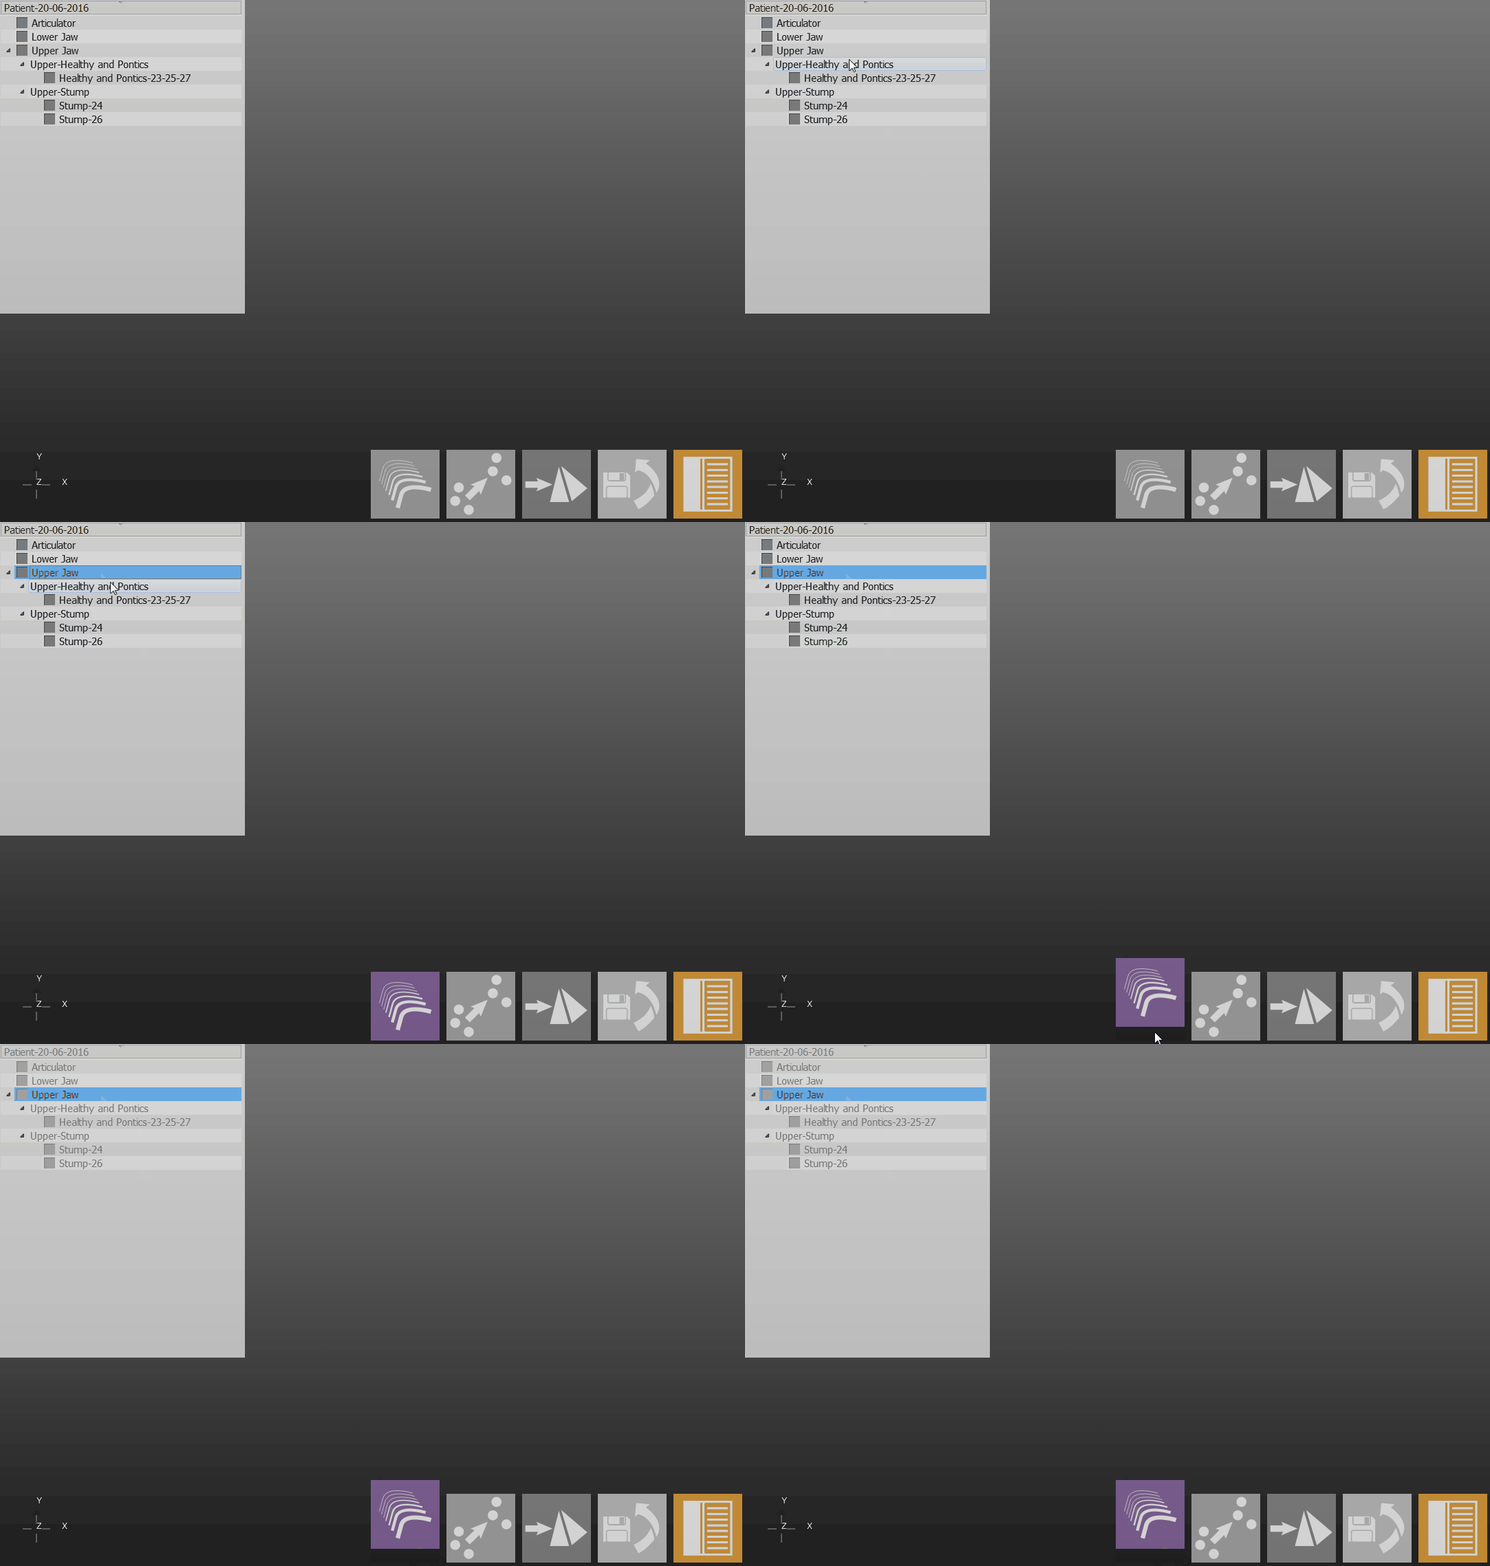
Das ist der einfachste und meistbenutzte Weg zur Datenerfassung:
- Gegenstand in den geeigneten Modellhalter eingeben
- Das zu scannende Element im Projektbaum auswählen
- Auf das Erfassungicon in der Hauptwerkzeugleiste klicken
Das Gerät scannt den Gegenstand mit der entsprechenden Scanmethode und der Projektbaum-Status wird upgedatet.
Erweiterte Optionen
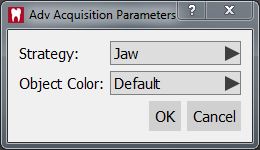
Um eine nicht standardisierte Erfassungsmethode zu verwenden, den Knopf ![]() beim Klicken auf das Erfassungsicon gedrückt halten.
beim Klicken auf das Erfassungsicon gedrückt halten.
Ein zusätzliches Dialogmenü wird verschiedene Methoden, sowie eine Farbe für das zu scannende Objekt, anbieten
Dynamisches Artikulationsmodell
Wenn das dynamische Okklusionsmodul aktiviert und in Betrieb ist, bittet die Software den Nutzer, den Zahnbogen auf dem geeigneten Halter zu scannen.
Der zu benutzende Halter hängt vom bei der Projektdefintion eingestellten Zahnartikulator ab.
Multi-Die
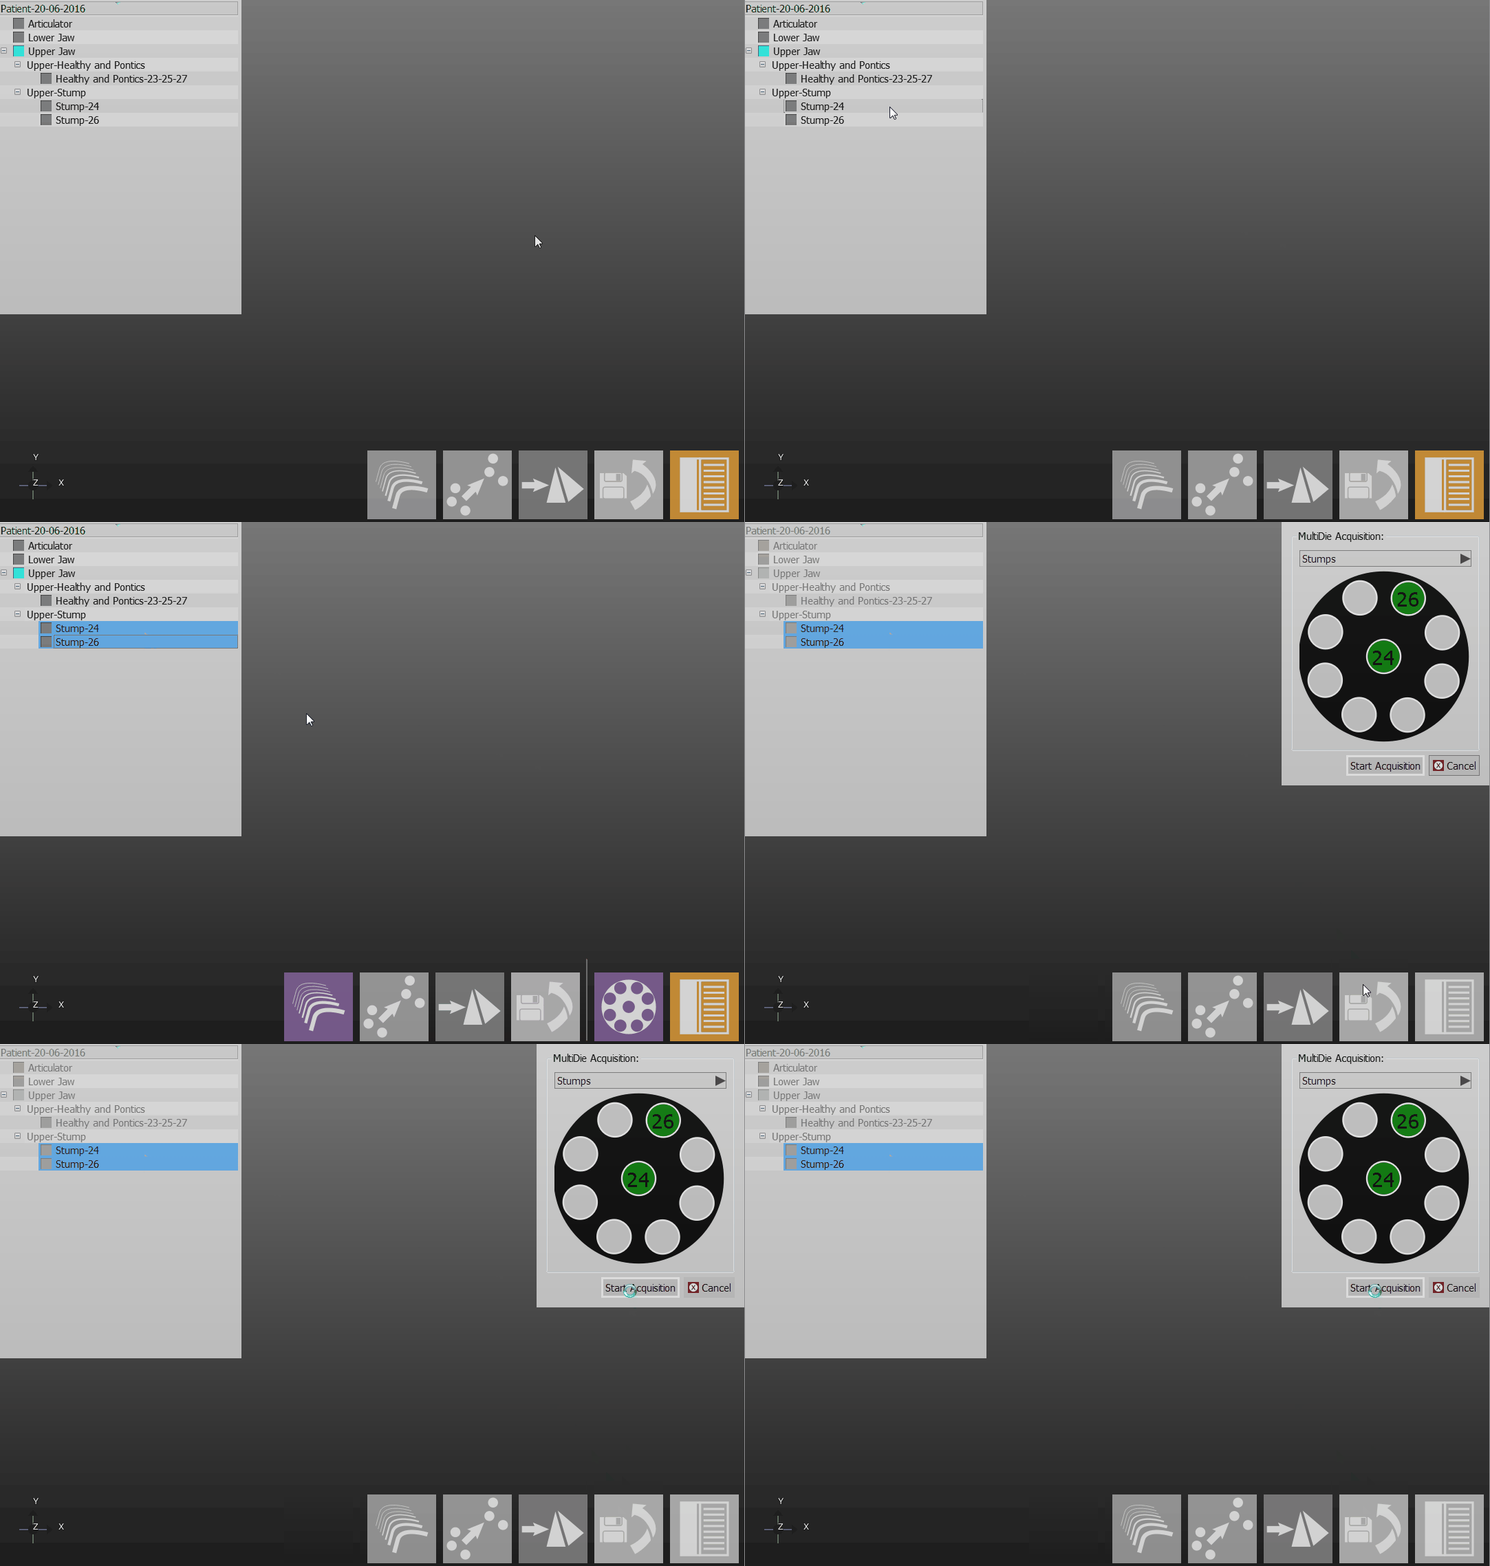
Um verschiedene Zahnstümpfe in einem einzigen Vorgang durch den Multi-Die-Halter zu scannen:
- Alle zu scannende Zahnstümpfe im Projektbaum auswählen
- Auf das Multi-Die-Erfassungsicon klicken, das in der Hauptwerkzeugleiste aktiviert wird, wenn mindestens zwei Zahnstümpfe im Projektbaum ausgewählt werden.
- Zahnstümpfe nach Softwareanweisungen in den Halterlöchern positionieren und Multi-Die-Halter in den Scanner eingeben
- Klicken Sie auf das “Scan starten”-Icon
Der Scanner erfasst die Daten, identifiziert die einzelnen Zahnstümpfe und updatet den Projektbaumstatus.
Einzeln
To acquire a single 3D image, and not a 360° object reconstruction (for testing or to acquire a big articulation in a small scanner):
- Put the object inside the scanner, in the best possible way
- Use the Single Acquisition tool
The software will carry out a single acquisition without moving the motors system
Integration
After an object has been acquired in the scanner, there could be the need to add further information to the starting scan. For example, part of the object may be missing due to shadows or because the acquisition strategy has not covered a specific point of view.
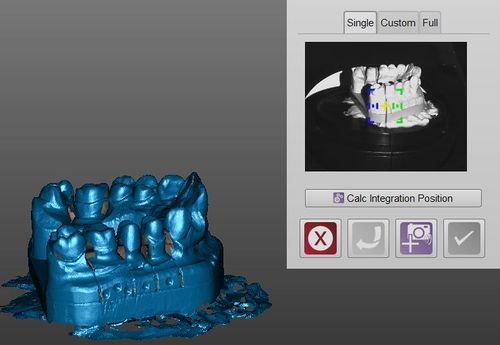
In order to integrate additional information, use the Integrate Acquisition button on the Main Toolbar. This will launch the Integration Mode, providing 3 different integration tools. It is possible to switch from one tool to another. Confirm the modification with the Apply ![]() button or discard it with the Cancel
button or discard it with the Cancel ![]() button.
button.
It is possible to add an unlimited number of acquisitions but adding to much data could slow down the project and increase the project disk size.
Single
The single integration mode allows to add information from a specific point of view. To add information:
- Rotate the 3D view so that the screen will show exactly the part of the object to be integrated
- Click on the Start Integration
 icon
icon
If the last added acquisition is not good, useless or problematic, it is possible to remove it with the Undo ![]() button.
button.
If the object is not in the original scanning position, the software can not correctly integrate the information. It is possible to try to fix this problem using the Calc Integration Position button.
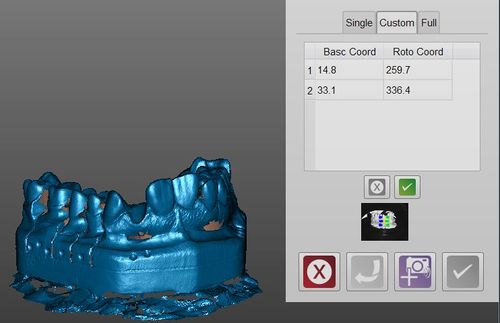
Custom
The Custom mode, instead of scanning one position at a time, allows to create a costumized sequence of positions and then the scanner will carry out all the acquisitions together.
To add a position:
- Rotate the 3D view so that the screen will show exactly the part to be integrated
- Click the Add Position
 button
To remove a position:
To start the scan, click the Start Integration ![]() button
button
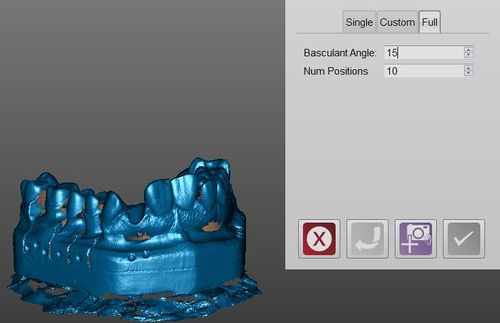
Full
The full integration is the easiest mode: it allows to select as many positions as needed and in which degree the plate must tilt to complete the image.
Then, by clicking the Start Integration ![]() button, the scanner will tilt the model and carry out a 360° acquisition using the selected number of positions.
button, the scanner will tilt the model and carry out a 360° acquisition using the selected number of positions.
Change Strategy
When the Project Tree is created, the software will select a specific strategy for every element, trying to maximize the scan quality and saving space. To change the strategy of an element of the project:
- Right click on the element in the project tree
- Select Change Strategy
- Select the new strategy from the dropdown menu
Another scan of the object will be carried out using the new strategy instead of the old one.
