Difference between revisions of "Dental Service Tools/ja"
(Created page with "キャリブレーション処理は自動で行われます。終了後、ソフトウェアは以下のいずれかのメッセージを表示します:") |
(Created page with "*'Scanner Already Calibrated' : キャリブレーションは必要ありません *'Scanner Recalibrated Successfully' : キャリブレーションが正常に完了しま...") |
||
| Line 40: | Line 40: | ||
キャリブレーション処理は自動で行われます。終了後、ソフトウェアは以下のいずれかのメッセージを表示します: | キャリブレーション処理は自動で行われます。終了後、ソフトウェアは以下のいずれかのメッセージを表示します: | ||
| − | *'Scanner Already Calibrated' : | + | *'Scanner Already Calibrated' : キャリブレーションは必要ありません |
| − | *'Scanner Recalibrated Successfully' : | + | *'Scanner Recalibrated Successfully' : キャリブレーションが正常に完了しました |
| − | *'Scanner Recalibration Failed' : | + | *'Scanner Recalibration Failed' : キャリブレーションを再度実行する必要があります |
If the calibration was successful, the '''Axes Calibration''' starts automatically. | If the calibration was successful, the '''Axes Calibration''' starts automatically. | ||
Revision as of 04:28, 30 December 2015
Contents
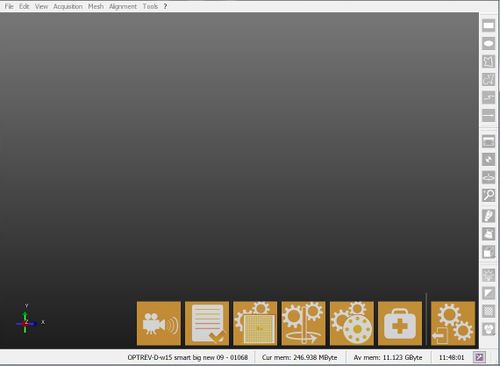
本スキャニングソフトウェアには、ツールメニューから利用できるサービスモードがあります。ここから、リキャリブレーションを行ったり、発生した問題の診断を行うことができます。
ライブモード
このツールで、スキャナーのカメラのライブ映像をチェックできます。
スキャナーチェック
ソフトウェア開始後、スキャナーが正しく接続されているかをチェックします。
ヘッドのリキャリブレーション
キャリブレーションには、2つのタイプがあります:
- リキャリブレーション
- 高速に行えるタイプで、定期的にスキャナーのキャリブレーションを更新したり、スキャナーを動かした際などに実行します
- フルキャリブレーション
- より複雑なタイプで、スキャナー修理後に実行します
スキャナーの光学ヘッドの新規キャリブレーションを実行するため、このツールはキャリブレーションキットを使います。以下の手順で行います:
- キャリブレーションキットをスキャナー内部の正しい位置に置きます
- ドロップダウンメニューから正しいキャリブレーションタイプを選択します
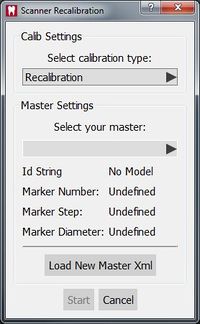
- キャリブレーションダイアログ画面では、ドロップダウンメニューから正確なキャリブレーションキット名を選択します
- Startをクリックします
ドロップダウンメニューにキャリブレーションキット名がない場合、Load New Master Xml(新しいマスターXMLをロード)ボタンを使って、適切なXml記述ファイルから新しいキャリブレーションキットを追加できます。
キャリブレーション処理は自動で行われます。終了後、ソフトウェアは以下のいずれかのメッセージを表示します:
- 'Scanner Already Calibrated' : キャリブレーションは必要ありません
- 'Scanner Recalibrated Successfully' : キャリブレーションが正常に完了しました
- 'Scanner Recalibration Failed' : キャリブレーションを再度実行する必要があります
If the calibration was successful, the Axes Calibration starts automatically.
Recalibrate Axis
This tool is used to check the movement system of the scanner. The scanner will scan an object, analyze it, and use this data to calibrate the movement system.
This tool will start automatically after a Head Recalibration or can be started manually with the button.
- Put the calibration object inside the scanner
- Click Recalibrate Axis
- Click Ok when prompted
The calibration procedure is automatic. Once it is finished, the software will show one of the following messages:
- 'Axis Recalibration Successfull' : the calibration has been completed
- 'Axis Recalibration Failed' : calibration has to be repeated
Auto Set-Up Multi-Die Parameters
This tool is used to calibrate the Multi-Die support. If the acquisitions carried out with the Multi-Die are not correctly recognized, the calibration procedure is the following:
- Clean the multi-die from excessive material or white powder, every single die position needs to be clearly separated from the others
- Put the empty multi-die support inside the scanner
- Start the tool with this button
- Click Ok when prompted
Diagnostic Acquisition
When doubting the proper functioning of the scanner, this tool carries out a specific acquisition of the object currently inside the scanner.
The software then saves all the information in a "*.diag" file that can be sent to the OpticalRevEng Dental support to diagnose possible issues.


