Alignment
Contents
Allineamento
Quando vengono scansionati piç oggetti, la loro posizione reciproca non viene registrata in un primo momento. Per poter lavorare correttamente con i dati acquisiti è necessario che questi vengano registrati in uno stesso sistema di riferimento.
Prima di tutto, l'utente deve identificare quale acquisizione verrà utilizzata come riferimento per tutte le altre. Nei Progetti Strutturati, il software identifica il riferimento di ogni elemento automaticamente.
Ocgni volta che viene acquisita una nuoca informazione è necessario allineare il nuovo dato alla Acquisizione di Riferimento o ad un'altra acquisizione precedentemente allineata al resto del progetto
Every acquired information will have a specific Reference Acquisition. The Project Tree will show this relation, every child will be aligned to its parent node in the tree.
Direct Alignment
OpticalRevEng Dental can automatically align the Acquisitions:
- Select from the Project Tree the element that has to be aligned to the rest of the project
- Click the Alignment Button in the Main Toolbar
The software will choose the reference, it will analyze the selected acquisition and the reference and it will identify the correct position of the selected item with respect to the reference.
If no alignment can be identified by the software, a Manual Alignment will start.
Manual Alignment
The manual alignment starts every time the software can not perform a Direct Alignment. The user can also acceed this tool by holding ![]() when clicking the Alignment Button in the Main Toolbar
when clicking the Alignment Button in the Main Toolbar
Interface
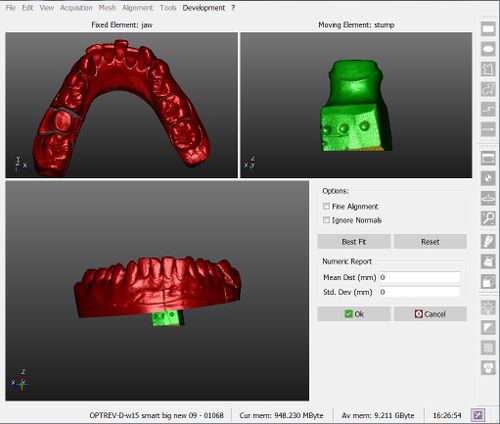
The picture here below shows the interface of the manual alignment:
There are 4 different areas in this screen:
- On the top left is displayed the reference object, which gives the reference position for all the project data
- On the top right is shown the moving object, that has to be moved from its current position and placed in the same reference system of all the other project data
- On the bottom are displayed both objects, so that the user can check the current position of the moving object
- On the bottom right some options and a Numeric Report are available
Procedure
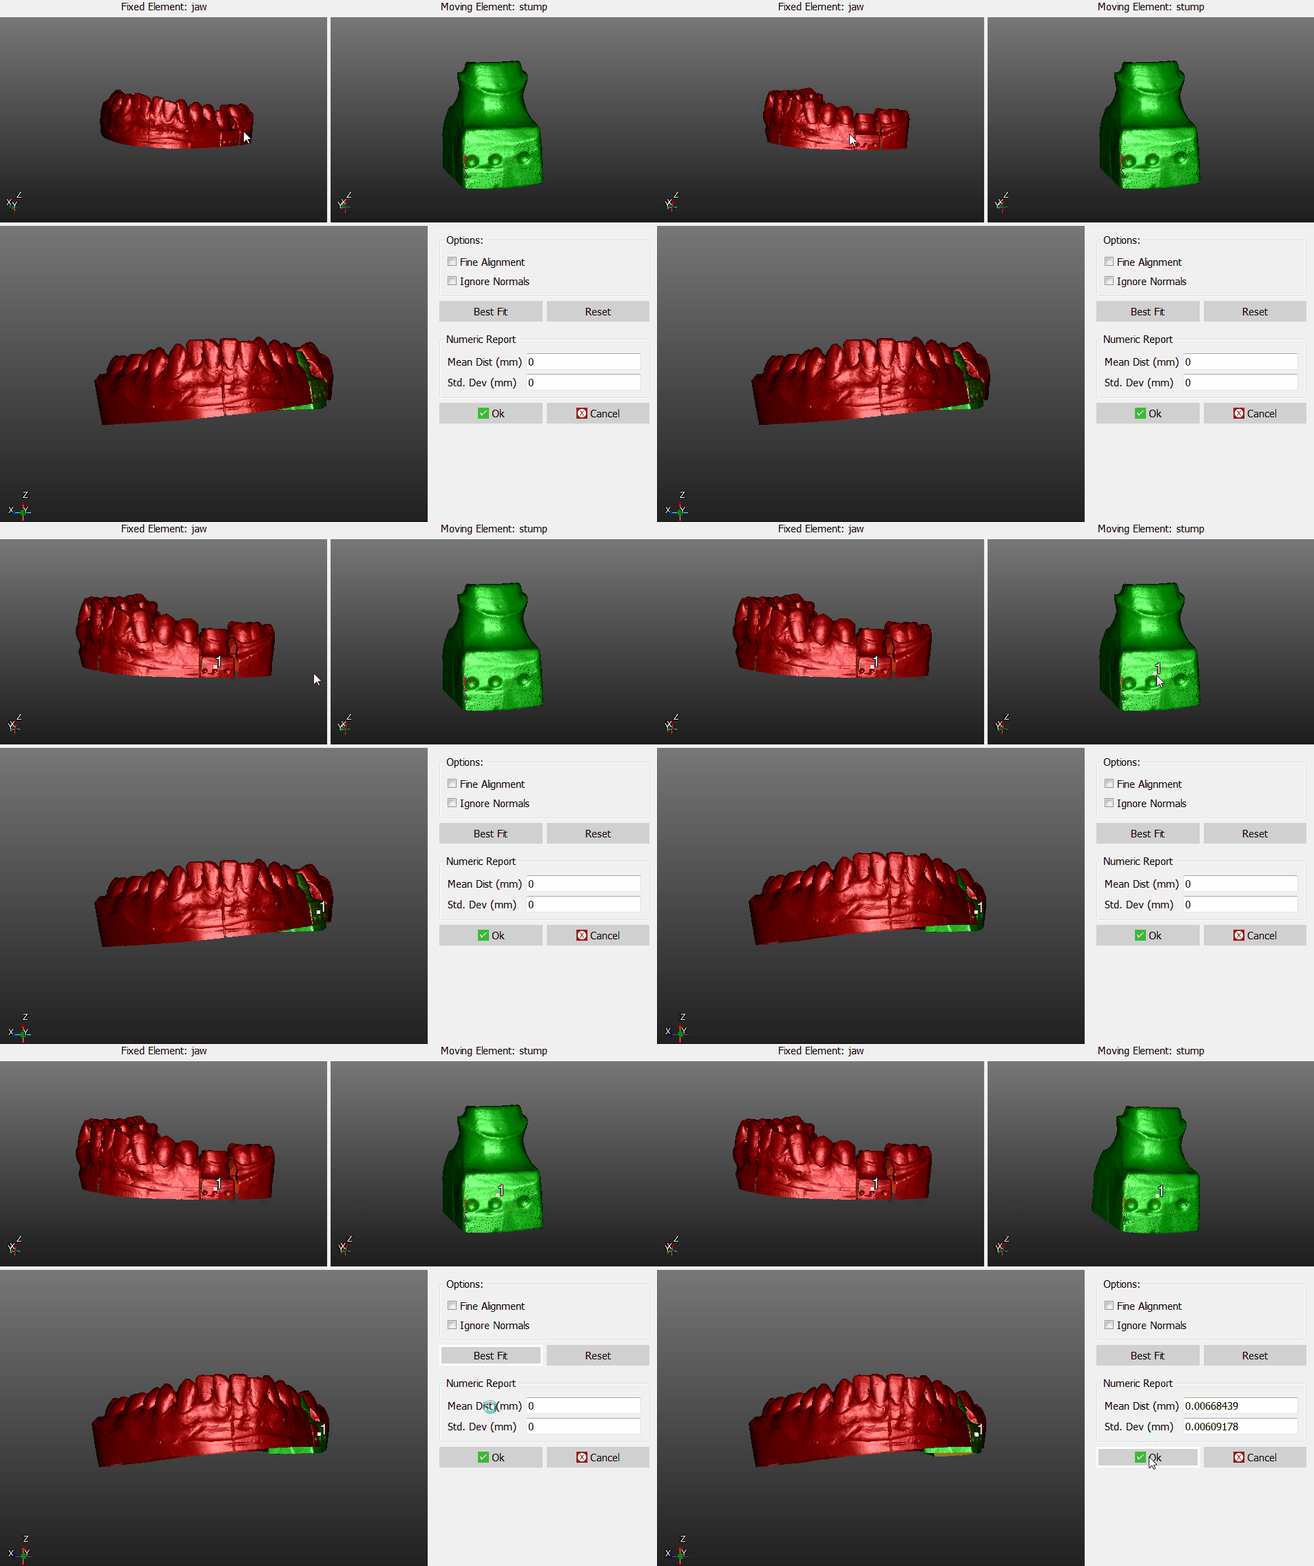
To manually align the elements:
- Place both the reference object and the moving object in the same point of view, until the parts in common are visible
- Click on the same point on both the objects
- Check in the 3D view below, if the position is more or less correct (it's not necessary, at this stage, to find the perfect position)
- Click the Best Fit button on the right
If the two objects have enough points in common, the software will find the best alignment between them. Visually check the alignment on the bottom 3D View or by reading the values in the Numeric Report.
If the alignment is correct, click Ok to confirm the new position of the moving object.
Otherwise, click the Reset button and restart the alignment.
Options
There are two options available during the manual aligment:
- Fine Alignment : usually Best Fit moves the object up to 1mm closer to the reference. If the parts in common between the two objects are really small ,use Fine Aligment to move the object not more than 0.1mm closer to the reference
- Ignore Normals : allows the user to align the internal part of an object to the external part of another, and viceversa.


