Alignment
アライメント
スキャナーで複数のオブジェクトが取得された場合、各アイテムの位置は、他のアイテムの位置とは関係がない状態となっています。スキャンされたデータで正しく作業するには、すべての取得データを同じ参照システム内で位置づける必要があります。
まずはじめに、他のアイテムに対する参照として使用される取得データを決める必要があります。構造プロジェクトでは、ソフトウェアはこの手順を自動的に実行します。
新しい情報が取得されるたびに、新しいデータを参照用取得データまたは残りのプロジェクトへのアライメントがすでにされている別の取得データに対して、アライメントをする必要があります
取得されたすべての情報は固有の参照用取得データを持ちます。プロジェクトツリーにはこの関係が表示され、すべての子部品は、ツリー上で親となるノードへアライメントされます。
ダイレクトアライメント
スキャニングソフトウェアは自動的に取得データをアライメントすることができます:
- プロジェクトツリーから、残りのプロジェクトへアライメントしたい部品を選択します
- メインツールバーのアライメントボタンをクリックします
ソフトウェアは参照データを選択し、選択された取得データと参照データを分析して、選択されたアイテムの参照データに対する正しい位置を特定します。
ソフトウェアがアライメントを特定することができなかった場合、手動アライメントが開始されます。
Manual Alignment
The manual alignment starts every time the software can not perform a Direct Alignment. The user can also acceed this tool by holding ![]() when clicking the Alignment Button in the Main Toolbar
when clicking the Alignment Button in the Main Toolbar
Interface
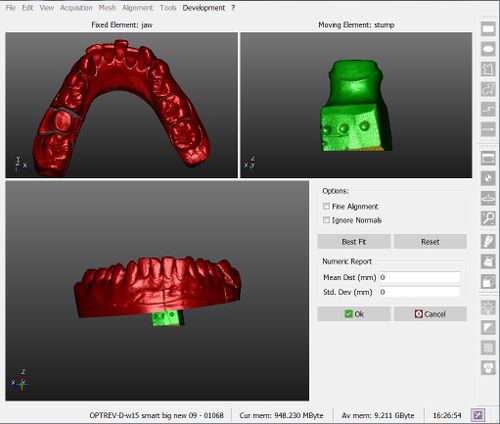
The picture here below shows the interface of the manual alignment:
There are 4 different areas in this screen:
- On the top left is displayed the reference object, which gives the reference position for all the project data
- On the top right is shown the moving object, that has to be moved from its current position and placed in the same reference system of all the other project data
- On the bottom are displayed both objects, so that the user can check the current position of the moving object
- On the bottom right some options and a Numeric Report are available
Procedure
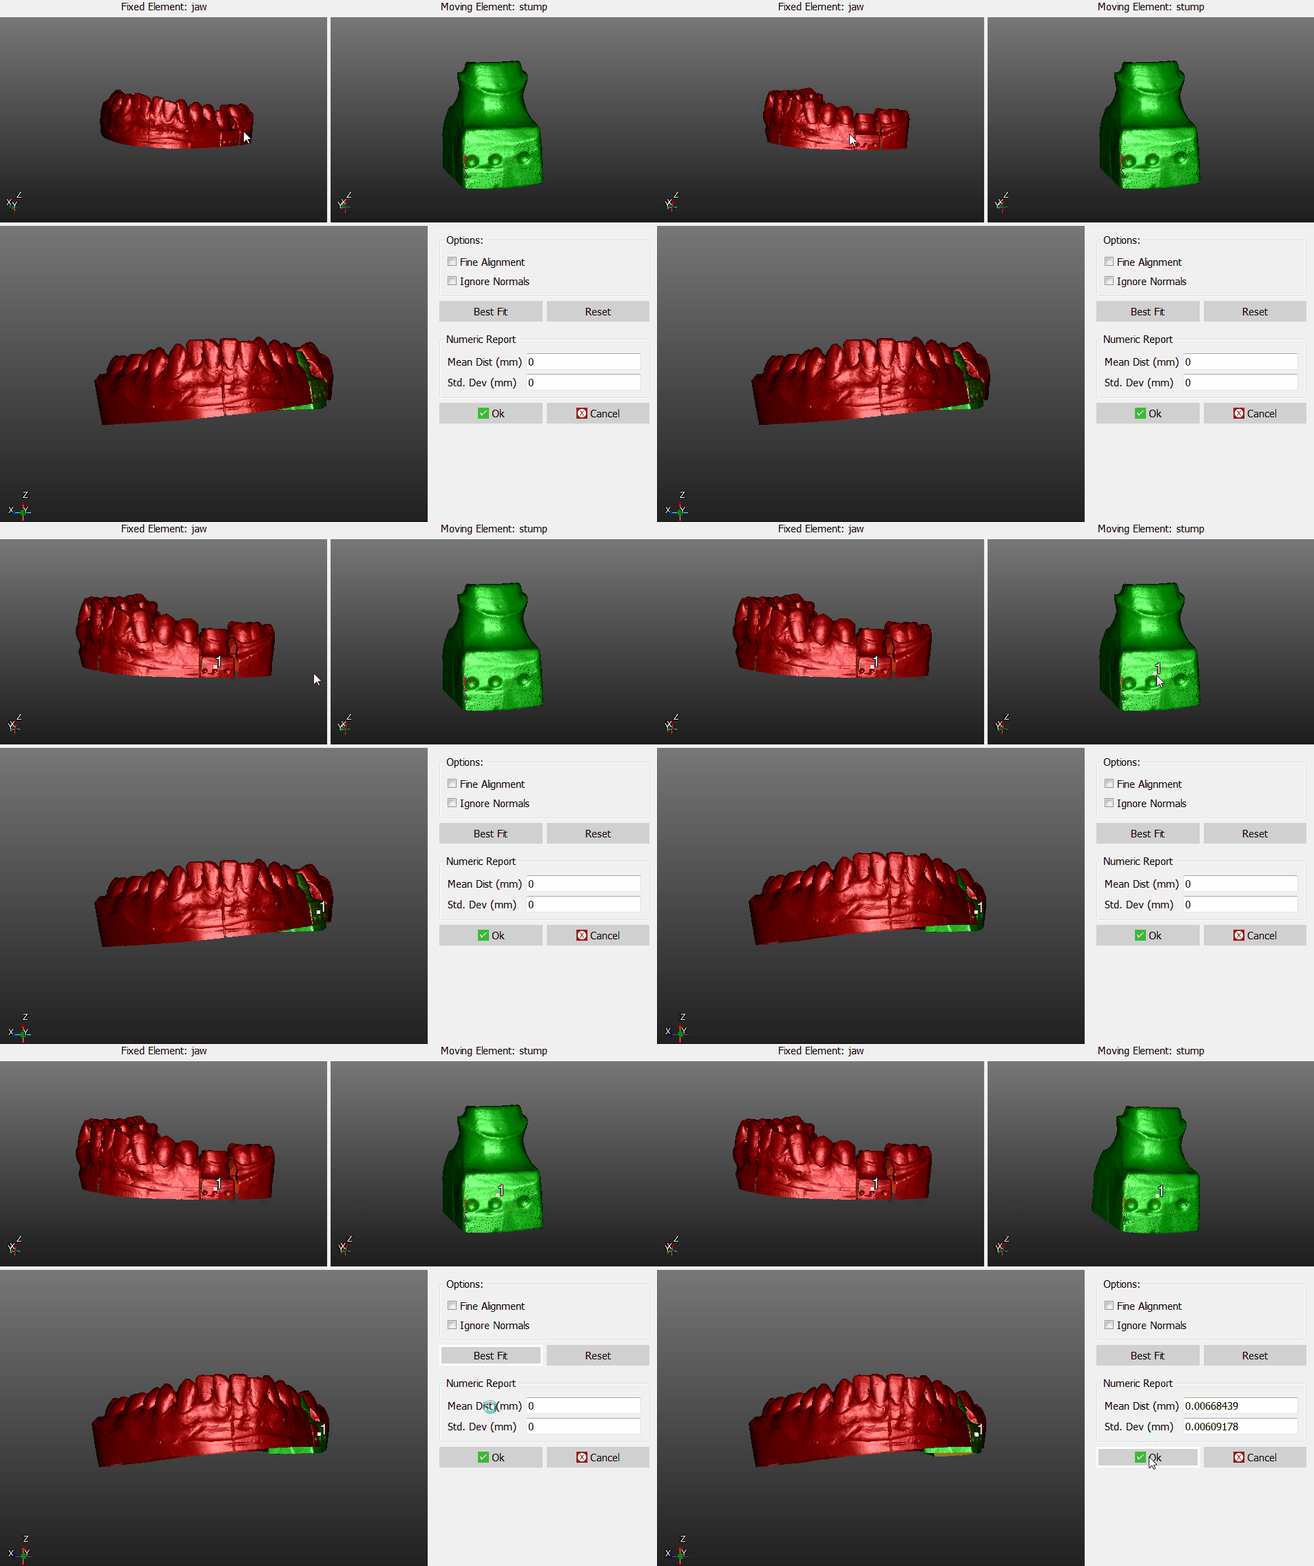
To manually align the elements:
- Place both the reference object and the moving object in the same point of view, until the parts in common are visible
- Click on the same point on both the objects
- Check in the 3D view below, if the position is more or less correct (it's not necessary, at this stage, to find the perfect position)
- Click the Best Fit button on the right
If the two objects have enough points in common, the software will find the best alignment between them. Visually check the alignment on the bottom 3D View or by reading the values in the Numeric Report.
If the alignment is correct, click Ok to confirm the new position of the moving object.
Otherwise, click the Reset button and restart the alignment.
Options
There are two options available during the manual aligment:
- Fine Alignment : usually Best Fit moves the object up to 1mm closer to the reference. If the parts in common between the two objects are really small ,use Fine Aligment to move the object not more than 0.1mm closer to the reference
- Ignore Normals : allows the user to align the internal part of an object to the external part of another, and viceversa.


