Difference between revisions of "Dental Options Dental"
(Created page with "<languages/> {{DISPLAYTITLE:Dental Options}} <translate> =Dental= This options section provide the information about how the Step-By-Step wizard works, how to integrate with o...") |
(No difference)
|
Revision as of 12:22, 28 July 2015
Dental
This options section provide the information about how the Step-By-Step wizard works, how to integrate with other CAD systems and how the configure the automatic export system for the structurated projects.
There are 5 sub-categories:
General
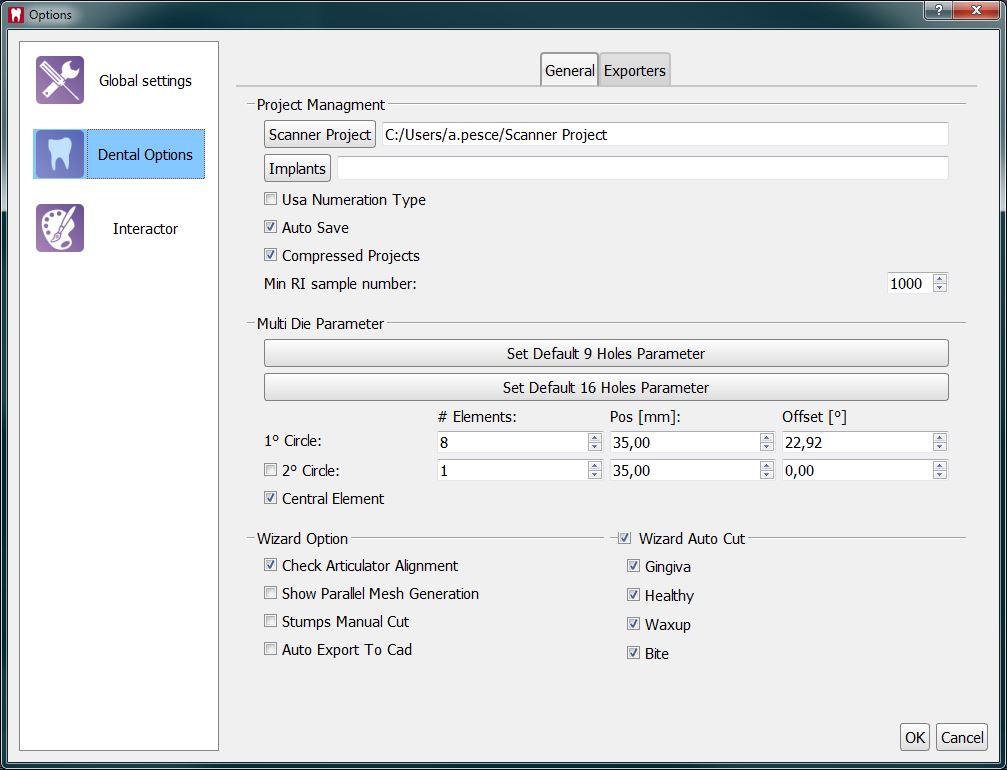
In the General Page there are:
- A project managment section with:
- Scanner Project : The path where the software saves all the project created by the user
- Auto Save : If checked the software will save automatically after every main step in the project (Acquisition, Alignment, Mesh Generation)
- Min RI sample number : The minimum number of points valid for an acquisition. All the acquisition that have less points will be automatically trashed.
- The Multi-Die Parameters: The best way to handle the multi-die parameters is to use the specific automatic calibration
- A wizard options section with :
- Check Articulator Alignment : If checked the software will show the result of the alignment with the articulation to the user during the Step-By-Step Wizard
- ShowParallel Mesh Generation : If checked the software will show the user an old function that tried to speed-up the Step-By-Step Wizard generating the Meshes as soon as possible and not at the specific Mesh Generation Step
- Sumps Manual Cut : If checked the software will show the user an additional Manual Cut step for every stump in the project
- A Wizard Auto Cut where the auto cut function can be enabled/disabled for every supported element.
Protesis
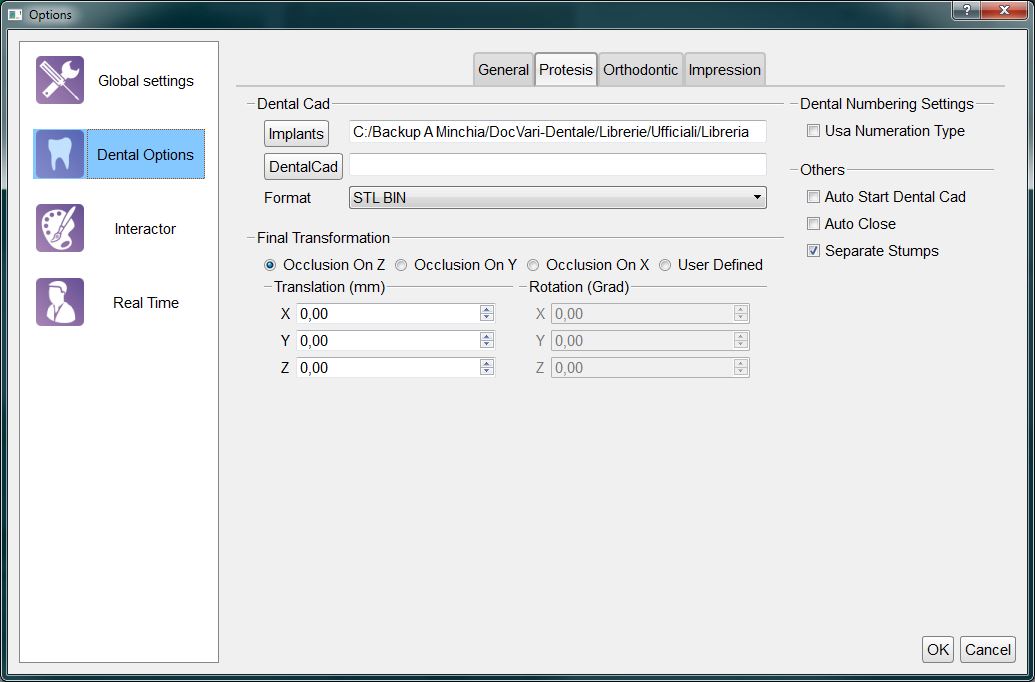
This page configure how the software integrate with the Exocad CAD Platform or other Protesis CAD softwares. The configurations are:
- A Dental Cad section with:
- Implants : The path on the disc with all the implants libraries
- DentalCad : The Exocad DentalCadApp.exe path, used by the Auto Start Dental Cad feature
- Format : The format used by the software to export the meshes. You can read more in the Automatic Export page
- A Dental Number Settings section with an option to use the US (Universal) tooth numbering scheme instead of the default FDI numbering scheme
- A Final Trasformation section better explained in the Final Transormation page
- Others Options like:
- Auto Start Dental Cad : If enabled OpticalRevEng Dental will automatically start the CAD design after a succesfull export to the Exocad CAD Platform
- Auto Close : If enabled OpticalRevEng Dental will close automatically after a succesfull export to the Exocad CAD Platform
- Separate Stumps : If enabled every stump will be exported as a separate file instead of beign exported all merged togheter with the rest of the jaw data
Orthodontic, Scheletric and Impression
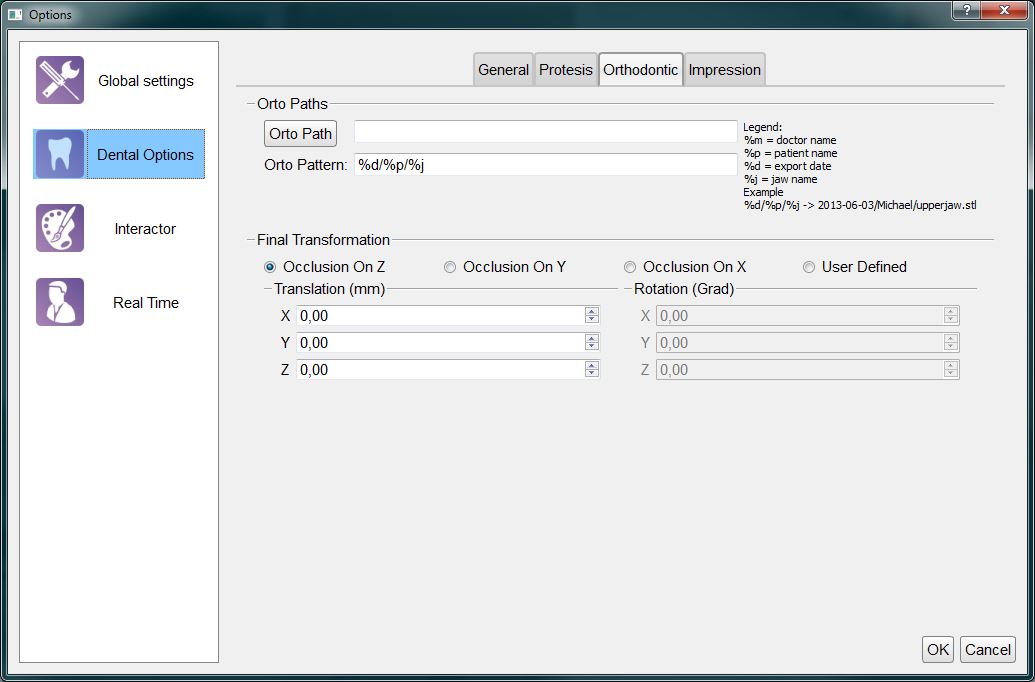
This three pages share the same function but are applied to specific Structurated Projects.
There are 2 sections:
- A Path section with:
- Path : The folder where the software will export the data for this specific project. If empty the data will be exported in the OpticalRevEng Dental Project folder
- Pattern : The directory and file name format used to save the files on disk. Some special characters starting with % will be replaced by specific data coming from the project as showed in the Legend.
- A Final Trasformation section better explained in the Final Transormation page


