Difference between revisions of "Man StartScreen/ja"
(Created page with "左側のAdvanced Import Options(高度なインポートオプション)から、Model Type(モデルタイプ)を選択して、ソフトウェアのワークフロ...") |
(Created page with "; Sectioned Model (セクションモデル): デフォルトのワークフローで、各部品は別々に取得され、すべての情報は最後にマージされ...") |
||
| Line 18: | Line 18: | ||
左側のAdvanced Import Options(高度なインポートオプション)から、Model Type(モデルタイプ)を選択して、ソフトウェアのワークフローを変更します: | 左側のAdvanced Import Options(高度なインポートオプション)から、Model Type(モデルタイプ)を選択して、ソフトウェアのワークフローを変更します: | ||
| − | ; Sectioned Model : | + | ; Sectioned Model (セクションモデル): デフォルトのワークフローで、各部品は別々に取得され、すべての情報は最後にマージされます |
| − | ; Impression Scan : | + | ; Impression Scan (印象スキャン): ライセンスで ''Impression Scan Module'' (印象スキャンモジュール)が有効になっている場合、このオプションをチェックして、石膏模型ではなく、印象をスキャンします。 |
| − | ; All In One : | + | ; All In One (オールインワン): ''All In One Scan Module''(オールインワンスキャンモジュール) が有効になっている場合、ワンステップで象限タイプのすべての部品をスキャンすることが可能です |
| − | ; Unsectioned Model : | + | ; Unsectioned Model (非セクションモデル): スキャンする模型がセクション分けされておらず、各歯型毎に個別のスキャンが必要でない場合、このオプションをオンにします。 |
On the right, there are 2 buttons: | On the right, there are 2 buttons: | ||
Revision as of 02:02, 27 December 2015
スタート
スタート画面は、ソフトウェア起動後に最初に表示されるダイアログ画面です。
スタート画面には2種類あります。1つはユーザーが直接ソフトウェアを起動した場合に表示される画面で、もう1つは別のソフトウェアによって起動された場合(すでにプロジェクトを定義済み)に表示されます。
どちらの場合でも、ソフトウェアはシステムチェックを実施し、メッセージを表示します。動作の準備が完了し、スキャナーが正常に接続されている場合、画面にScanner initialized correctly (スキャナーの初期化が正常に完了しました)とメッセージが表示されます。何らかの理由でスキャナーが正常に動作しない場合は、エラーメッセージが表示されます。
どちらのスタート画面でも、このボタン ![]() で オプションダイアログを開けます。
で オプションダイアログを開けます。
プロジェクト準備済みのスタートアップ
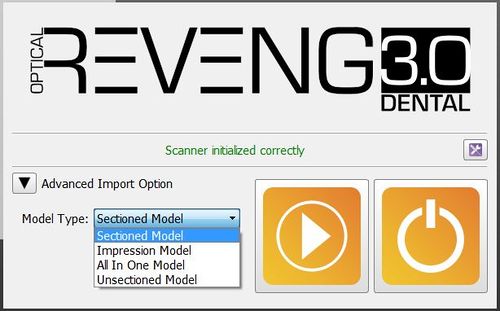
このスタート画面は 呼び出し元のソフトウェア(例:Exocad DentalDBからの起動など)で、すでにプロジェクトが設定済みの状態で起動された時に表示されます。
左側のAdvanced Import Options(高度なインポートオプション)から、Model Type(モデルタイプ)を選択して、ソフトウェアのワークフローを変更します:
- Sectioned Model (セクションモデル)
- デフォルトのワークフローで、各部品は別々に取得され、すべての情報は最後にマージされます
- Impression Scan (印象スキャン)
- ライセンスで Impression Scan Module (印象スキャンモジュール)が有効になっている場合、このオプションをチェックして、石膏模型ではなく、印象をスキャンします。
- All In One (オールインワン)
- All In One Scan Module(オールインワンスキャンモジュール) が有効になっている場合、ワンステップで象限タイプのすべての部品をスキャンすることが可能です
- Unsectioned Model (非セクションモデル)
- スキャンする模型がセクション分けされておらず、各歯型毎に個別のスキャンが必要でない場合、このオプションをオンにします。
On the right, there are 2 buttons:
 Start Project
 - Creates a specific Scan Project using data coming from the Invoking Sofware, with the selected options, and starts the Step-By-Step Wizard
 Close
Close - Closes the software without starting the project
Direct Launch
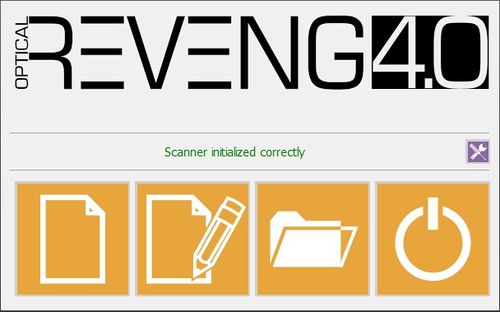
This is the Start Screen that appears when launching the software directly
In this case, no project is ready so the software will ask to create a new project or to load a previously created project.
 New Free Project
 - Only present if the Free Module is enabled. It allows to create a project in Free Mode
 New Project
 - Allows to create a Structured Project and start a Step-By-Step Wizard
 Load Project
 - Allows to load a previous project
 Close
Close - Closes the software without starting the project


