Difference between revisions of "Man MeshEditing/ja"
(Created page with "メッシュ編集") |
|||
| (80 intermediate revisions by 3 users not shown) | |||
| Line 1: | Line 1: | ||
{{Language bar}} | {{Language bar}} | ||
{{DISPLAYTITLE:Mesh Editing|noerror}} | {{DISPLAYTITLE:Mesh Editing|noerror}} | ||
| − | = | + | = 7、メッシュ編集 = |
| − | + | スキャナーで取得されたデータを基に生成したメッシュの場合、指定された用途に最適となっていない場合があります。 | |
| − | + | 生成されたメッシュには、欠陥・ノイズ・穴があることがあり、修正が必要です。 | |
| − | + | スキャニングソフトウェアでは、各部品に対して特定のメッシュ生成計画がすでに適用されています。しかし、別のソフトウェアへデータをエクスポートする前に、さらにメッシュを編集する必要がある場合もあります。 | |
| − | + | このページには、[[Support_Toolbars_And_Menus|メッシュメニューまたはメッシュツールバー]]からアクセスできるメッシュ編集ツールの説明があります。 | |
| − | == | + | == 〇スパイク除去 == |
| − | + | メッシュの'''スパイク'''とは、表面上にある小さな部分で、実際はスキャナーによって取得された3Dオブジェクトの一部ではないものを指します。 | |
| − | + | 通常、このようなスパイクは、メッシュ生成中にソフトウェアによって自動的に修正されますが、メッシュが他のシステムからインポートされた場合、スパイクが残っていることもあります。 | |
| − | + | このツールは、自動的にすべてのスパイクを除去し、メッシュを修復します。 | |
<gallery> | <gallery> | ||
| − | File:Dental_2_5_spike.jpg| | + | File:Dental_2_5_spike.jpg|スパイクを除去前 |
| − | File:Dental_2_5_spikeRemoved.jpg| | + | File:Dental_2_5_spikeRemoved.jpg|スパイク除去後 |
</gallery> | </gallery> | ||
| − | |||
| − | + | == 〇高度なスムージング == | |
| − | + | '''Advanced Smoothing'''(高度なスムージング)ツールは、'''Smooth'''(スムージング)ツールの強化バージョンで、より多くのコントロール、パラメータの設定が可能で、よりよい結果を得ることができます。 | |
| − | |||
| − | + | [[File:Adv-smoothing.jpg]] | |
| − | + | ●パラメータ: | |
| + | ; Iteration(反復): ツールが適用される回数。 | ||
| + | ; Strength(強度): オブジェクト表面に対してツールが適用される強さ。値が高くなると、メッシュはより滑らかになり、シャープになります。 | ||
| + | ; Sensitivity(感度): 「ディテール」として特定される表面上の部分の数(マージン、エッジ)。ディテール部分はシャープニングされますが、スムージングされません。 | ||
| + | ; Protection(保護): シャープニングされない「ディテール」部分の数。値が高くなると、シャープニングされる小さいディテールの数も少なくなります。 | ||
| + | ; Max Deviation(最大の逸脱値): ツールがどの程度メッシュの形状を変更できるかを設定します。この値は、元のメッシュ上の点が、最終的なメッシュで移動・変更できる最大の距離となります。 | ||
| + | ; Flip Edges(エッジ反転): このオプションが有効な場合、ツールはメッシュ構造を再配列し、エッジをよりよく表現します。 | ||
| − | + | '''※ソフトウェアは、特定のパラメータを使って、このツールを自動的に適用します。このツールを誤ったパラメータで使用すると、オブジェクトの形状や寸法を変えてしまうことがあります'''。 | |
| − | |||
| − | == | + | == 〇縮小 == |
| − | + | このツールはメッシュ内のトライアングル数を削減させて、容量をセーブします。その際、可能な限りディテールを保存するよう試みます。 | |
| − | + | [[File:Dental_2_5_decimate.jpg]] | |
| − | + | 上部には、選択されているメッシュにおける現在のトライアングル数が表示されます。 | |
| − | |||
| − | |||
| − | |||
| − | |||
| − | |||
| − | |||
| − | + | 保存するトライアングル数の割合を設定することができます(例:50%で、メッシュサイズを半減させます)。 | |
| − | + | また、tolerance(許容値)を設定することもできます。許容値を有効にした場合、ソフトウェアは、この許容値パラメータを超えるメッシュを変更しようとした際に、縮小を停止します。 | |
| − | + | Apply(適用)をクリックして、結果を確認します。 | |
| − | + | == 〇フィーチャ削除 == | |
| − | + | このツールは、選択したメッシュから、すべてのディテールを削除して、表面を可能なかぎり平らにさせます。穴、スパイク、ノイズが除去されます。 | |
| − | + | ツールの使い方: | |
| − | + | # すべての''フィーチャ''を取り除く必要のある領域を、 [[Man_DataEditing#Selection_Tools|選択ツール]]を使って選択します | |
| + | # ''メッシュのフィーチャ削除''を適用します | ||
| − | == | + | == 〇連結 == |
| − | + | このツールは、[[Free_Mode|フリーモード]]でのみ使用できます。選択されたメッシュから単一のメッシュを生成します。選択されたメッシュはすべて結合されます。 | |
| − | + | == 〇法線の反転 == | |
| − | |||
| − | + | 各メッシュには内側と外側があります。ソフトウェアはこれらに対して2つの異なる色を使います。このツールは、選択されたメッシュの内側と外側を反転させます。 | |
| − | + | == 〇すべての穴を埋める == | |
| − | + | インタラクティブなツールで、現在選択されているメッシュの穴を埋めることができます。 | |
| − | + | [[File:Dental 2 5 fillHoles.jpg]] | |
| − | + | このツールは2つの方法で動作します | |
| − | + | === ●Fill One(1つ埋める) === | |
| − | + | このモードでは、ソフトウェアはマウスカーソルの近くにある穴をハイライトします。ハイライトされている穴をマウスの左ボタンでクリックすることで、埋めることができます。 | |
| − | + | === ●Fill All(すべてを埋める) === | |
| − | + | このモードでは、ソフトウェアはすべての穴を埋めるよう試みます。''Filter By Size''(サイズによるフィルター)機能で、一定のサイズ以下のすべての穴を選択して埋めることができます。選択された穴はソフトウェアによってリアルタイムでハイライトされます。 | |
| − | + | === ●Curvature Filling(カーブフィリング) === | |
| − | + | これは追加のオプションで、有効の場合、残りの表面部分の湾曲に従って、ソフトウェアは穴を埋めます。無効の場合、残りの表面部分を無視して、ソフトウェアはまっすぐ平らに穴を埋めます。 | |
| − | + | == 〇デンチャーのクローズ == | |
| − | + | 全顎をスキャンする際、ベースの情報は取得されません。このツールは、その情報を再現します。Fill All Holesツールでデンチャーをクローズするには時間がかかりすぎ、最終的な結果も満足のいくものではありません。 | |
| − | + | デンチャーのクローズツールでは、メッシュは完璧な平面で閉じられ、時間も削減されます。 | |
| − | == | + | == 〇メッシュ修正 == |
| − | + | メッシュにある欠陥やノイズをすべて除去します。 | |
| − | + | == 〇メッシュオフセット == | |
| − | + | このツールは、選択したメッシュの大きい/小さいバージョンを作成します。Offset [mm] パラメータでは、メッシュがどの程度変化するのかを設定できます。 | |
| − | + | 3つのフラグ(Remesh、SharpenおよびOptimize Vertices)を選択する必要があります。 | |
| − | + | 各部品には、計画によって一連の固有のツールがすでに適用されているので、通常はこれらのツールを使う必要はありません。 | |
| − | |||
| − | |||
| − | |||
| − | |||
| − | |||
| − | |||
{{Navigation|Man_MeshGen|Man_ImplantAlign}} | {{Navigation|Man_MeshGen|Man_ImplantAlign}} | ||
Latest revision as of 08:08, 29 June 2017
Contents
7、メッシュ編集
スキャナーで取得されたデータを基に生成したメッシュの場合、指定された用途に最適となっていない場合があります。
生成されたメッシュには、欠陥・ノイズ・穴があることがあり、修正が必要です。
スキャニングソフトウェアでは、各部品に対して特定のメッシュ生成計画がすでに適用されています。しかし、別のソフトウェアへデータをエクスポートする前に、さらにメッシュを編集する必要がある場合もあります。
このページには、メッシュメニューまたはメッシュツールバーからアクセスできるメッシュ編集ツールの説明があります。
〇スパイク除去
メッシュのスパイクとは、表面上にある小さな部分で、実際はスキャナーによって取得された3Dオブジェクトの一部ではないものを指します。
通常、このようなスパイクは、メッシュ生成中にソフトウェアによって自動的に修正されますが、メッシュが他のシステムからインポートされた場合、スパイクが残っていることもあります。
このツールは、自動的にすべてのスパイクを除去し、メッシュを修復します。
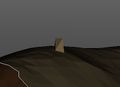
スパイクを除去前

スパイク除去後


〇高度なスムージング
Advanced Smoothing(高度なスムージング)ツールは、Smooth(スムージング)ツールの強化バージョンで、より多くのコントロール、パラメータの設定が可能で、よりよい結果を得ることができます。

●パラメータ:
- Iteration(反復)
- ツールが適用される回数。
- Strength(強度)
- オブジェクト表面に対してツールが適用される強さ。値が高くなると、メッシュはより滑らかになり、シャープになります。
- Sensitivity(感度)
- 「ディテール」として特定される表面上の部分の数(マージン、エッジ)。ディテール部分はシャープニングされますが、スムージングされません。
- Protection(保護)
- シャープニングされない「ディテール」部分の数。値が高くなると、シャープニングされる小さいディテールの数も少なくなります。
- Max Deviation(最大の逸脱値)
- ツールがどの程度メッシュの形状を変更できるかを設定します。この値は、元のメッシュ上の点が、最終的なメッシュで移動・変更できる最大の距離となります。
- Flip Edges(エッジ反転)
- このオプションが有効な場合、ツールはメッシュ構造を再配列し、エッジをよりよく表現します。
※ソフトウェアは、特定のパラメータを使って、このツールを自動的に適用します。このツールを誤ったパラメータで使用すると、オブジェクトの形状や寸法を変えてしまうことがあります。
〇縮小
このツールはメッシュ内のトライアングル数を削減させて、容量をセーブします。その際、可能な限りディテールを保存するよう試みます。

上部には、選択されているメッシュにおける現在のトライアングル数が表示されます。
保存するトライアングル数の割合を設定することができます(例:50%で、メッシュサイズを半減させます)。
また、tolerance(許容値)を設定することもできます。許容値を有効にした場合、ソフトウェアは、この許容値パラメータを超えるメッシュを変更しようとした際に、縮小を停止します。
Apply(適用)をクリックして、結果を確認します。
〇フィーチャ削除
このツールは、選択したメッシュから、すべてのディテールを削除して、表面を可能なかぎり平らにさせます。穴、スパイク、ノイズが除去されます。
ツールの使い方:
- すべてのフィーチャを取り除く必要のある領域を、 選択ツールを使って選択します
- メッシュのフィーチャ削除を適用します
〇連結
このツールは、フリーモードでのみ使用できます。選択されたメッシュから単一のメッシュを生成します。選択されたメッシュはすべて結合されます。
〇法線の反転
各メッシュには内側と外側があります。ソフトウェアはこれらに対して2つの異なる色を使います。このツールは、選択されたメッシュの内側と外側を反転させます。
〇すべての穴を埋める
インタラクティブなツールで、現在選択されているメッシュの穴を埋めることができます。

このツールは2つの方法で動作します
●Fill One(1つ埋める)
このモードでは、ソフトウェアはマウスカーソルの近くにある穴をハイライトします。ハイライトされている穴をマウスの左ボタンでクリックすることで、埋めることができます。
●Fill All(すべてを埋める)
このモードでは、ソフトウェアはすべての穴を埋めるよう試みます。Filter By Size(サイズによるフィルター)機能で、一定のサイズ以下のすべての穴を選択して埋めることができます。選択された穴はソフトウェアによってリアルタイムでハイライトされます。
●Curvature Filling(カーブフィリング)
これは追加のオプションで、有効の場合、残りの表面部分の湾曲に従って、ソフトウェアは穴を埋めます。無効の場合、残りの表面部分を無視して、ソフトウェアはまっすぐ平らに穴を埋めます。
〇デンチャーのクローズ
全顎をスキャンする際、ベースの情報は取得されません。このツールは、その情報を再現します。Fill All Holesツールでデンチャーをクローズするには時間がかかりすぎ、最終的な結果も満足のいくものではありません。
デンチャーのクローズツールでは、メッシュは完璧な平面で閉じられ、時間も削減されます。
〇メッシュ修正
メッシュにある欠陥やノイズをすべて除去します。
〇メッシュオフセット
このツールは、選択したメッシュの大きい/小さいバージョンを作成します。Offset [mm] パラメータでは、メッシュがどの程度変化するのかを設定できます。
3つのフラグ(Remesh、SharpenおよびOptimize Vertices)を選択する必要があります。
各部品には、計画によって一連の固有のツールがすでに適用されているので、通常はこれらのツールを使う必要はありません。


