Difference between revisions of "Man Align/es"
(Created page with "* En la ventana '''arriba a la izquierda''' se visualiza el ''objeto de referencia'' de los datos del proyecto * En la ventana "arriba a la derecha" se visualiza el "objeto m...") |
(Created page with "== Procedimiento ==") |
||
| Line 39: | Line 39: | ||
* En la ventana "abajo a la derecha''' están disponibles unas opciones y un "Report Numerico" | * En la ventana "abajo a la derecha''' están disponibles unas opciones y un "Report Numerico" | ||
| − | == | + | == Procedimiento == |
To manually align the elements: | To manually align the elements: | ||
Revision as of 21:46, 4 January 2016
Contents
Alineación
Cuando se escanean más objetos, su posición recíproca no está registrada. Para trabajar correctamente con los datos escaneados, todas las Capturas deben estár situadas en el mismo sistema de referencia.
Antes de todo, el usuario debe identificar qué Captura utilizar como referencia para todas las otras. En los "Proyectos Estructurados", el software identifica automaticamente la referencia de cada elemento.
Cada vez que se captura una nueva información, es necesario "alinear" el nuevo dato a la "Alineación de Referencia" o a una "captura ya alineada al resto del proyecto"
Cada información capturada tendrá una "Captura de Referencia". El "Árbol de Proyecto" muestra esta relación: cada elemento hijo será alineado a su elemento padre.
Alineación Directa
OpticalRevEng Dental puede alinear automaticamente las Capturas:
- Seleccionar del Árbol de Proyecto el elemento que debe ser alineado con el resto del proyecto.
- Hacer clic en el icono "Alineación" en la Barra de las Herramientas
The software will choose the reference, it will analyze the selected acquisition and the reference and it will identify the correct position of the selected item with respect to the reference.
If no alignment can be identified by the software, a Manual Alignment will start.
Alineación Manual
La alineación manual se inicia cada vez que el software no lleva a cabo una "Alineación Directa".
El usuario puede acceder a esta herramienta presionando ![]() mientras hace clic en el icono "Alineación" en la Barra de las Herramientas
mientras hace clic en el icono "Alineación" en la Barra de las Herramientas
Interfaz
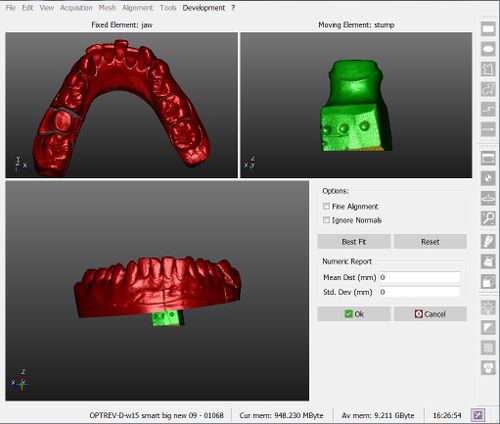
La imagen muestra la interfaz de la alineación manual:
La ventana está dividida en 4 áreas:
- En la ventana arriba a la izquierda se visualiza el objeto de referencia de los datos del proyecto
- En la ventana "arriba a la derecha" se visualiza el "objeto móvil" que cambiará su posición para ajustarse al sistema de referencia de los datos del proyecto
- En la ventana "abajo" se visualizan ambos los objetos para que el usuario controle la posición del objeto móvil
- En la ventana "abajo a la derecha están disponibles unas opciones y un "Report Numerico"
Procedimiento
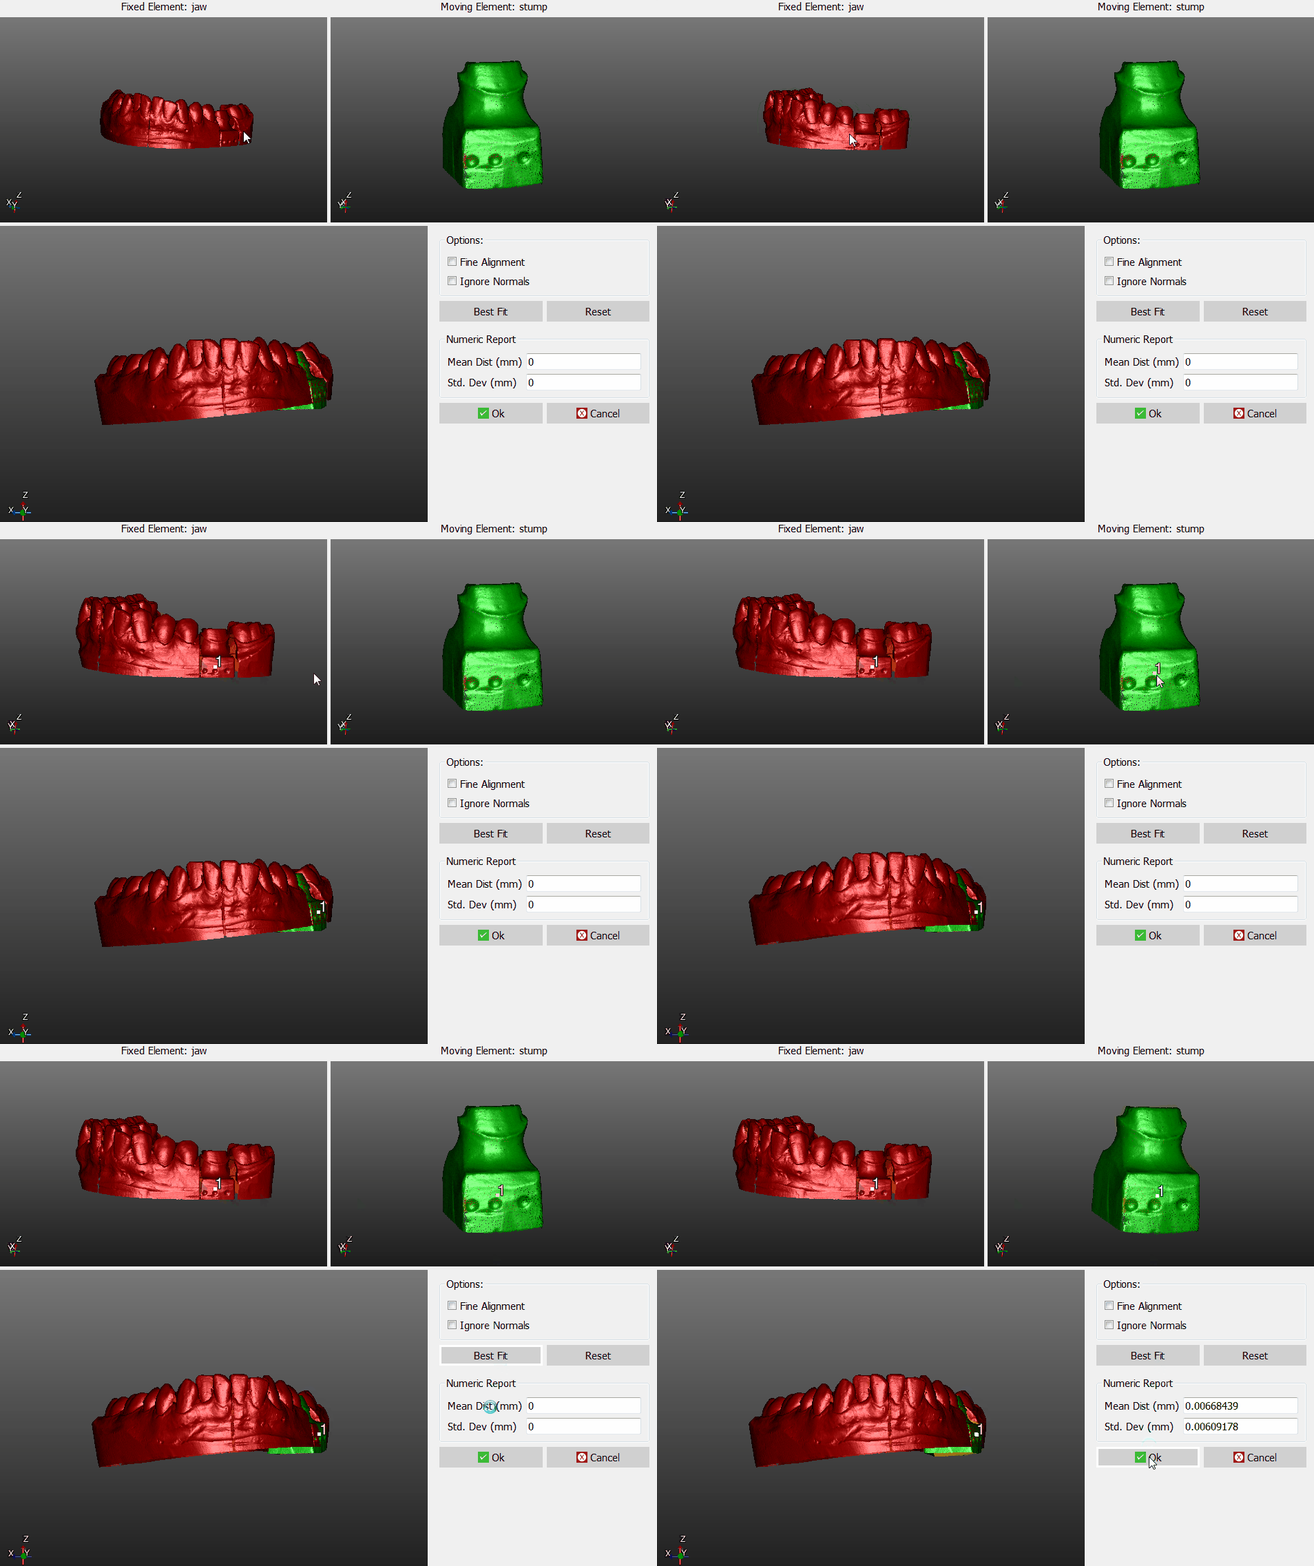
To manually align the elements:
- Place both the reference object and the moving object in the same point of view, until the parts in common are visible
- Click on the same point on both the objects
- Check in the 3D view below, if the position is more or less correct (it's not necessary, at this stage, to find the perfect position)
- Click the Best Fit button on the right
If the two objects have enough points in common, the software will find the best alignment between them. Visually check the alignment on the bottom 3D View or by reading the values in the Numeric Report.
If the alignment is correct, click Ok to confirm the new position of the moving object.
Otherwise, click the Reset button and restart the alignment.
Options
There are two options available during the manual aligment:
- Fine Alignment : usually Best Fit moves the object up to 1mm closer to the reference. If the parts in common between the two objects are really small ,use Fine Aligment to move the object not more than 0.1mm closer to the reference
- Ignore Normals : allows the user to align the internal part of an object to the external part of another, and viceversa.


