Difference between revisions of "Wiz Acquisition/tr"
(Created page with "# Nesne açıklamasını okuyun # Doğru nesneyi tarayıcının içine yerleştirin # Tara düğmesine tıklayın # Alımdan memnun kalmazsanız, yeni bir alım başlatmak iç...") |
|||
| Line 11: | Line 11: | ||
* Alınacak nesnenin adı | * Alınacak nesnenin adı | ||
* Taranması gereken öğenin kısa bir açıklaması | * Taranması gereken öğenin kısa bir açıklaması | ||
| − | * Nesne Rengi için bir seçici | + | * ''Nesne Rengi'' için bir seçici |
| − | * Alımı başlatmak için Tara Düğmesi | + | * Alımı başlatmak için ''Tara'' Düğmesi |
| − | * Daha önce alınmış bir nesnenin tümleştirilmesi için Tümleştir Düğmesi | + | * Daha önce alınmış bir nesnenin tümleştirilmesi için ''Tümleştir'' Düğmesi |
| − | * Bu nesnenin projenin kalanıyla daha önce hizalandığını gösteren bir Daha Önce Hizalanmış onay işareti | + | * Bu nesnenin projenin kalanıyla daha önce hizalandığını gösteren bir ''Daha Önce Hizalanmış'' onay işareti |
Sihirbazı takip etmek çok kolaydır: | Sihirbazı takip etmek çok kolaydır: | ||
Revision as of 13:41, 23 August 2017
Contents
Sihirbaz Alımı
Adım Adım Sihirbaz sırasında şunlar yapılabilir: tek bir taramada tek bir nesne veya çok sayıda nesne alma, daha önce alınmış bir nesneyi yendien alma ve tüm bu alımları tümleştirme.
Tek Nesne
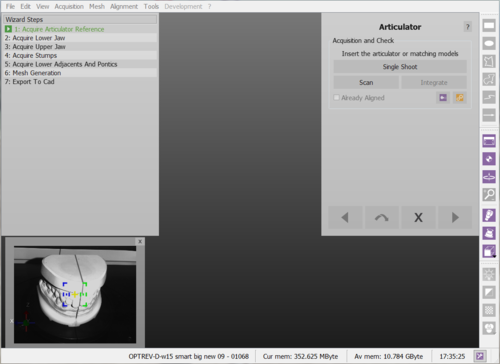
Bir öğenin alınması her gerektiğinde, spesifik bir sihirbaz ekranı görüntülenir:
- Alınacak nesnenin adı
- Taranması gereken öğenin kısa bir açıklaması
- Nesne Rengi için bir seçici
- Alımı başlatmak için Tara Düğmesi
- Daha önce alınmış bir nesnenin tümleştirilmesi için Tümleştir Düğmesi
- Bu nesnenin projenin kalanıyla daha önce hizalandığını gösteren bir Daha Önce Hizalanmış onay işareti
Sihirbazı takip etmek çok kolaydır:
- Nesne açıklamasını okuyun
- Doğru nesneyi tarayıcının içine yerleştirin
- Tara düğmesine tıklayın
- Alımdan memnun kalmazsanız, yeni bir alım başlatmak için Tara düğmesine yeniden tıklayın veya verileri eklemek için Tümleştir düğmesine tıklayın
Open Live
It is possible to open the live view of the cameras, by clickin on the ![]() to see the progress of the scanning in the monitor of the computer.
to see the progress of the scanning in the monitor of the computer.
Advanced Parameters
During the wizard the acquisition strategy is selcted automatically depending on the kind of element to acquire.
There are some specific cases, however, in which it might be necessary to change the scanning strategy to a non default one. For instance, if the user needs to scan abutments instead of stumps, it would be best to select the specific abutment strategy. Same goes if the user needs to design a veneer: it is not a default strategy for stumps but it can be selected during acquisition.
To change strategy, click on the ![]() button and select it from the drop down menu.
button and select it from the drop down menu.
Copy From Reference
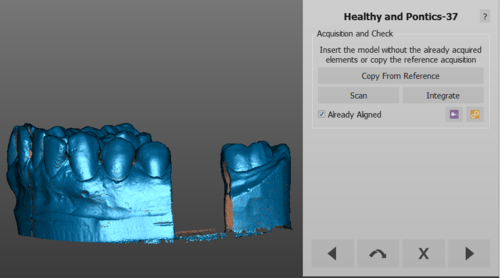
Sometimes, one element data has already been scanned during another acquisition.
In these cases, the software will show the existing image and automatically remove the parts already scanned in detail. It is always anyways possible to copy the whole image again by clicking Copy From Reference or to start a new acquisition if the cut copy is not satisfying.
Multi Acquisition
When acquiring multiple dies or multiple implants, it's better not to carry out a single acquisition for every element.
It is possible to acquire many objects at once.
Just make sure that the objects are completely visible in all their parts and that they are at an adequate distance either on the model holder or on the Multi-Die support.
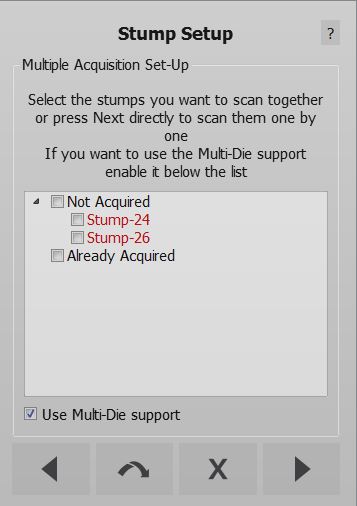
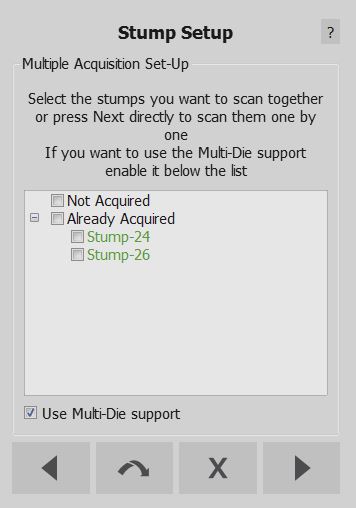
In these cases, the software will show a Multi-Acquisition Setup step where it is possible to select the objects to be scanned at the same time.
This step will show a list of all the objects that have to be scanned together with the already acquired items. Flag the boxes of the objects that have to be scanned together and, when scanning stumps,the flag Use Multi-Die support option on the bottom of the dialog will be checked by default to allow the use of the Multi-Die holder.
With Multi-Die
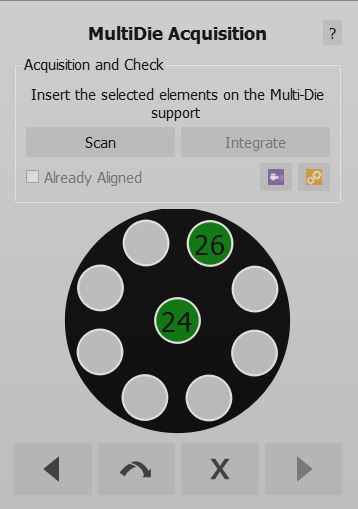
If the Multi-Die option is selected, the software will set up a specific acquisition for the dies; an image will guide the user in positioning the dies in the Multi-Die holder.
After the acquisition, the software will automatically recognize each single die and return to the Multi-Acquisition Step to allow the acquisition of additional objects.
Without Multi-Die
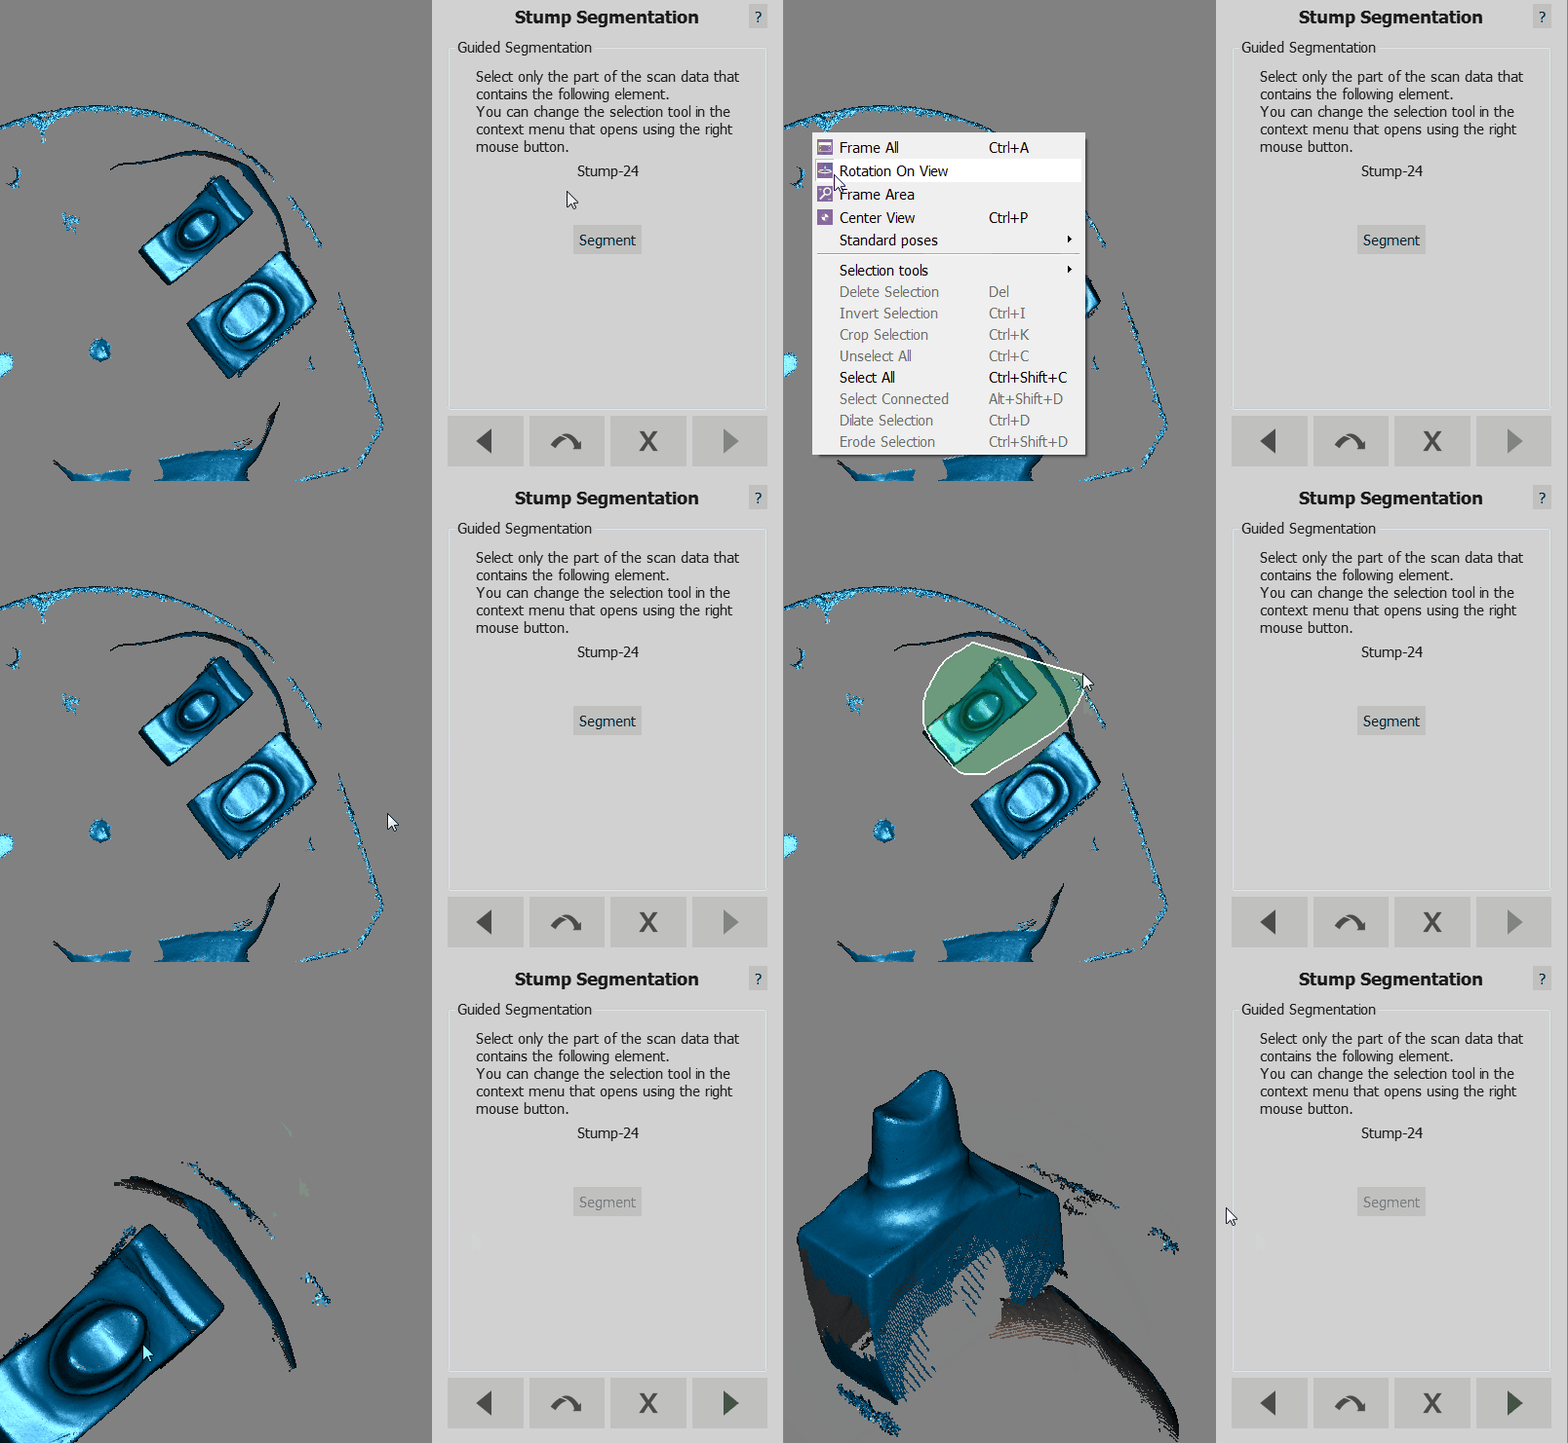
If the Multi-Die gets deselected, the software will acquire the objects and, in the following step, require the user to manually identify each object.
A specific Wizard Step will ask which object has to be identified. The user has to:
- Read from the Wizard Page which object has to be selected
- Select the specific object, using a Selection Tool
- Click the button Segment
- Click the button Next
When the objects are all identified, the software returns to the Multi-Acquisition step. If all the objects have already been aquired, click Next to continue with the Step-By-Step Wizard
Integration
By clicking the Integrate button after an acquisition, the Integration mode will be launched.
