Wizard Acquisition
Contents
Wizard Acquisition
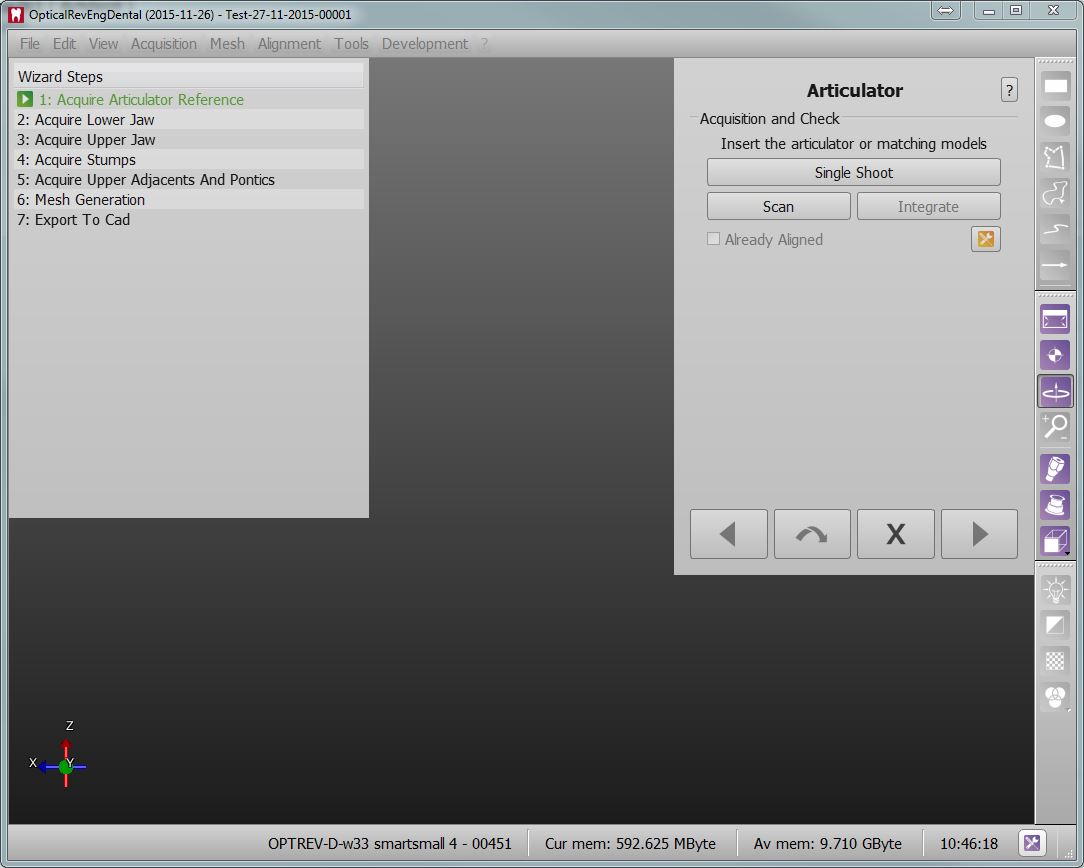
During the Step-By-Step Wizard my acquisitions will be performed. It is possible to acquire single objects, to acquire multiple objects in only one scan, to re- acquire a previously acquired object and to integrate the acquisitions.
Single Object
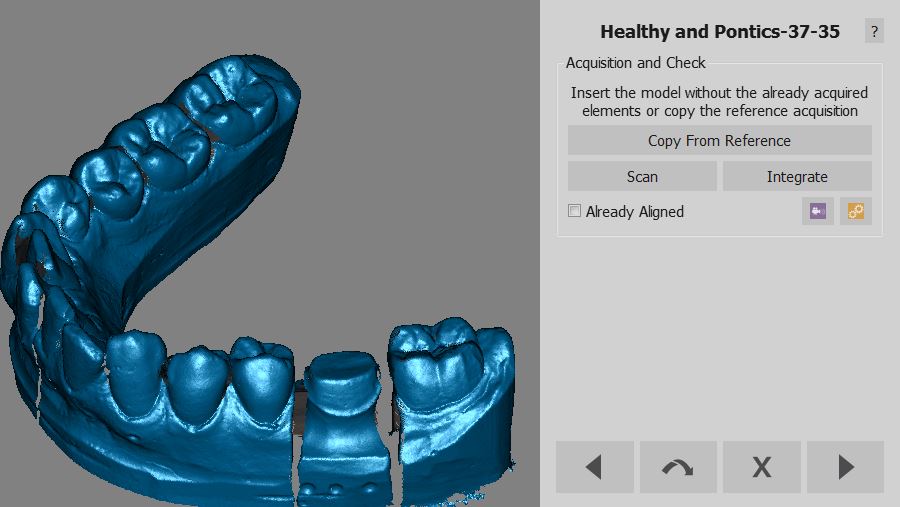
Every time an element is to be acquired a specific wizard screen will show:
- The name of the object to acquire
- A brief description of exactly what to put inside the scanner
- A selector for the Object Color
- A Scan Button to start the acquisition
- An Integrate Button to start the integration of a previously acquired object
- An Already Aligned check that shows if this object was already aligned to the rest of the project
To follow the wizard it is only necessary to:
- Read the object description
- Put the right object inside the scanner
- Click Scan
- If the acquisition is not good enough click Scan again to start a new acquisition or Integrate to add further data
Copy From Reference
Sometimes, part of the data needed for one element has already been acquired during another acquisition.
For example the acquisition of the healthy and pontics parts of the jaw is really similar to the reference acquisition of the entire jaw, except for the stumps, that will be acquired in a separate step.
In these cases the software will show an additional button Copy From Reference that, instead of starting a new acquisition, will simply make a copy of the previous one.
After the Base Cut step the software will try to remove the duplicated parts from the acquisition automatically.
Multi Acquisition
When acquiring multiple dies or multiple implants it's better not to perform single acquisition for every element.
It is possible to acquire more than 1 object at the time.
Just make sure that the objects are completely visible in all their parts and that they are at an adecuate distance either in the model holder or using the Multi-Die support.
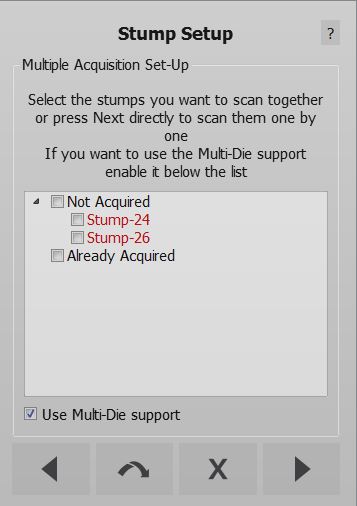
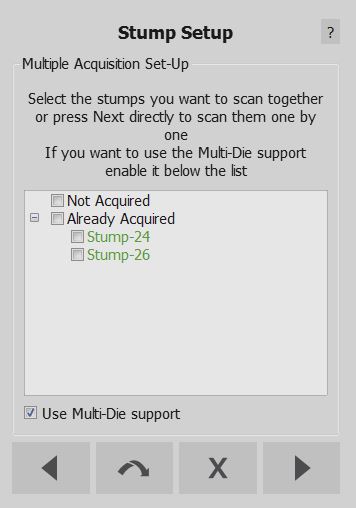
In these cases the software will show a Multi-Acquisition Setup step where it is possible to select which objects are to be scanned togheter.
This step will show a list of all the objects that need to acquired and all the already acquired items. Check the boxes of objects to scan togheter and, when scanning stumps, check the Use Multi-Die support option on the bottom of the dialog to use the Multi-Die holder.
With Multi-Die
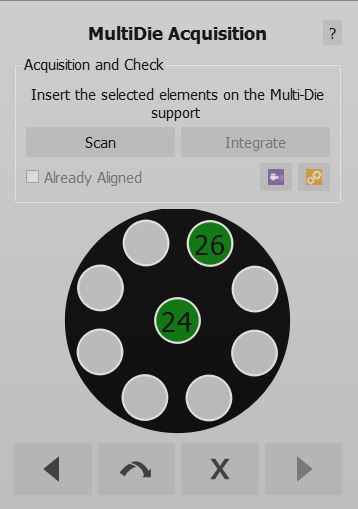
If the Multi-Die is selected the software will prepare a specific acquisition for the dies; an image will guide the user in positioning the dies in the Multi-Die holder.
After the acquisition the software will automatically recognize the single dies and return to the Multi-Acquisition Step to allow acquire additional objects
Without Multi-Die
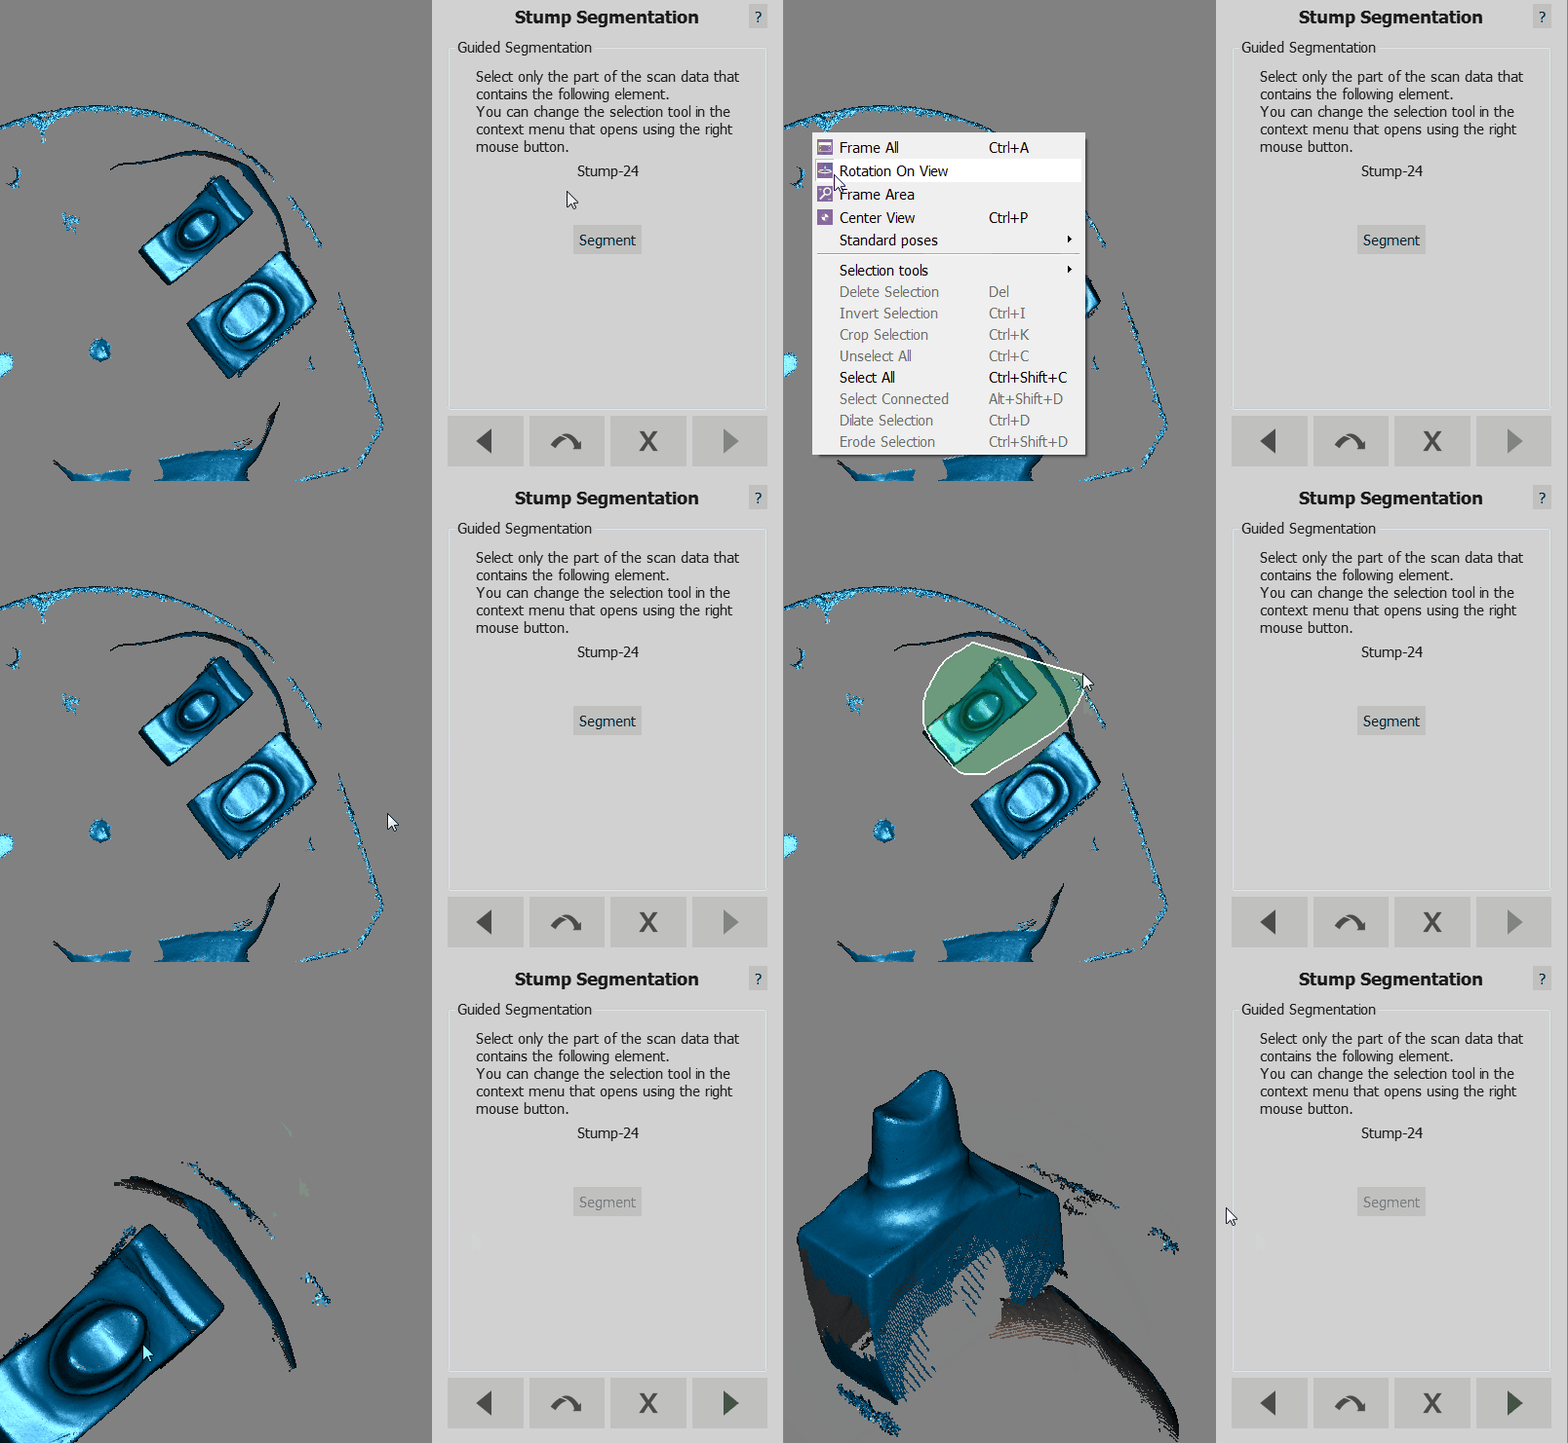
If the multi die is not selected the software will acquire the objects normally, but later will require the user to manually identify the objects one at the time.
A specific Wizard Step will tell you what object you need to identify. You need to:
- Read from the Wizard Page what object needs to be selected
- Select the specific object using any of the Selection Tool
- Click the Segment button
- Click the Next button
When all the objects are identified the software returns to tue Multi-Acquisition step. If all the objects have already been aquired click next without selecting anything to continue with the Step-By-Step Wizard
Integration
By clicking the Integrate button after an acquisition the integragion mode will be launched.
Next
After every acquisition there is a Base Cut And Auto Cleaning Step.
