Scanner's connection
連接掃描儀
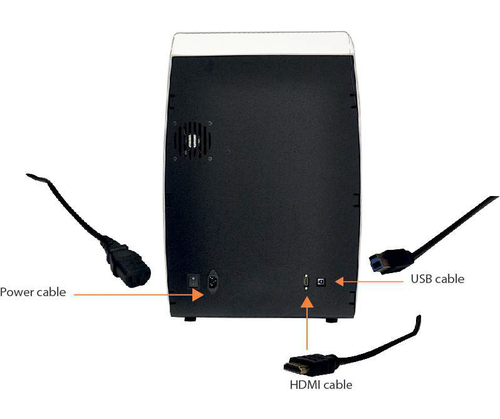
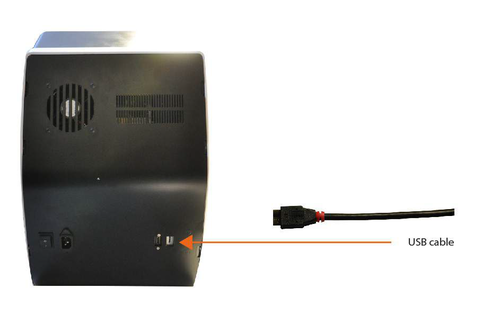
正如你所看到下面的圖片, 在掃描儀的背面自左至右為 ; 電源開關 , 電源線接口 , HDMI 接口和 USB 接口:
掃描儀接口 (Big/Deluxe)
掃描儀接口 (Small)
電源線是一個平均 230V 的電纜 , 它必須連上穩定及高品質的電源 , 避免過載及短路 .
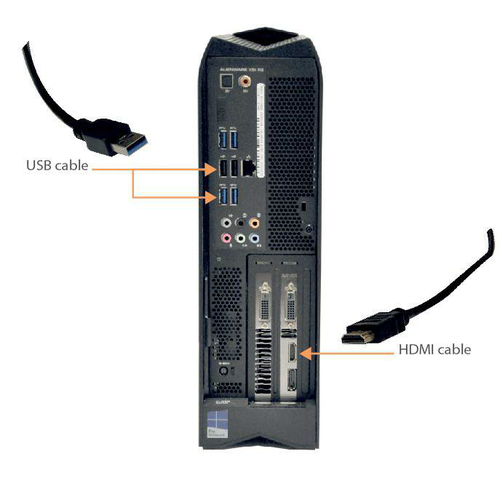
HDMI 接線必須連上電腦圖形卡的 HDMI 接口 . 這個接口在電腦上的位置可能會根據電腦的品牌和型號有所不同 . 我們提供的電腦 , 戴爾的Alienware i5和i7 , HDMI接口在底部左側:
The connection of the USB cable depends on the model of the scanner, as in the Easy and Smart models (both Small and Big) there are USB 2.0 components, whereas in the Deluxe model there are USB 3.0 components. Therefore, the USB cable of Easy and Smart Scanners must be plugged in a port USB 2.0 and the USB cable of the Deluxe model must be connected to a port USB 3.0. These ports are usually colour-coded, so it's possible to recognise the 2.0 because of its black colour and the 3.0 because of its blue colour. The USB cable that Open Technologies provides to connect the scanner to the Computer is a 3.0 USB cable (blue), however the above-mentioned instructions remain valid and even though the cable is 3.0, if the scanner is an Easy or Smart model it must be plugged in a USB 2.0.


