Scanner's connection
Scanneranschluss an den PC
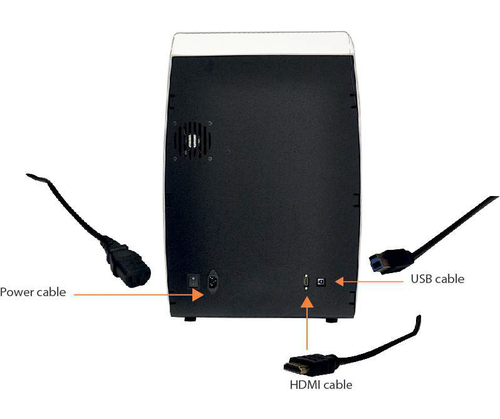
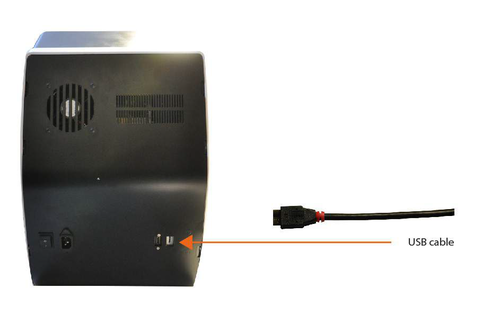
Wie in den Bildern ersichtlich, sind auf der hinteren Seite des Scanners, von links nach rechts, der Stromschalter, der Stromanschluss, der HDMI- und der USB-Anschluss zu finden:
Big/Deluxe-Scanneranschluss
Small-Scanneranschluss
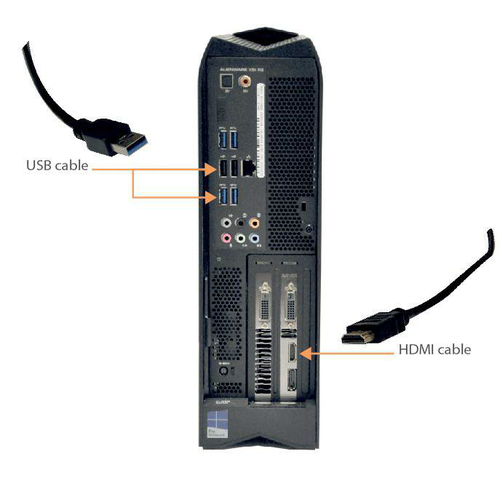
Das 230V-Standardstromkabel muss an eine Stromversorgung angeschlossen werden, die die Spannung in allen Betriebsphasen sicherstellt und die vor Strombelastungen und Kurzschlüssen geschützt ist. Das HDMI-Kabel muss durch den HDMI-Anschluss (mit der jeweiligen Grafikkarte) an den Computer angeschlossen werden. Die Position dieses Anschlusses ist vom PC-Modell abhängig. Bei unseren Computern - Alienware i5 und i7 von Dell - ist der HDMI-Anschluss unten links zu finden:
The connection of the USB cable depends on the model of the scanner, as in the Easy and Smart models (both Small and Big) there are USB 2.0 components, whereas in the Deluxe model there are USB 3.0 components. Therefore, the USB cable of Easy and Smart Scanners must be plugged in a port USB 2.0 and the USB cable of the Deluxe model must be connected to a port USB 3.0. These ports are usually colour-coded, so it's possible to recognise the 2.0 because of its black colour and the 3.0 because of its blue colour. The USB cable that Open Technologies provides to connect the scanner to the Computer is a 3.0 USB cable (blue), however the above-mentioned instructions remain valid and even though the cable is 3.0, if the scanner is an Easy or Smart model it must be plugged in a USB 2.0.


