Project Creation
Contents
Project
When launching the software directly, if the project was not defined in another database like Exocad DentalDB, the scan project needs to be defined.
The software has a Project Manager dialog to collect all the data about the items to be scanned and to prepare a specific Step-By-Step Wizard.
The project manager will allow to select one of the available project types by clicking on the respective icon in the left bar of the dialog.
In all projects, the user has to define some General Information:
- The patient ID (Mandatory)
- The doctor ID (Optional)
- A specific project name to save the project on the disk, if none is provided one will be automatically generated based on the patient ID
- A designer name (Optional)
- Notes (Optional)
When the project is defined, confirm it by clicking on the green icon at the bottom of the dialog. The software will create a specific Structured Project and start the Step-By-Step Wizard.
Fixed Prosthesis Project
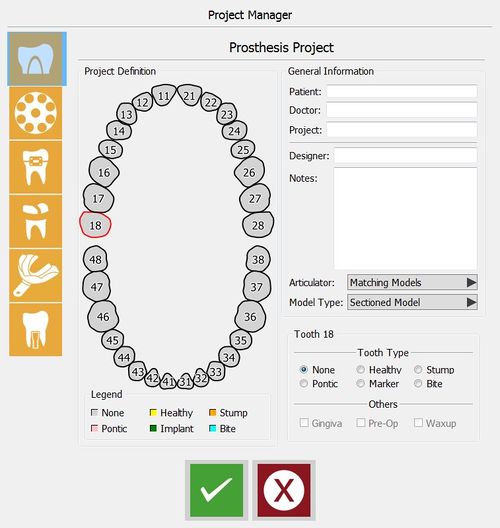
Project Definition enabled by clicking on the Prosthesis icon.
The prosthesis section is the most complex because of the amount of elements that can be set and which require a tooth by tooth definition.
Other than the General Information section, this project shows 2 additional sections
Project Definition
In the main part of the window, an odontogram is available that allows to define the elements that have to be scanned.
By holding ![]() when clicking on a tooth, the last selected item will be copied to the selected tooth.
when clicking on a tooth, the last selected item will be copied to the selected tooth.
By holding ![]() when clicking on a tooth, the last set parameters will be copied to all the teeth between the last tooth and the selected one.
when clicking on a tooth, the last set parameters will be copied to all the teeth between the last tooth and the selected one.
Tooth Information
The section in the bottom right corner allows to select the Tooth Type and some Other Options for each selected element. The Tooth Types are:
- None
- this tooth is not part of the project, it will not be acquired or can be ignored
- Healthy
- this tooth is part of the main stone model, it can be acquired with the rest of the model
- Stump
- this tooth is a removable die that has to be acquired alone or on the Multi-Die support
- Pontic
- missing tooth in between two stumps, it will be the intermediate element of a bridge
- Implant
- there is an implant in this position, therefore a Scan Body will be acquired
- Bite
- this tooth is part of an occlusal bite
Every tooth type has a specific color in the project definition scheme.
The Other Options are:
- Gingiva
- this element is mounted on an artificial gingiva that has to be acquired separately from the stone model
- Pre-Op
- the anatomy of this element is part of an additional model that will be acquired separately and then aligned to the reference stone model
- Waxup
- over this tooth position, it's possible to scan a Pre-Modelled Waxup that will be aligned to the rest of the stone model
Additional Parameters
In the general information section, there are some additional parameters:
Articulator Box
Select how the models are kept in articulation:
- Matching models
- to scan the occlusion if there is no need to use the automatic positioning in Exocad's Virtual Articulator
- Articulator A
- to scan the Artex Articulator and to use the same in Exocad's Virtual Articulator
- Articulator S
- to scan the Sam Articulator and to use the same in Exocad's Virtual Articulator
- Articulator P
- to scan the Kavo Articulator and to use the same in Exocad's Virtual Articulator
- Articulator B
- to scan the Bioart Articulator and to use the same in Exocad's Virtual Articulator
- Articulator D
- to scan the Denar Articulator and to use the same in Exocad's Virtual Articulator
Model Type Box
Select which specific workflow to use:
- Sectioned Model
- default workflow, in which every element is acquired separately and all the information gets merged at the end
- Impression Scan
- if the Impression Scan Module is enabled in the license, check this option to scan an impression and not a stone model
- Quadrant Model
- if the Concept Quad Scan Module is enabled, it is possible to scan all the parts of a Quadrant Tray in just one step
- Unsectioned Model
- enable this option if the model to be scanned is not sectioned, the scanner will not require a separate scan for every die
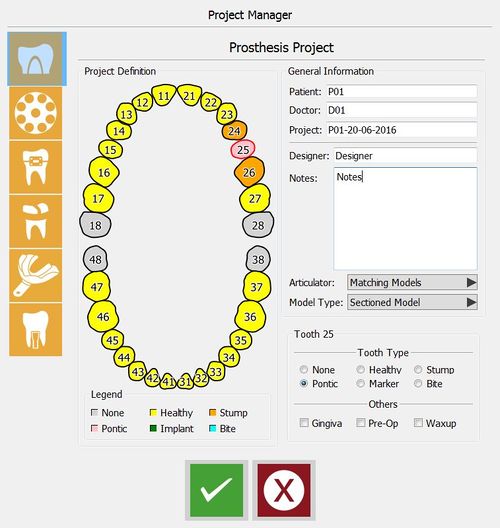
Here below an example of a defined prosthesis project for a 3-elements bridge with a stone antagonist:
Multi-Die Project
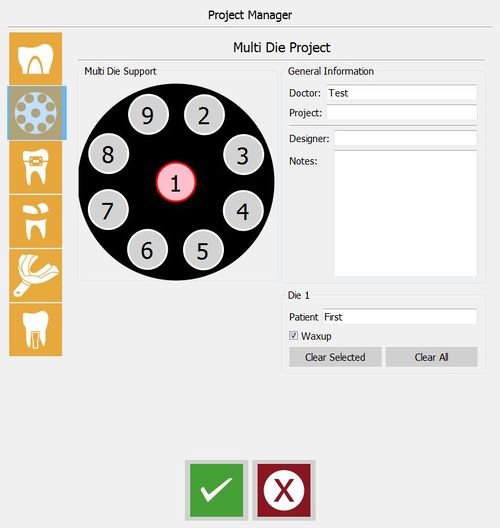
Use the Multi-Die Project to scan different dies from different patients in one single project:
To set the case, click on each multi-die position and define the name of each patient in the Patient field.
To scan a Waxup for the selected stump, select the Waxup box.
Orthodontic/Scheletric/Impression Project
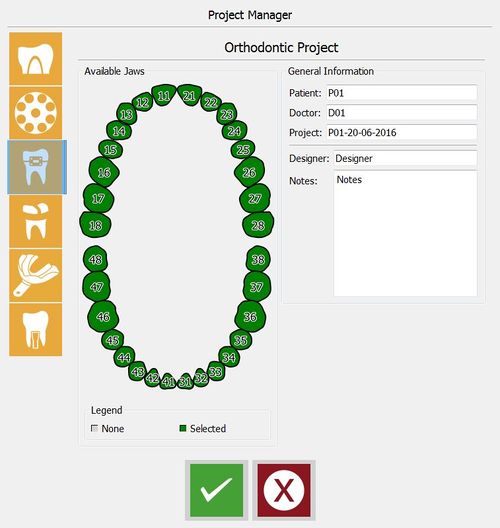
The Orthodontic, Scheletric and Impression Projects are straightforward and similar to one another.
These projects require the user to select the whole jaws instead of individual teeth.
When the project definition is confirmed, the software will prepare the Project Tree to acquire the data from the scanner.
Project Editing
If the project definition needs to be changed while already in use, it is possible to select the Edit Project tool in the File Menu or in the Project Toolbar (See Support Toolbars And Menus).
This tool will open again the Project Manager with the current project definition. It is possible to change the project definition and the parameters of every tooth.
When the editing is confirmed, the software will adapt the Project Tree. Editing an already scanned, or partially scanned, project can cause data loss.


