Interaction
Contents
Главное изображение
Ниже приведен пример 3D взаимодействия на выбранный меш в OpticalRevEngDental.
Возможно работать с 3D изображением с помощи мыши и клавиатуры, контекстного меню, меню изображения и графического меню изображения.
Работа с мышью
Пользователь может воздействовать на расположение 3D изображения посредством мыши и специальных инструментов из раздела "Меню изображения", "Графическое меню" и "Контекстное меню".
Ниже приведет список комбинаций при работе с мышью и клавиатурой:
-
 +
+  или
или  +
+  : панорама камеры 2D
 -
 : свободное вращение камеры вокруг 3D объекта
 -
 +
+  : вращение камеры по оси Y 3D изображения
 -
 +
+  : вращение камеры по оси X 3D изображения
 -
 +
+  : вращение камеры по оси Z 3D изображения
 -
 : изменение зума
 -
 : вход в контекстное меню
 -
 +
+  : изменение положения источника света на 3D изображении
 -
 : использование текущего инструмента (например, прямоугольная обработка, заполнение полостей, и т.д.)
 -
 +
+  : сброс параметров текущего инструмента (например, Удалить выделение точек вместо Выделить точки)
 -
 + число от 1 до 7 : возвращение 3D изображение к начальному положению (например, фронтальный, задний вид)
In the software options, it's possible to enable an "Alternative Interaction" mode which allows to swap the middle mouse button and the right mouse button, in order to set an interaction more similar to other CAD software.
Context Menu and View Menu
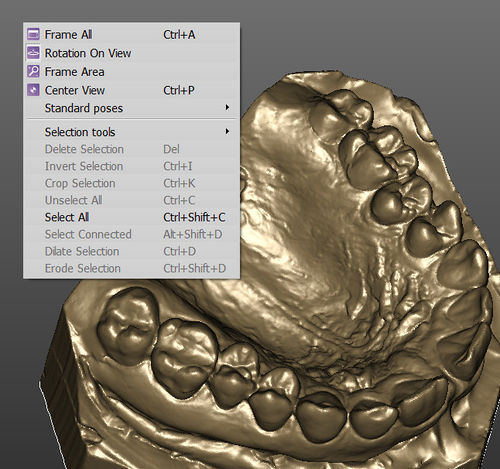
The view menu and the 3D View context menu contain some tools that can be used to interact with the 3D View.
- Frame All (
 + A) : the 3D camera will move to show, on the screen, all the current selected 3D Objects
 - Rotation On View : if this option is enabled, the rotation will ignore the current selected 3D Objects; if it is disabled, the center of the rotation will be the baricenter of the selected 3D Objects
- Area Frame Tool: this tool allows to draw with
 a rectangle. The rectangle will become the new camera view.
 - Center View (
 + P) : the currently selected 3D Objects are moved at the center of the screen without changing their Zoom
 - Standard Poses : sub-menu to apply default 3D views:
The context menu contains other tools described in the Data Editing page.
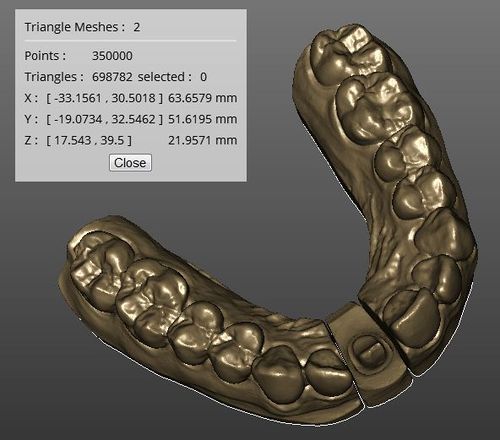
Data Information Window
In the view menu, it is possible to enable the Data Information Window with the View Data Window (![]() +
+ ![]() + I) action.
+ I) action.
This window provides some information about the current selected 3D Objects.
- Description: a line that describes the type of the currently selected objects (E.g. Triangle Mesh: 2, Range Images: 6, etc.)
- Points: the number of points of the currently selected objects
- Faces: the number of faces, available only for triangle meshes
- Selected: the number of selected points/faces of the currently selected objects
- Size and Position: the minimum/maximum coordinates of the volume of the currently selected objects, and their size in every direction


