Difference between revisions of "Free Mode/ja"
(Created page with "= メッシュ生成 =") |
(Created page with "スキャンされるオブジェクトに関する情報が提供されていないので、追加のダイアログ画面で適切なメッシュ生成計画を定義する...") |
||
| Line 25: | Line 25: | ||
= メッシュ生成 = | = メッシュ生成 = | ||
| − | + | スキャンされるオブジェクトに関する情報が提供されていないので、追加のダイアログ画面で適切なメッシュ生成計画を定義する必要があります。<br /> | |
| − | + | 同じダイアログ画面で、取得データを'''aggregate'''(アグリゲート)するかどうかも選択できます。 | |
If '''aggregate''' is checked, the software will create just one mesh with all the selected acquisitions. <br /> | If '''aggregate''' is checked, the software will create just one mesh with all the selected acquisitions. <br /> | ||
Revision as of 13:27, 29 December 2015
フリーモード
フリープロジェクトモードは本スキャニングソフトウェアの使用モードの1つで、サポートされている構造プロジェクトのどれにも適合しないデータを取得する必要がある場合に使用が推奨されます。
フリーモードを使用して、スキャンシステムを試してみたり、単一オブジェクトをスキャンできます。
フリーモードには、プロジェクトツリー、自動アライメント、ステップバイステップウィザードはありません。一方で、データの取得、2つのオブジェクトのアライメント、メッシュの生成や、すべての情報の編集などは行うことができます。
プロジェクトの動きは完全にユーザー依存となります。ユーザーは、参照アイテムの選択、すべてのプロジェクトのアライメント、そしてすべてのプロジェクトデータに対する最適なスキャンおよびメッシュ計画の選択を、正確に行う責任を負います。
フリーモードでは、プロジェクトが十分な情報を持っていないことがあるため、ツールの動作が変わります。
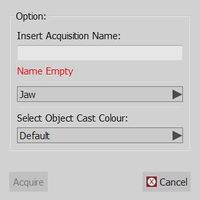
取得
フリーモードでは、ソフトウェアは、スキャンするオブジェクトタイプ、名前や色などに関する情報を持っていません。
取得ボタンをクリックすると、この情報を追加できるダイアログ画面が表示されます。
アラインメント
フリーモードでは、ソフトウェアは自動で参照アイテムを特定することはできません。2つのオブジェクトをアライメントするには、プロジェクトツリーページで説明されている、ドラッグアンドドロップ機能を使います。
メッシュ生成
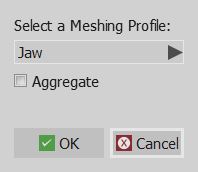
スキャンされるオブジェクトに関する情報が提供されていないので、追加のダイアログ画面で適切なメッシュ生成計画を定義する必要があります。
同じダイアログ画面で、取得データをaggregate(アグリゲート)するかどうかも選択できます。
If aggregate is checked, the software will create just one mesh with all the selected acquisitions.
If aggregate is not checked, each acquisition will be separately converted.
Implant Alignment
When an implant marker is aligned to its implant library, the tooth position of the Scan Body needs to be manually defined.
Select the correct implant position or the identification will not be correctly exported
Exocad Export
In a free project, the software can't automatically export the data to Exocad.
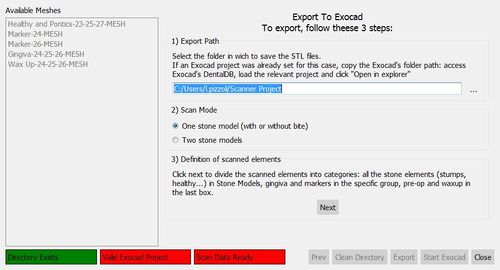
By clicking on the Export To CAD button, a wizard will start. The first page will ask:
- In which folder the data has to be exported
- If the user wants to export a single model (with or without a bite) or two stone models
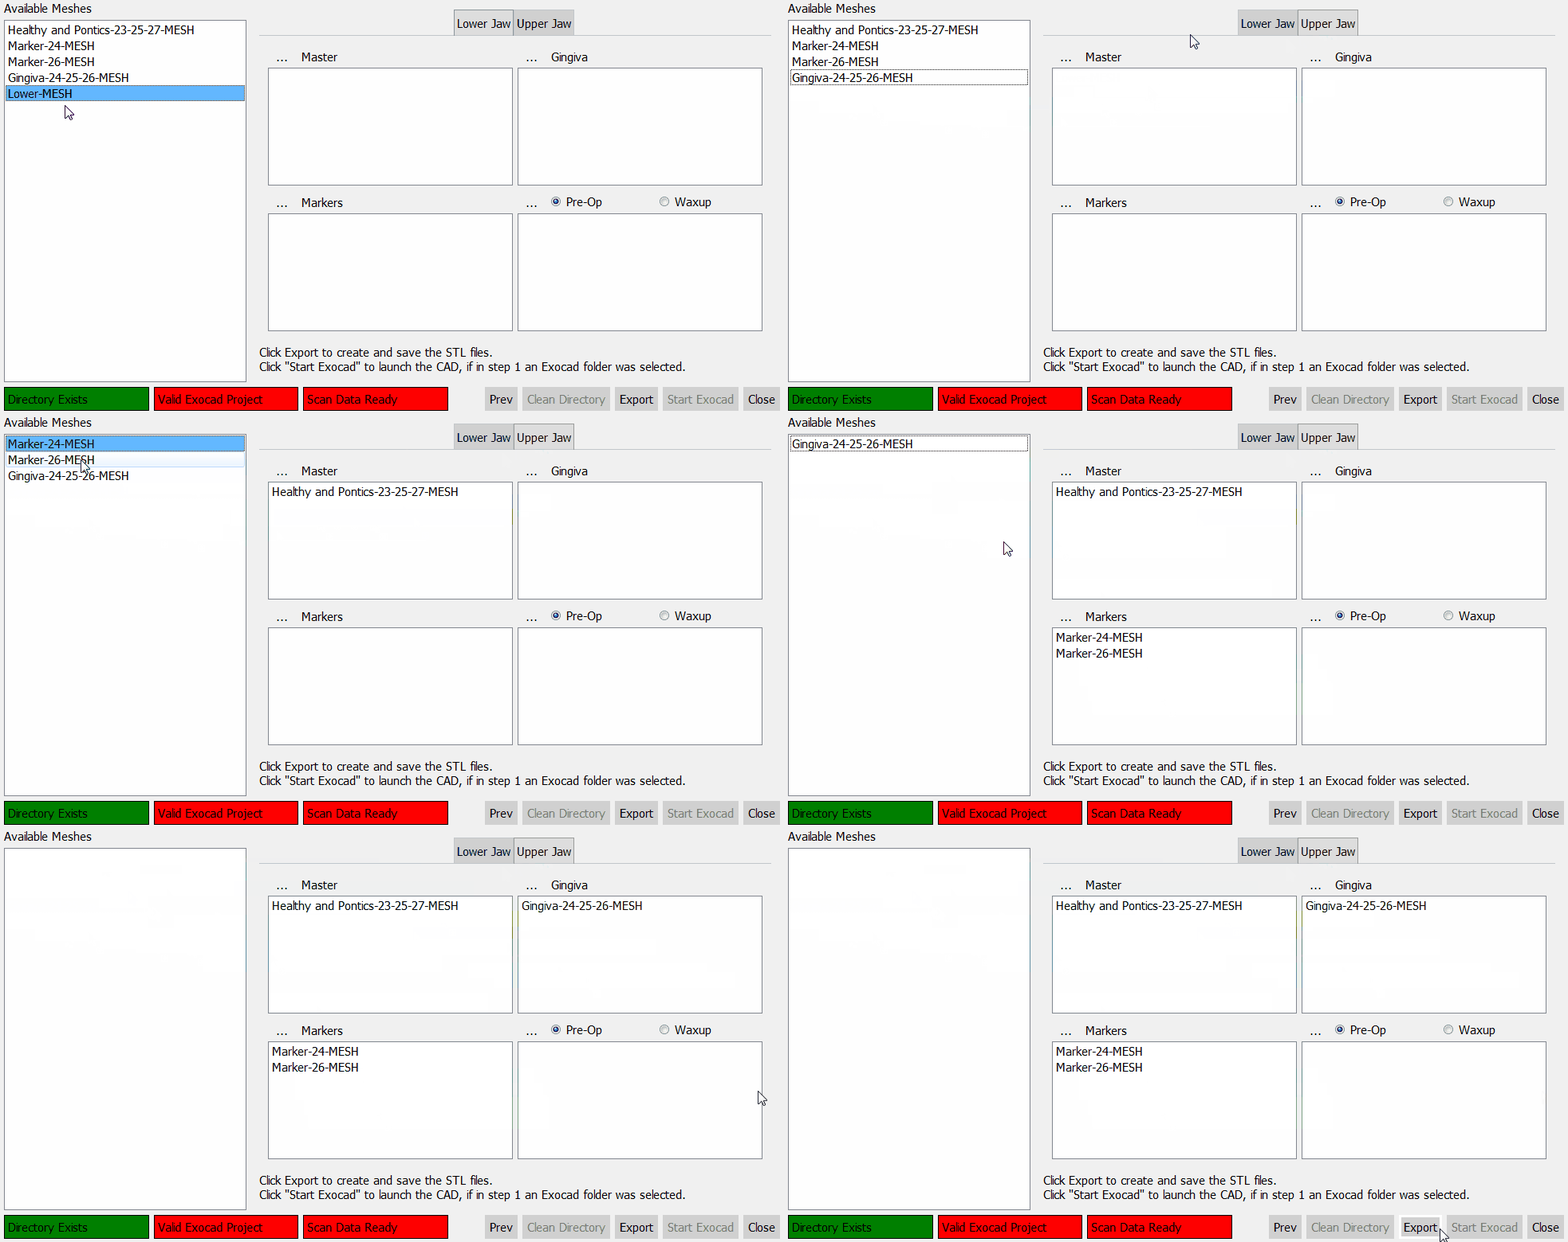
Then, after clicking next, the software will ask the user to specify the status of each mesh in the project.
For every jaw, the following meshes can be identified:
- Master Meshes : all the meshes that are part of the stone model: healthy parts, stumps, pontic parts, etc.
- Gingiva Meshes : mesh of the separated gingiva
- Markers : meshes of the implant markers
- Pre-Op or Waxup : mesh of the Provisional Model or of a Waxup, selecting the type of element.
When all the meshes are identified, click Export to save the files on disk.


