Difference between revisions of "Free Mode/de"
(Created page with "Wenn die '''Fusion-Funktion''' ausgewählt wird, erstellt die Software ein einziges Mesh mit allen ausgewählten Scanbildern. Wenn die '''Fusion-Funktion''' nicht aktiviert wi...") |
(Created page with "= Implantatsausrichtung =") |
||
| Line 32: | Line 32: | ||
{{Small image|Dental_2_5_freeMeshGeneration.jpg}} | {{Small image|Dental_2_5_freeMeshGeneration.jpg}} | ||
| − | = | + | = Implantatsausrichtung = |
When an implant marker is aligned to its implant library, the tooth position of the Scan Body needs to be manually defined.<br /> | When an implant marker is aligned to its implant library, the tooth position of the Scan Body needs to be manually defined.<br /> | ||
Revision as of 10:20, 3 February 2016
Contents
Freiprojektmodus
Der Freiprojektmodus von OpticalRevEng Dental ist die empfohlene Variante, wenn der Nutzer Daten erfassen muss, die keiner der Kategorien der Strukturprojekte zuzuordnen sind.
Der Freiprojektmodus ist für das Experimentieren mit dem Scansystem oder für das Scannen eines einzelnen Objektes geeignet.
In diesem Modus sind kein Projektbaum, keine automatischen Ausrichtungen und keine Wizardhilfe verfügbar. Es ist aber möglich, Daten zu erfassen, Meshes zu erstellen und Informationen zu bearbeiten.
Die gesamte Logik dieses Projekttyps liegt in den Händen des Nutzers, der ein Bezugsobjekt auswählen, alle Objekte ausrichten und die bestmögliche Scan- und Mesherstellungsmethoden für das Projekt wählen muss.
Einige Werkzeuge funktionieren im Freiprojektmodus anders, da das Projekt nicht über alle notwendigen Informationen verfügt.
Erfassung
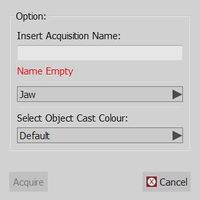
Im Freiprojektmodus hat die Software keine Informationen über das zu scannende Objekt und dessen Name oder Farbe.
Durch einen Klick auf das Erfassungsicon wird eine Maske für die Eingabe dieser Informationen angezeigt.
Ausrichtung
Im Freiprojektmodus ist die Software nicht in der Lage, das Bezugselement automatisch zu identifizieren. Zur Ausrichtung zweier Objekte hilft die Drag-and-Drop-Funktion, wie sie in der Projektbaumseite beschrieben ist.
Mesherstellung
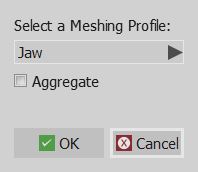
Da der Software keine Information zum gescannten Objekt zur Verfügung gestellt wurde, fragt ein weiteres Fenster nach der geeigneten Mesherstellungsmethode.
Im gleichen Fenster ist auch eine Option zur Fusion der Scanbilder verfügbar.
Wenn die Fusion-Funktion ausgewählt wird, erstellt die Software ein einziges Mesh mit allen ausgewählten Scanbildern. Wenn die Fusion-Funktion nicht aktiviert wird werden Scanbilder in einzelne Meshes konvertiert.
Implantatsausrichtung
When an implant marker is aligned to its implant library, the tooth position of the Scan Body needs to be manually defined.
Select the correct implant position or the identification will not be correctly exported
Exocad Export
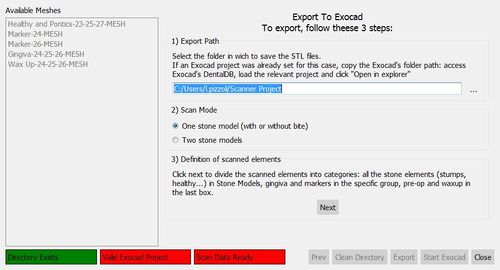
In a free project, the software can't automatically export the data to Exocad.
By clicking on the Export To CAD button, a wizard will start. The first page will ask:
- In which folder the data has to be exported
- If the user wants to export a single model (with or without a bite) or two stone models
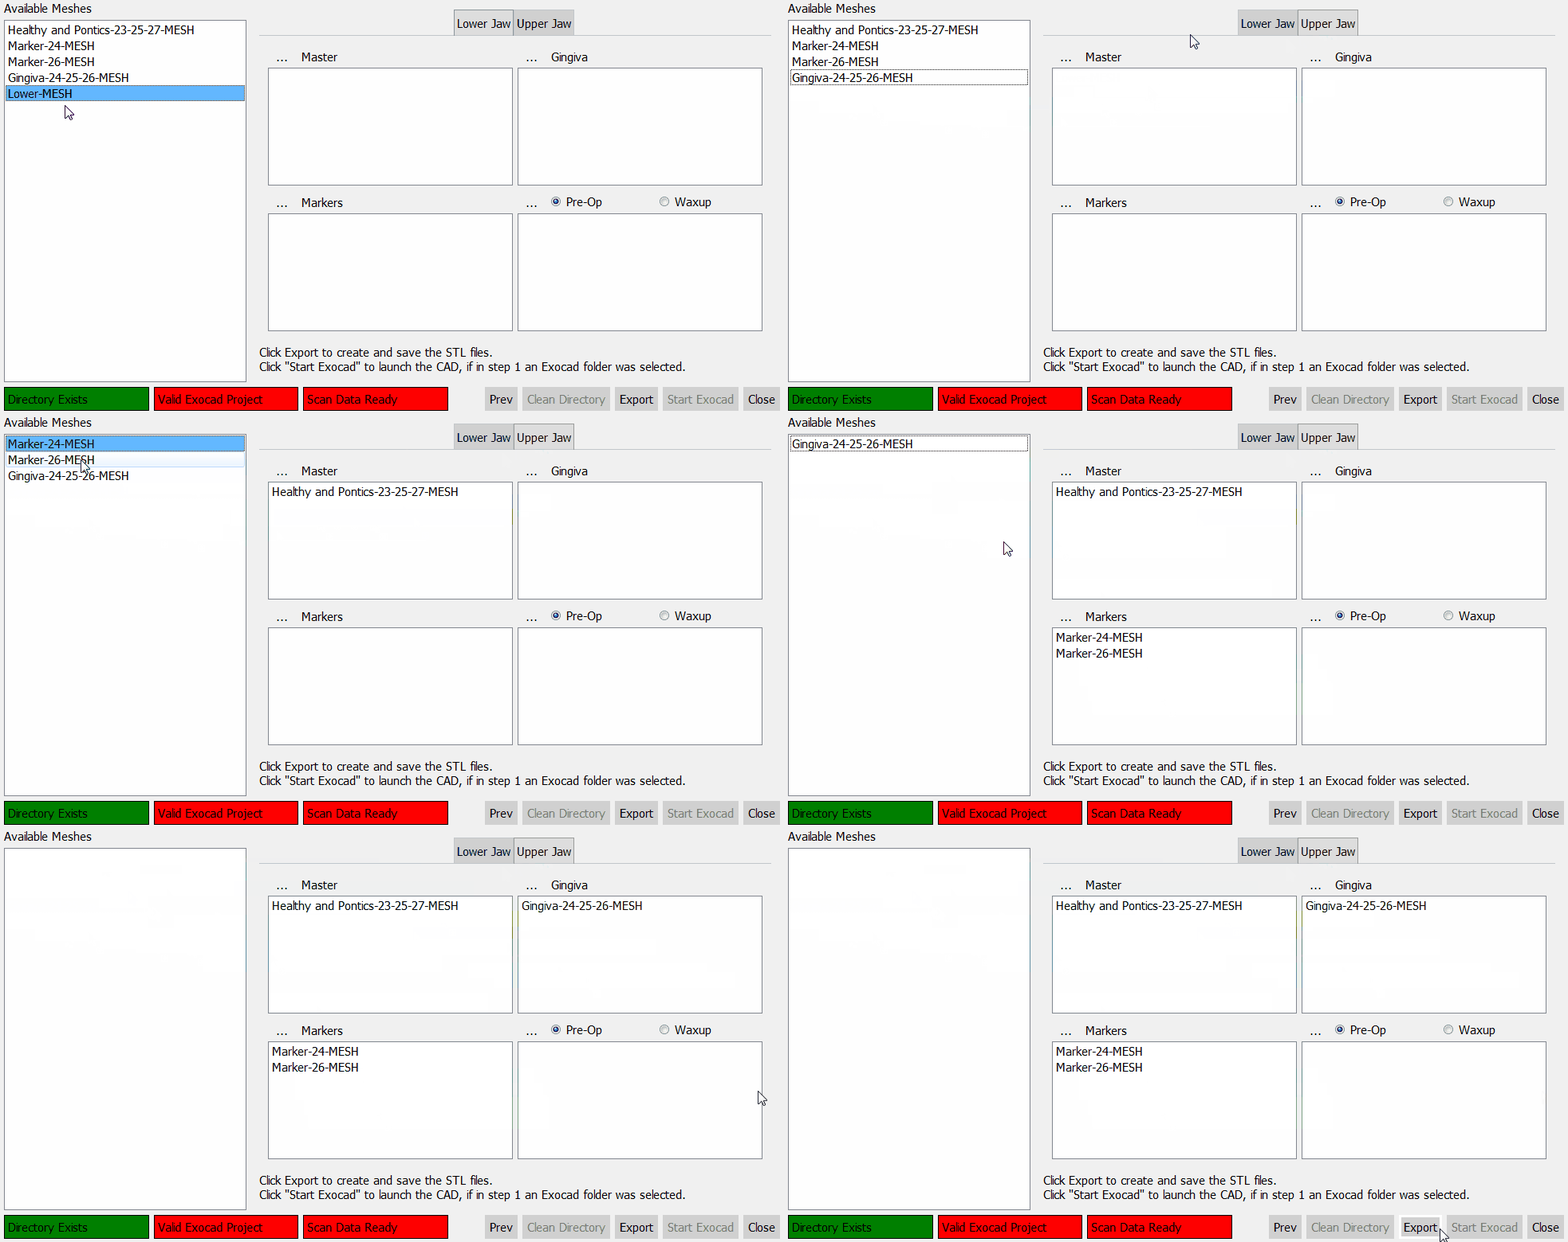
Then, after clicking next, the software will ask the user to specify the status of each mesh in the project.
For every jaw, the following meshes can be identified:
- Master Meshes : all the meshes that are part of the stone model: healthy parts, stumps, pontic parts, etc.
- Gingiva Meshes : mesh of the separated gingiva
- Markers : meshes of the implant markers
- Pre-Op or Waxup : mesh of the Provisional Model or of a Waxup, selecting the type of element.
When all the meshes are identified, click Export to save the files on disk.


