Interaction
Contents
Vista Principal
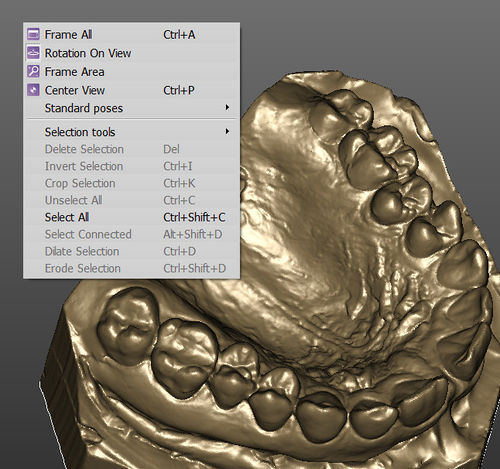
En la imagen de abajo se muestra un ejemplo de interaccion 3D sobre una malla seleccionada en OpticalRevEngDental
Es posible interactuar con la Vista 3D utilizando el mouse y el teclado, el menu contestual, el menu principal y la barra de las herramientas Vista.
Interaccion con el mouse
El usuario puede interactuar con el orientamento del objeto 3D utilizando el mouso o herramientas mas especificos que pueden ser seleccionadas en el "menu Vista", la "barra de las herramientas Vista" o el "menu Contestual".
La lista siguiente muestra las combinaciones posibles mouse/teclado:
-
 +
+  or
or  +
+  : pan the camera in 2D
 -
 : freely rotate the camera around the 3D Object
 -
 +
+  : rotate the camera restricted to the Y axis of the 3D View
 -
 +
+  : rotate the camera restricted to the X axis of the 3D View
 -
 +
+  : rotate the camera restricted to the Z axis of the 3D View
 -
 : change Zoom
 -
 : enter the context menu
 -
 +
+  : change the position of the light source in the 3D View
 -
 : use the current tool (E.g. Rectangular Selection, Hole Filling, etc.)
 -
 +
+  : invert the current tool if available (E.g. Deselect points instead of Select points, etc.)
 -
 + Number from 1 to 7 : change the 3D View to one of the default positions (E.g. Frontal, Back, Top, etc.)
En las opciones del software es posible habilitar la modalidad de Interaccion Alternativa que permite invertir el boton central del mouse con el boton derecho del mouse para obtener una interaccion mas parecida a la de otros software CAD.
Context Menu and View Menu
The view menu and the 3D View context menu contain some tools that can be used to interact with the 3D View.
- Frame All (
 + A) : the 3D camera will move to show, on the screen, all the current selected 3D Objects
 - Rotation On View : if this option is enabled, the rotation will ignore the current selected 3D Objects; if it is disabled, the center of the rotation will be the baricenter of the selected 3D Objects
- Area Frame Tool: this tool allows to draw with
 a rectangle. The rectangle will become the new camera view.
 - Center View (
 + P) : the currently selected 3D Objects are moved at the center of the screen without changing their Zoom
 - Standard Poses : sub-menu to apply default 3D views:
The context menu contains other tools described in the Data Editing page.
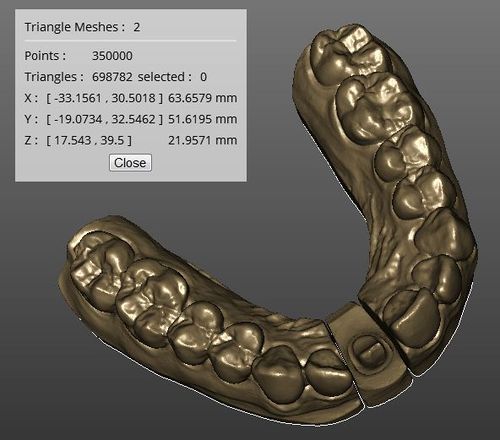
Data Information Window
In the view menu, it is possible to enable the Data Information Window with the View Data Window (![]() +
+ ![]() + I) action.
+ I) action.
This window provides some information about the current selected 3D Objects.
- Description: a line that describes the type of the currently selected objects (E.g. Triangle Mesh: 2, Range Images: 6, etc.)
- Points: the number of points of the currently selected objects
- Faces: the number of faces, available only for triangle meshes
- Selected: the number of selected points/faces of the currently selected objects
- Size and Position: the minimum/maximum coordinates of the volume of the currently selected objects, and their size in every direction


