Scanner's connection
Connettere lo Scanner
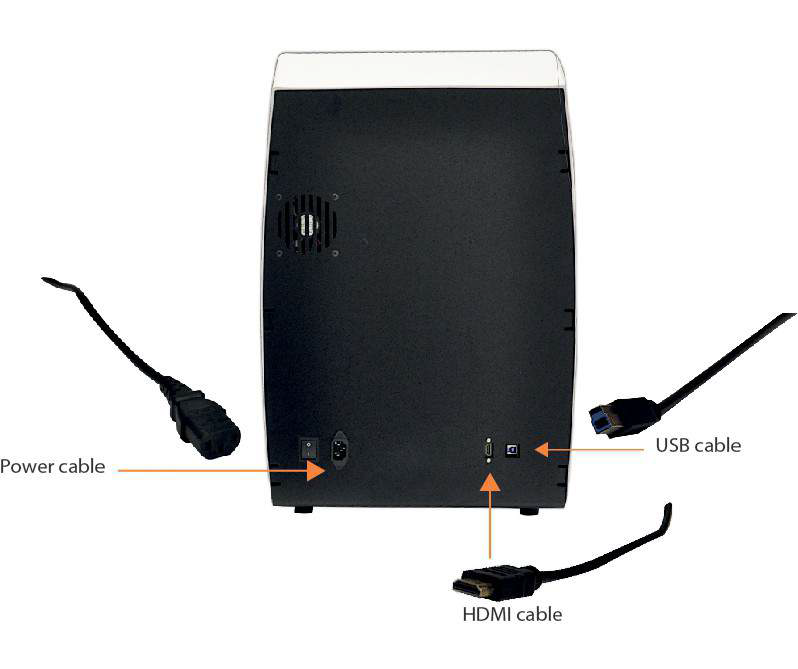
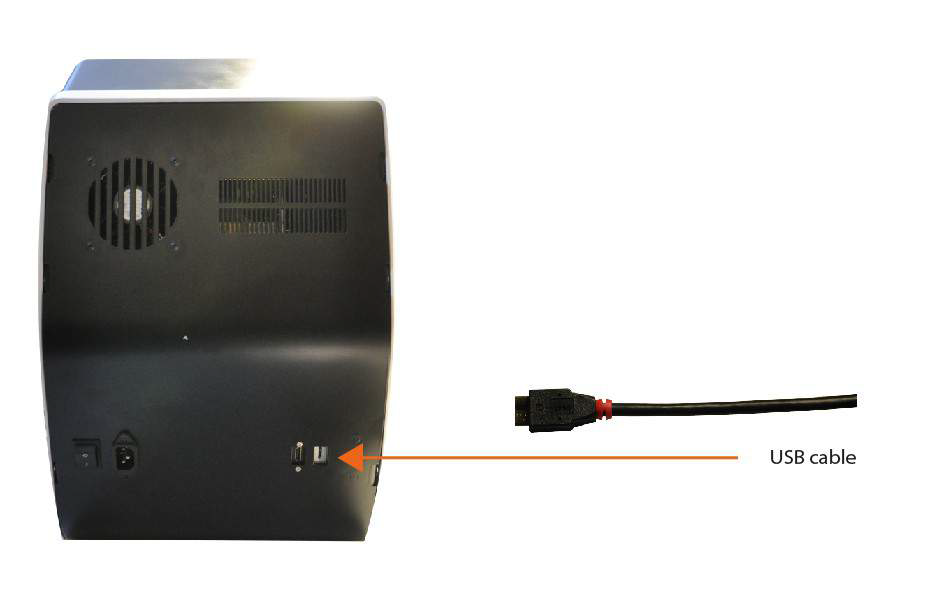
Come mostrato nelle immagini, nella parte posteriore dello scanner ci sono, da sinistra a destra, l'interruttore della corrente, la presa di corrente, la porta HDMI e la porta USB:
Connessione Scanner Big/Deluxe
Connessione Scanner Small
Il cavo di corrente è standard a 230V e deve essere connesso a una linea elettrica che possa mantenere il voltaggio durante tutte le fasi di lavoro e che sia protetta da sovraccarichi e corto circuiti.
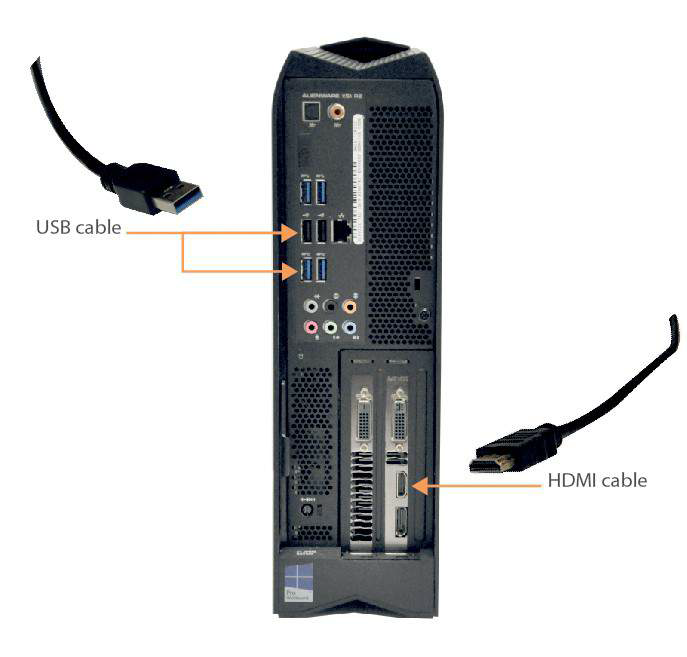
Il cavo HDMI deve essere connesso al Computer utilizzando la porta HDMI corrispondente alla Scheda Grafica. La posizione di tale porta può variare a seconda della marca e del modello del Computer stesso. Nei Computer da noi forniti, Alienware i5 e i7 della Dell, questa porta HDMI si trova in basso a sinistra:
The connection of the USB cable depends on the model of the scanner, as in the Easy and Smart models (both Small and Big) there are USB 2.0 components, whereas in the Deluxe model there are USB 3.0 components. Therefore, the USB cable of Easy and Smart Scanners must be plugged in a port USB 2.0 and the USB cable of the Deluxe model must be connected to a port USB 3.0. These ports are usually colour-coded, so it's possible to recognise the 2.0 because of its black colour and the 3.0 because of its blue colour. The USB cable that Open Technologies provides to connect the scanner to the Computer is a 3.0 USB cable (blue), however the above-mentioned instructions remain valid and even though the cable is 3.0, if the scanner is an Easy or Smart model it must be plugged in a USB 2.0.


