Scanner's connection
Scanneranschluss an den PC
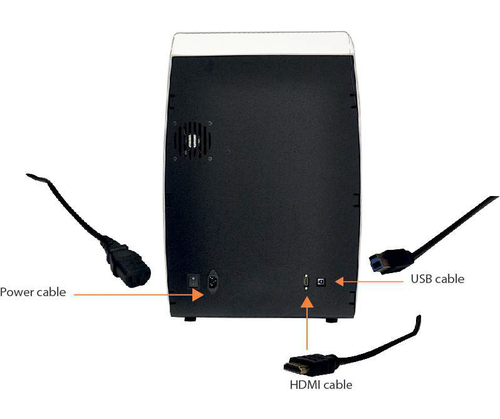
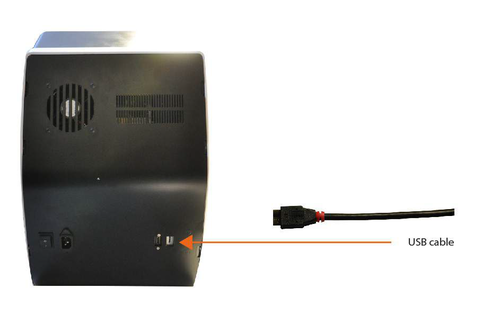
Wie in den Bildern ersichtlich, sind auf der hinteren Seite des Scanners, von links nach rechts, der Stromschalter, der Stromanschluss, der HDMI- und der USB-Anschluss zu finden:
Big/Deluxe-Scanneranschluss
Small-Scanneranschluss
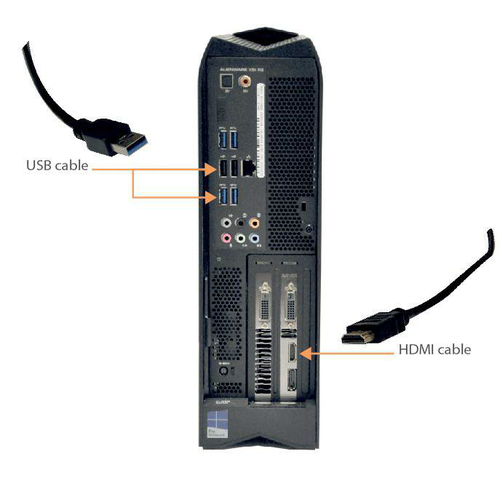
Das 230V-Standardstromkabel muss an eine Stromversorgung angeschlossen werden, die die Spannung in allen Betriebsphasen sicherstellt und die vor Strombelastungen und Kurzschlüssen geschützt ist. Das HDMI-Kabel muss durch den HDMI-Anschluss (mit der jeweiligen Grafikkarte) an den Computer angeschlossen werden. Die Position dieses Anschlusses ist vom PC-Modell abhängig. Bei unseren Computern - Alienware i5 und i7 von Dell - ist der HDMI-Anschluss unten links zu finden:
The connection of the wire USB depend of the model of the scanner. The models *Easy and *Smart (so much *Big like *Small) have components USB 2.0, instead the model *Deluxe has components USB 3.0. The wires USB of the *escáneres *Easy and *Smart have to be *inseridos in a port USB 2.0, unlike the wire *Deluxe that it has to be inserted in a port USB 3.0. The ports USB follow a code of colours to be identified: the ports 2.0 are of colour *nigro and the 3.0 are of blue colour. Although the wire USB of *Open *Technologies to connect the scanner to the Computer was a wire with USB 3.0 (blue), the instructions remain cost; then, for the models *Easy and *Smart the dig will have to be connected to a port USB 2.0.


