Wizard Acquisition
Contents
Captura con Asistente
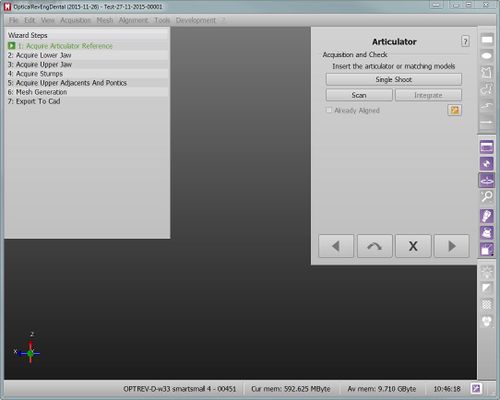
Durante el modo Asistente Paso a Paso, es posible: capturar objetos por separado o conjuntos de objetos en un solo escaneo, capturar un objeto capturado anteriormente e integrar todas las capturas.
Objeto Solo
Cada vez que se quiera capturar un elemento, aparecerá una pantalla específica:
- El nombre del objeto que se quiere capturar
- Una descripción de lo que se va a escanear
- Un menú para seleccionar elColor del Objeto
- Un botón Escanear para iniciar la captura
- Un botón Integrar para iniciar la integración de un objeto capturado anteriormente
- Una casilla Ya Alineado" que muestra si el objeto ya está alineado con el resto del proyecto
Seguir el asistente es muy simple, es suficiente:
- Leer la descripción del objeto
- Insertar el objeto dentro del escáner
- Hacer clic en Escanear
- En el caso de que la captura no sea satisfactoria, hacer clic en el botón "Escanear" para iniciar una nueva captura, o en el botón Integrar para añadir datos
Parámetros Avanzados
Durante el asistente, el tipo de captura depende del tipo de objeto y se selecciona automáticamente.
En algunos casos, es necesario utilizar un perfil de captura diferente. Por ejemplo, si el usuario quiere escanear pilares en lugar de muñones, debe seleccionar el perfil específico para pilares; o si quiere proyectar una corona puede seleccionar el perfil durante la captura.
Para seleccionar un perfil, hacer clic en el botón ![]() en el menú desplegable.
en el menú desplegable.
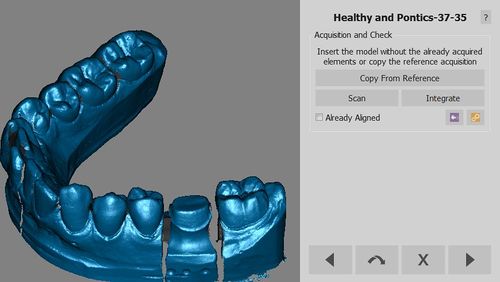
Copiar Desde Referencia
A veces es posible que un elemento ya haya sido escaneado durante otra captura.
En estos casos, el software mostrara un boton adicional ("Copiar desde referencia) para hacer una copia de la captura anterior.
Despues del paso Cortar Base, el software quitara los duplicados.
Capturas de Conjuntos
When acquiring multiple dies or multiple implants, it's better not to carry out a single acquisition for every element.
It is possible to acquire many objects at once.
Just make sure that the objects are completely visible in all their parts and that they are at an adequate distance either on the model holder or on the Multi-Die support.
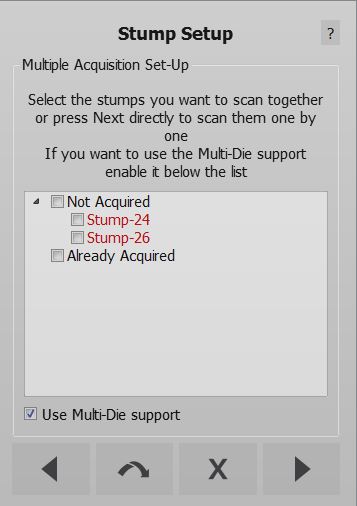
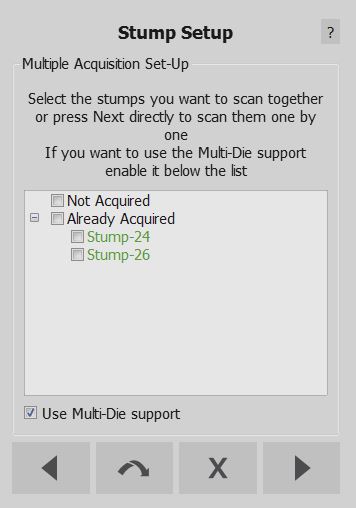
In these cases, the software will show a Multi-Acquisition Setup step where it is possible to select the objects to be scanned at the same time.
This step will show a list of all the objects that have to be scanned together with the already acquired items. Flag the boxes of the objects that have to be scanned together and, when scanning stumps, flag the Use Multi-Die support option on the bottom of the dialog to use the Multi-Die holder.
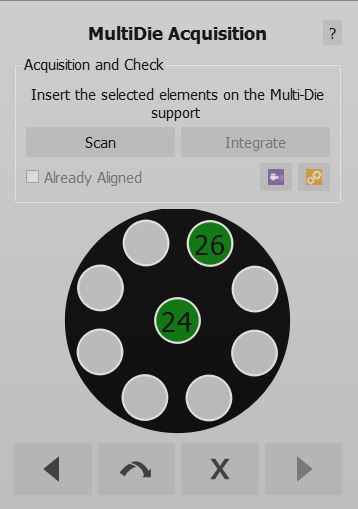
With Multi-Die
If the Multi-Die option is selected, the software will set up a specific acquisition for the dies; an image will guide the user in positioning the dies in the Multi-Die holder.
After the acquisition, the software will automatically recognize each single die and return to the Multi-Acquisition Step to allow the acquisition of additional objects.
Without Multi-Die
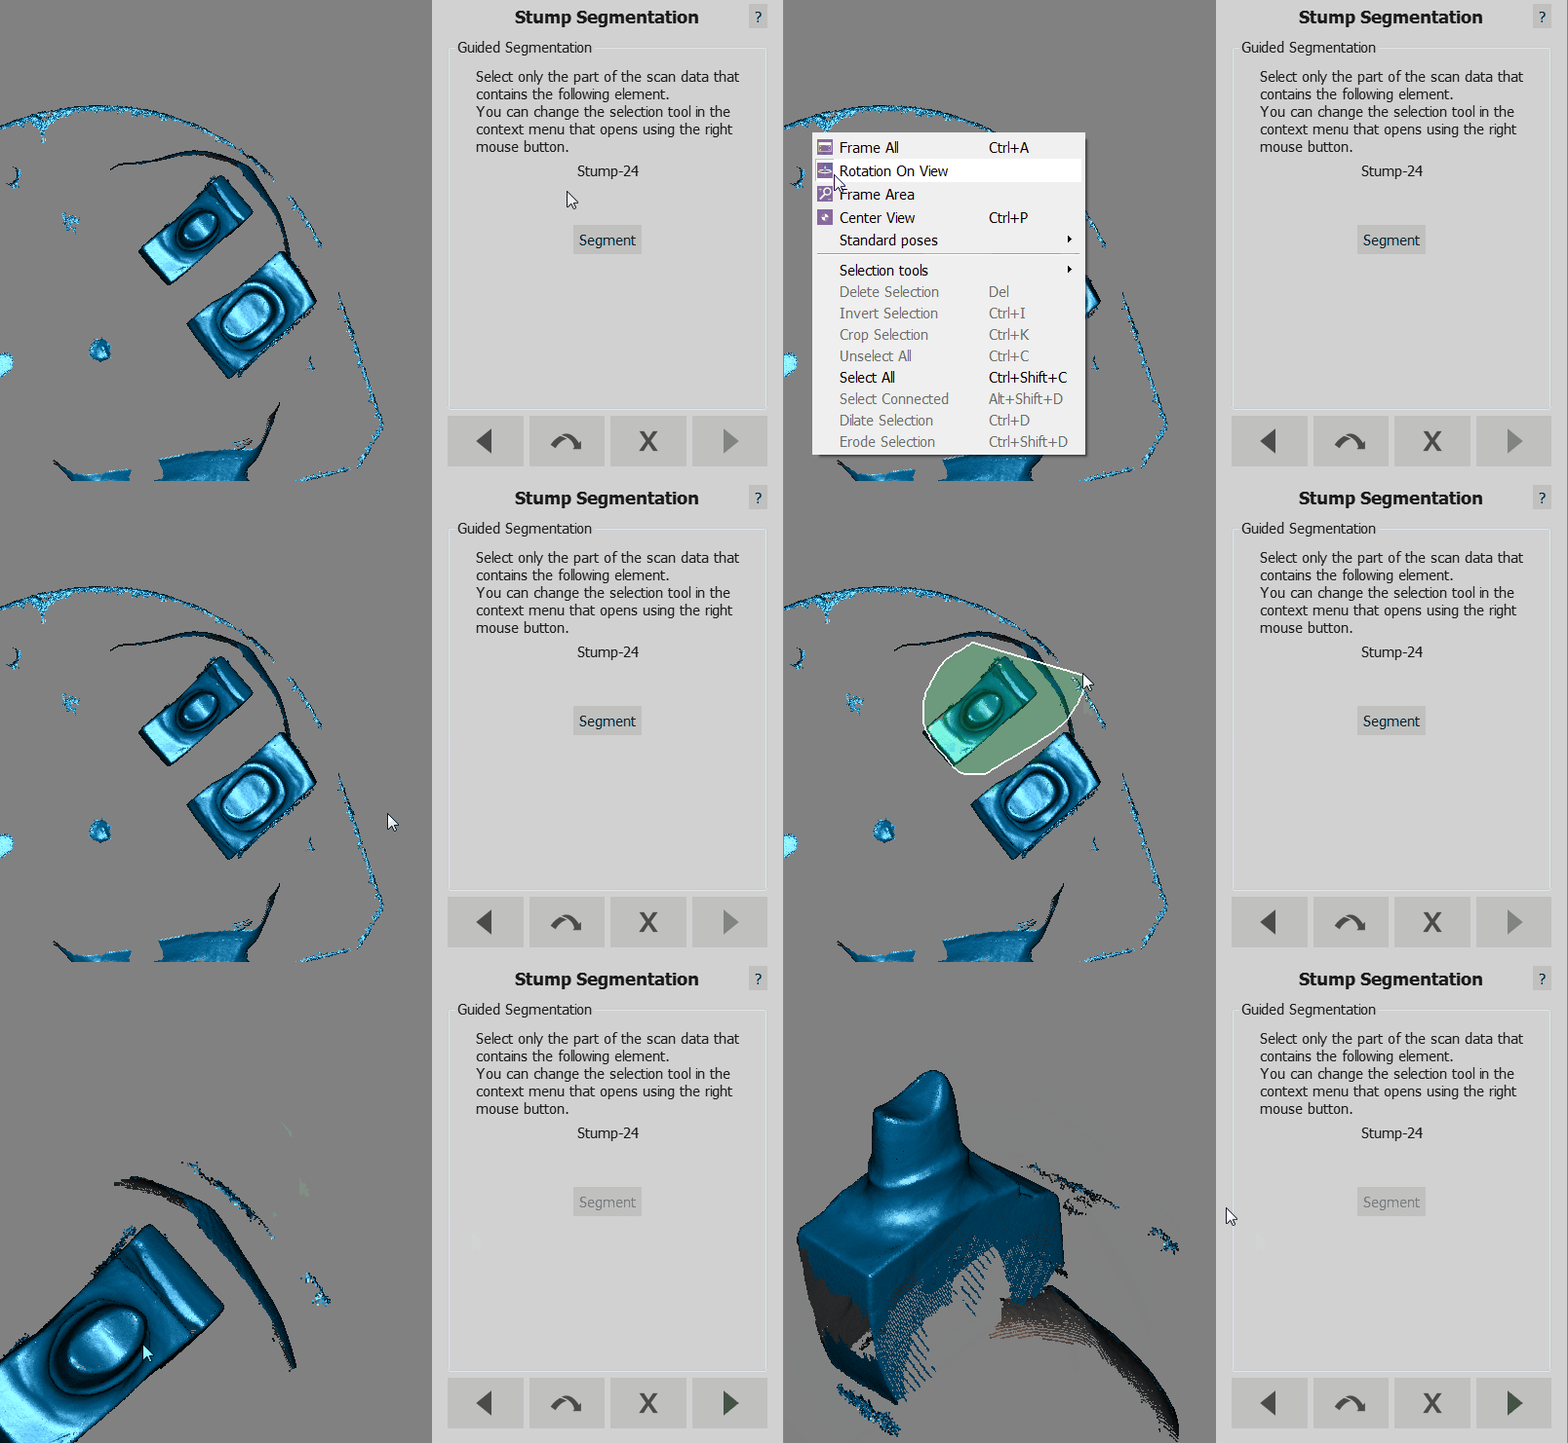
If the Multi-Die is not selected, the software will acquire the objects and, in the following step, require the user to manually identify each object.
A specific Wizard Step will ask which object has to be identified. The user has to:
- Read from the Wizard Page which object has to be selected
- Select the specific object, using a Selection Tool
- Click the button Segment
- Click the button Next
When the objects are all identified, the software returns to the Multi-Acquisition step. If all the objects have already been aquired, click Next to continue with the Step-By-Step Wizard
Integración
Al hacer clic en el botón Integrar después de una captura, se iniciará el modo Integración.
