Free Mode
Contents
Free Mode
The Free Project mode is a specific use of OpticalRevEng Dental software, suggested when the user needs to acquire some data that does not fit in any of the supported Structed Projects.
The free mode can be used to experiment the scan system or when the user needs to scan only a single object.
In free mode there is no Project Tree, no automatic alignment and no Step-By-Step Wizard. However, it is still possible to acquire data, align two objects together, generate a mesh and edit all the information.
The project logic is completely in the user's hands, who is responsible to correcty choose a reference item, align all the objects and choose the best scan and mesh strategy for all the project data.
Some tools work differently in Free Mode, as the project can lack some information.
Acquisition
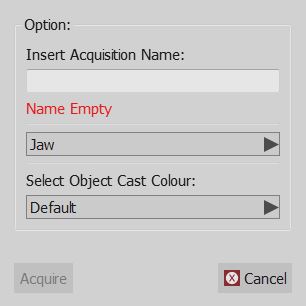
In Free Mode, the software has no way to know what kind of object is going to be acquired, and what name it has to assign to the item.
By clicking the Acquisition button, an extra dialog will ask to add this information.
Alignment
In Free Mode, the software has no way to automatically identify the reference item. To align two objects, use the drag and drop function as explained in the Project Tree page.
Mesh Generation
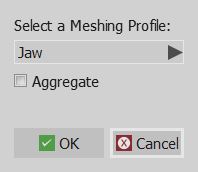
By selecting one or more acquisitions and by clicking on the Generate Mesh button, the software has no way of knowing which mesh generation strategy to use.
An extra dialog will ask the user to choose the mesh generation strategy and to choose whether to aggregate the acquisition or not.
If aggregate is checked, the software will create only a mesh with all the selected acquisitions.
If aggregate is not checked, each acquisition will be separately converted.
Implant Alignment
When an implant marker is aligned to its implant library, the software has no way of knowing the tooth position of this implant marker.
Select the correct implant position or the identification will not be correctly exported
Exocad Export
In a free project, the software has no way of knowing how to export the data to Exocad.
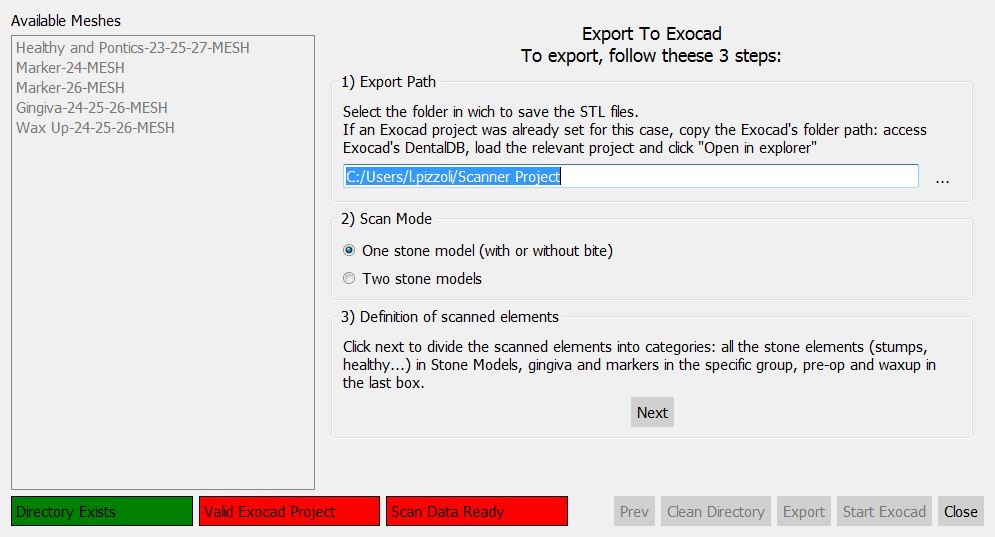
By clicking on the Export To CAD button, a wizard will start. The first page will ask:
- In which folder the data has to be exported
- If the user wants to acquire only the single model (with or without a bite) or both the stone models
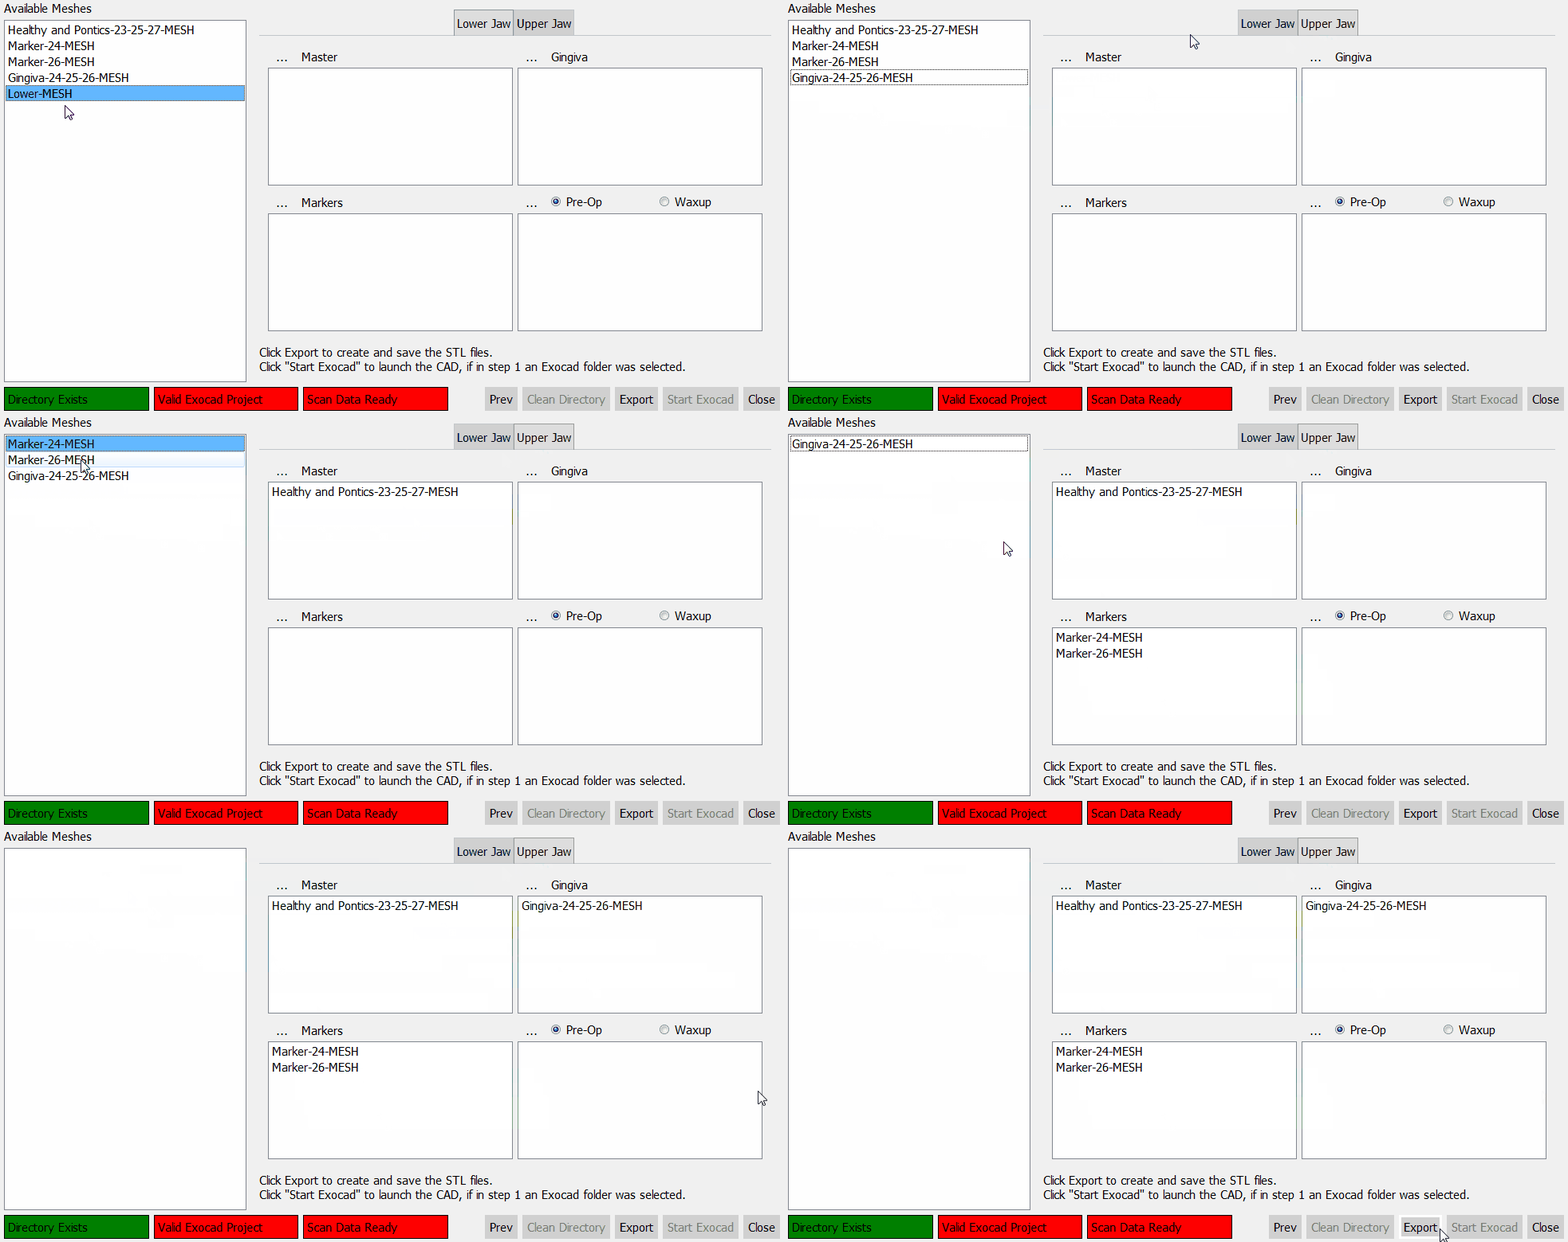
Then, after clicking next, the software will ask the user to specify the role of each mesh in the project.
For every jaw, the following meshes can be identified:
- Master Meshes : all the meshes that are part of the stone model: Healthy parts, stumps, pontic parts, etc.
- Gingiva Meshes : mesh of the separate gingiva
- Markers : meshes of the implant markers
- Pre-Op or Waxup : mesh of the Provisional Model or of a Waxup, selecting the type of element.
When all the meshes are identified, click Export to save the files on disk.


