Project Creation
When you start the software, if you're not coming from another Database software like Exocad DentalDB with a project already defined, you need to define your scan project.
The software will show you a Project Manager dialog to collect all the data about what you're going to scan and to prepare a specific Step-By-Step Wizard.
The project manager will let you select what kind of project you want to do from the one availables with your system. On the left bar of the dialog you'll se one button for every kind of project.
All the projects will have a General Information part where you'll be able to input:
- The patient id for this project (Mandatory)
- The doctor id for this project (Optional)
- A specific project name (This will be used to save the project on the disk, if none is provided one will be automatically generated by the patient id)
- A designer name (Optional)
- Notes (Optional)
When a project is defined you just have to click the green confirm button on the botton and the software will create you specific Structured Proejct and start the Step-By-Step Wizard.
Contents
Fixed Protesis Project
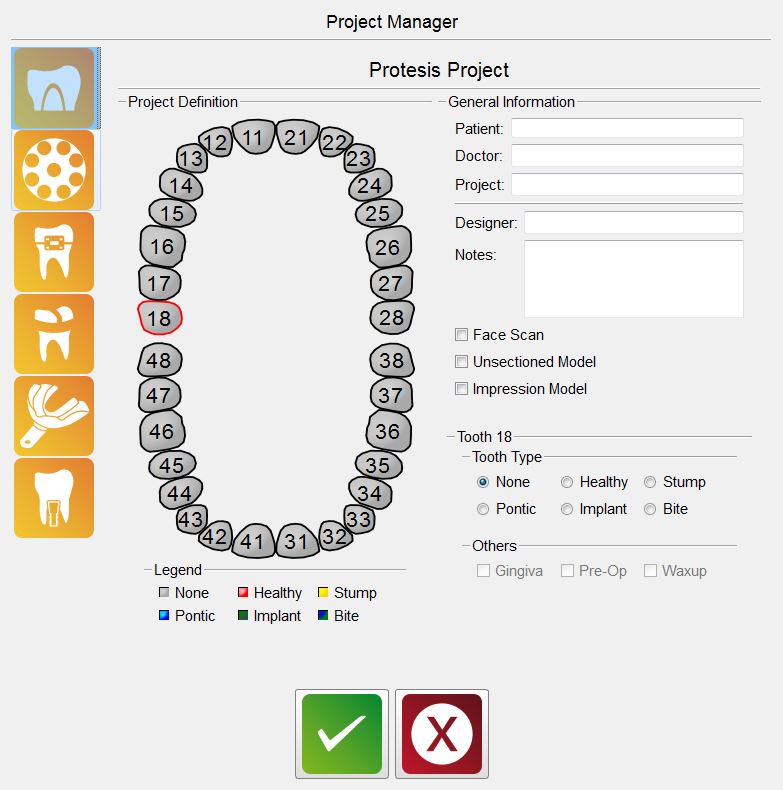
This is the screen you see if you click on the Protesis Button.
This is the most complex job because you need to define the information tooth by tooth.
Other than the General Information section this project show 2 additional sections
Project Definition
Here you see a tooth graph where you can click on a specific tooth to change that tooth information.
If you keep ![]() pressed when you click on a tooth you'll copy the last tooth parameters on the clicked tooth.
pressed when you click on a tooth you'll copy the last tooth parameters on the clicked tooth.
If you keep ![]() pressed when you click on a tooth all the teeth between the last tooth and the clickd one will have the same parameters of the last tooth selected.
pressed when you click on a tooth all the teeth between the last tooth and the clickd one will have the same parameters of the last tooth selected.
Tooth Information
This section, on the botton right, will show the parameters of the current selected tooth. Every tooth will have one Tooth Type and some Others flags. The meaning of the Tooth Types are:
- None : This tooth is not part of the project, will not be acquired or can be ignored
- Healthy : This tooth is part of the main stone model, can be acquired with the rest of the model
- Stump : This tooth is a removable die that has to be acquired alone or on the Multi-Die support with a better detail
- Pontic : This tooth is part of the main stone model but will be below a pontic element
- Implant : This tooth is the position of an implant and so an Implant Marker will be acquired in this position
- Bite : This tooth is part of a occlusal bite
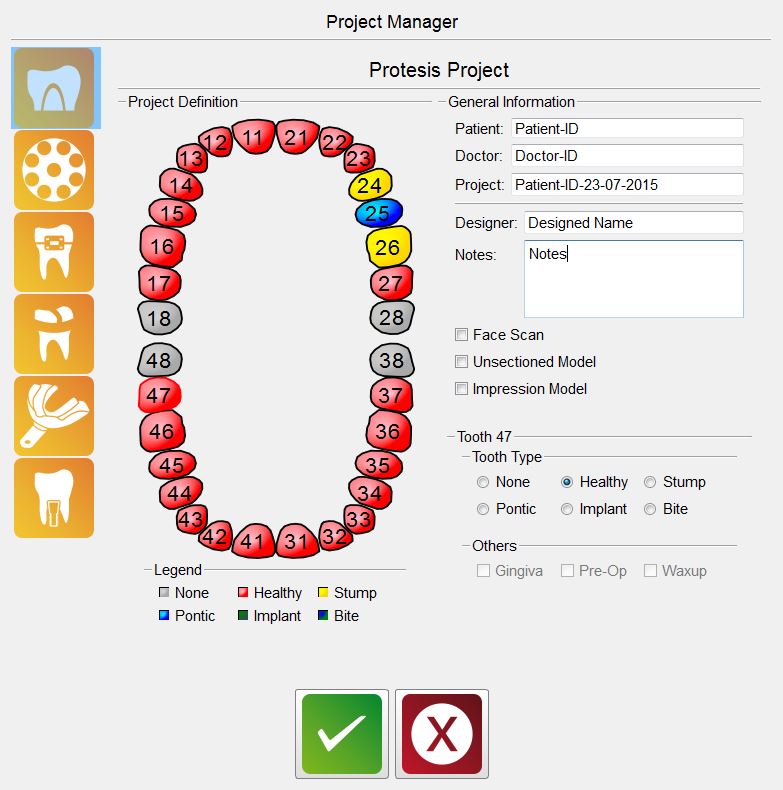
Every tooth type have a specific color in the project definition scheme.
The Other Flags are:
- Gingiva : This element has a gingiva piece that need to be acquired separately from the stone model
- Pre-Op: The anatomy of this element is part of an additional model that will be acquired separately and then aligned to the reference stone model
- Waxup : Over this tooth position you want to scan a Pre-Modelled Waxup that will be aligned to the rest of the stone model.
Additional Parameters
In the general information section there are some additional parameters:
- Face Scan : The project will have the additional data required from a Real Time Face Scan
- Unsectioned Model : The model is not sectioned so the stumps will be treated as Healthy Teeth and not acquried separately
- Impression : This job is not a model but an impression so a specific scan strategy will be used
Here you can see an example of a defined protesis project for a 3 element bridge with a stone antagonist.
Multi-Die Project
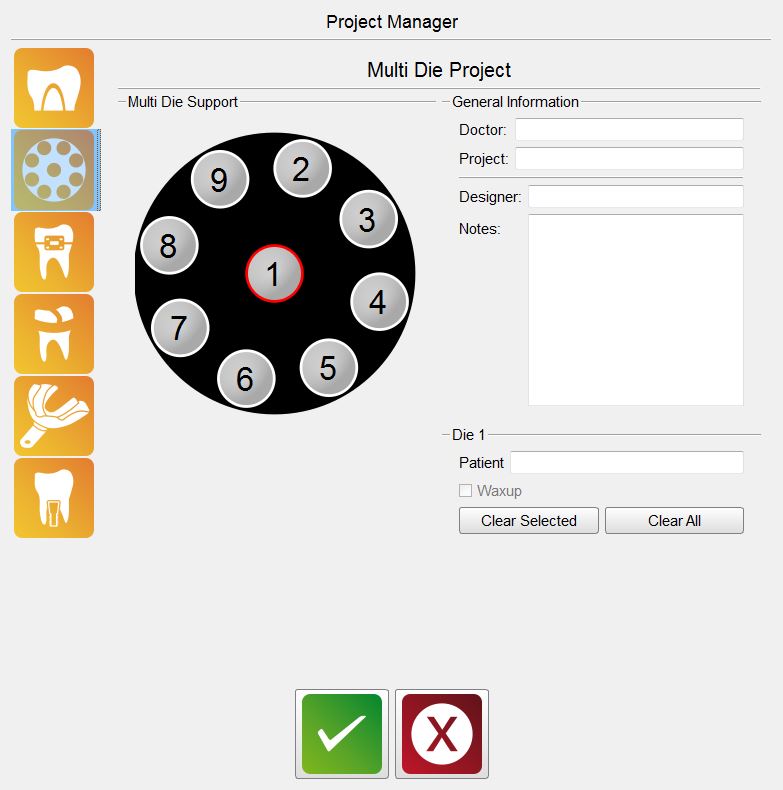
If you want to scan many different dies from different patients in only one project you can use the Multi-Die Project
In this project you just need to set a name for every die instead of a single patient name.
Orthodontic/Scheletric/Impression Project
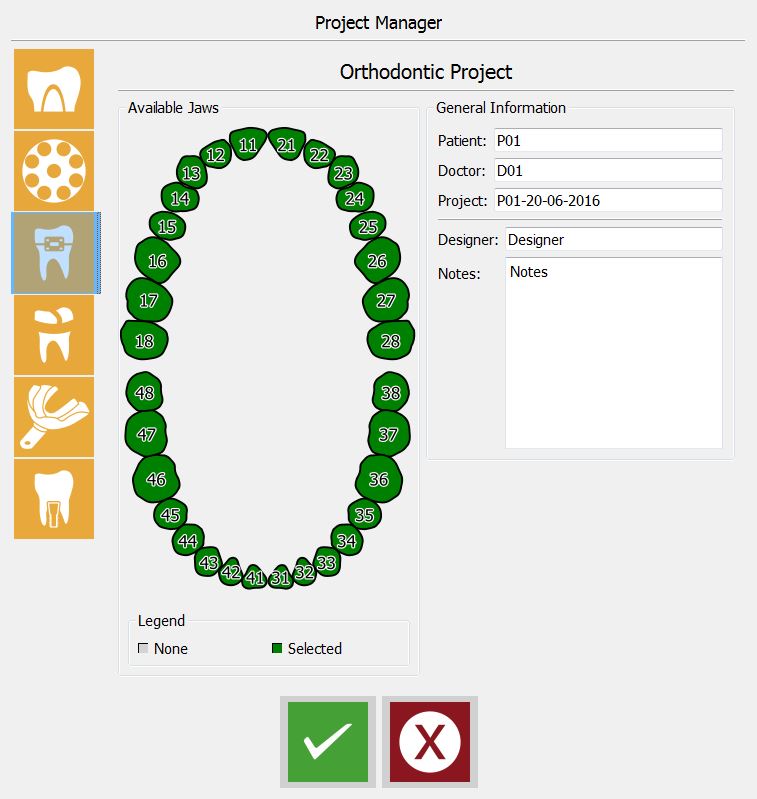
The Orthodontic, Scheletric and Impression Projects are really simple and works in the same way.
In this projects you enable/disble the entire jaws and not single teeth.
When you confirm your project definition the software will prepare the Project Tree for you so you can start to acquire the data from the scanner.
Now you can return to the Main Page or read about Acquisition


