Wizard Acquisition
Contents
ウィザードでの取得
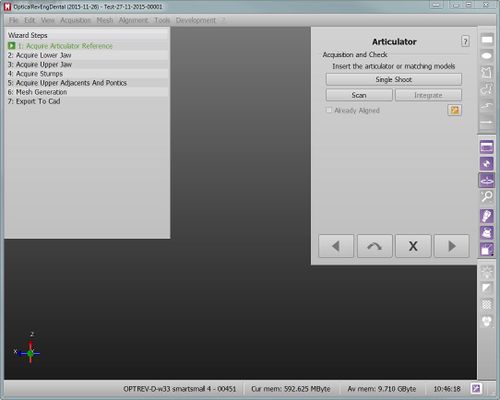
ステップバイステップウィザードでは、単一オブジェクトを取得したり、複数のオブジェクトを1回のスキャンで取得したり、以前取得したオブジェクトを再取得したり、これらすべての取得を統合することができます。
シングルオブジェクト
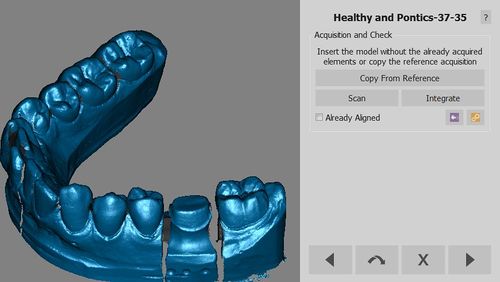
部品が取得されるたびに、特定のウィザード画面で以下が表示されます:
- 取得されるオブジェクト名
- スキャンされる内容の簡単な説明
- オブジェクトの色のセレクター
- 取得を開始するScan(スキャン)ボタン
- 以前取得されたオブジェクトの統合を開始するIntegrate(統合)ボタン
- このオブジェクトがプロジェクトの残りの部分にアライメントされているかどうかを示す、Already Aligned(アライメント済み)チェック
ウィザードを使うのは非常に簡単です:
- オブジェクトの説明を確認します
- 正しいオブジェクトをスキャナー内部に置きます
- Scanをクリックします
- 取得に満足できない場合は、Scanボタンを再度クリックして新しい取得を開始するか、またはIntegrateボタンでデータを追加します
アドバンス設定
ウィザード中、取得する部品の種類に応じて、取得計画が自動的に選択されます。
時には、1つの部品に対して異なる計画を使用することが有用となることもあります。
参照からのコピー
時には、1つの部品データが、別の取得で既にスキャン済みのこともあります。
このようなケースでは、ソフトウェアは追加のボタン (Copy From Reference)を表示し、新しい取得を開始する代わりに、以前のもののコピーを作成します。
ベースカットステップ後、ソフトウェアは取得から複製を自動的に削除します。
複数取得
複数の歯型やインプラントを取得する際、各部品ごとに取得を行うのは得策ではありません。
多くのオブジェクトを一度に取得することができます。
オブジェクトのすべての部分が完全に見えていること、モデルホルダーやマルチダイサポート上でお互いが十分離れていることを確認して下さい。
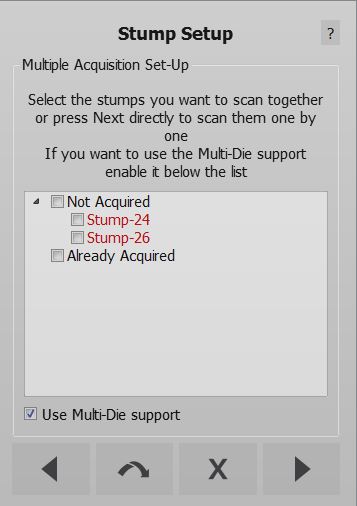
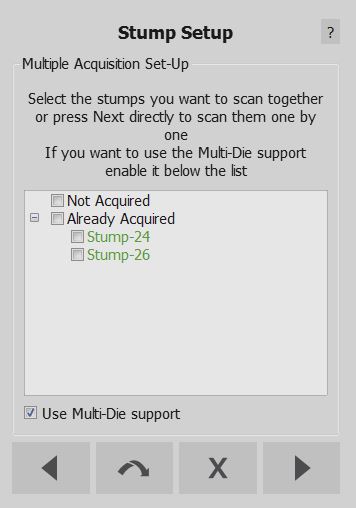
このようなケースでは、Multi-Acquisition Setup(マルチ取得セットアップ)ステップが表示されます。ここで、同時にスキャンするオブジェクトを選択することができます。
このステップでは、一緒にスキャンされるすべてのオブジェクトのリストと、既に取得済みのアイテムが表示されます。一緒にスキャンされるべきオブジェクトをチェックし、スタンプをスキャンする場合は、画面下部のUse Multi-Die support(マルチダイサポートを使用する)オプションにチェックを入れて、マルチダイホルダーを使います。
マルチダイ使用時
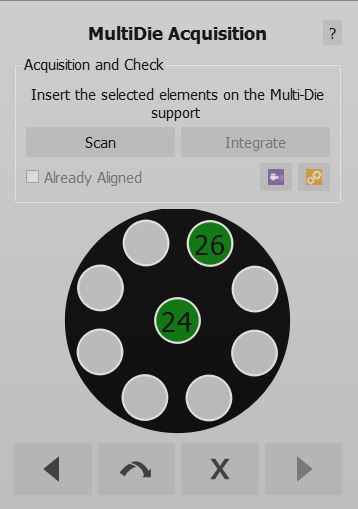
If the Multi-Die option is selected, the software will set up a specific acquisition for the dies; an image will guide the user in positioning the dies in the Multi-Die holder.
After the acquisition, the software will automatically recognize each single die and return to the Multi-Acquisition Step to allow the acquisition of additional objects.
Without Multi-Die
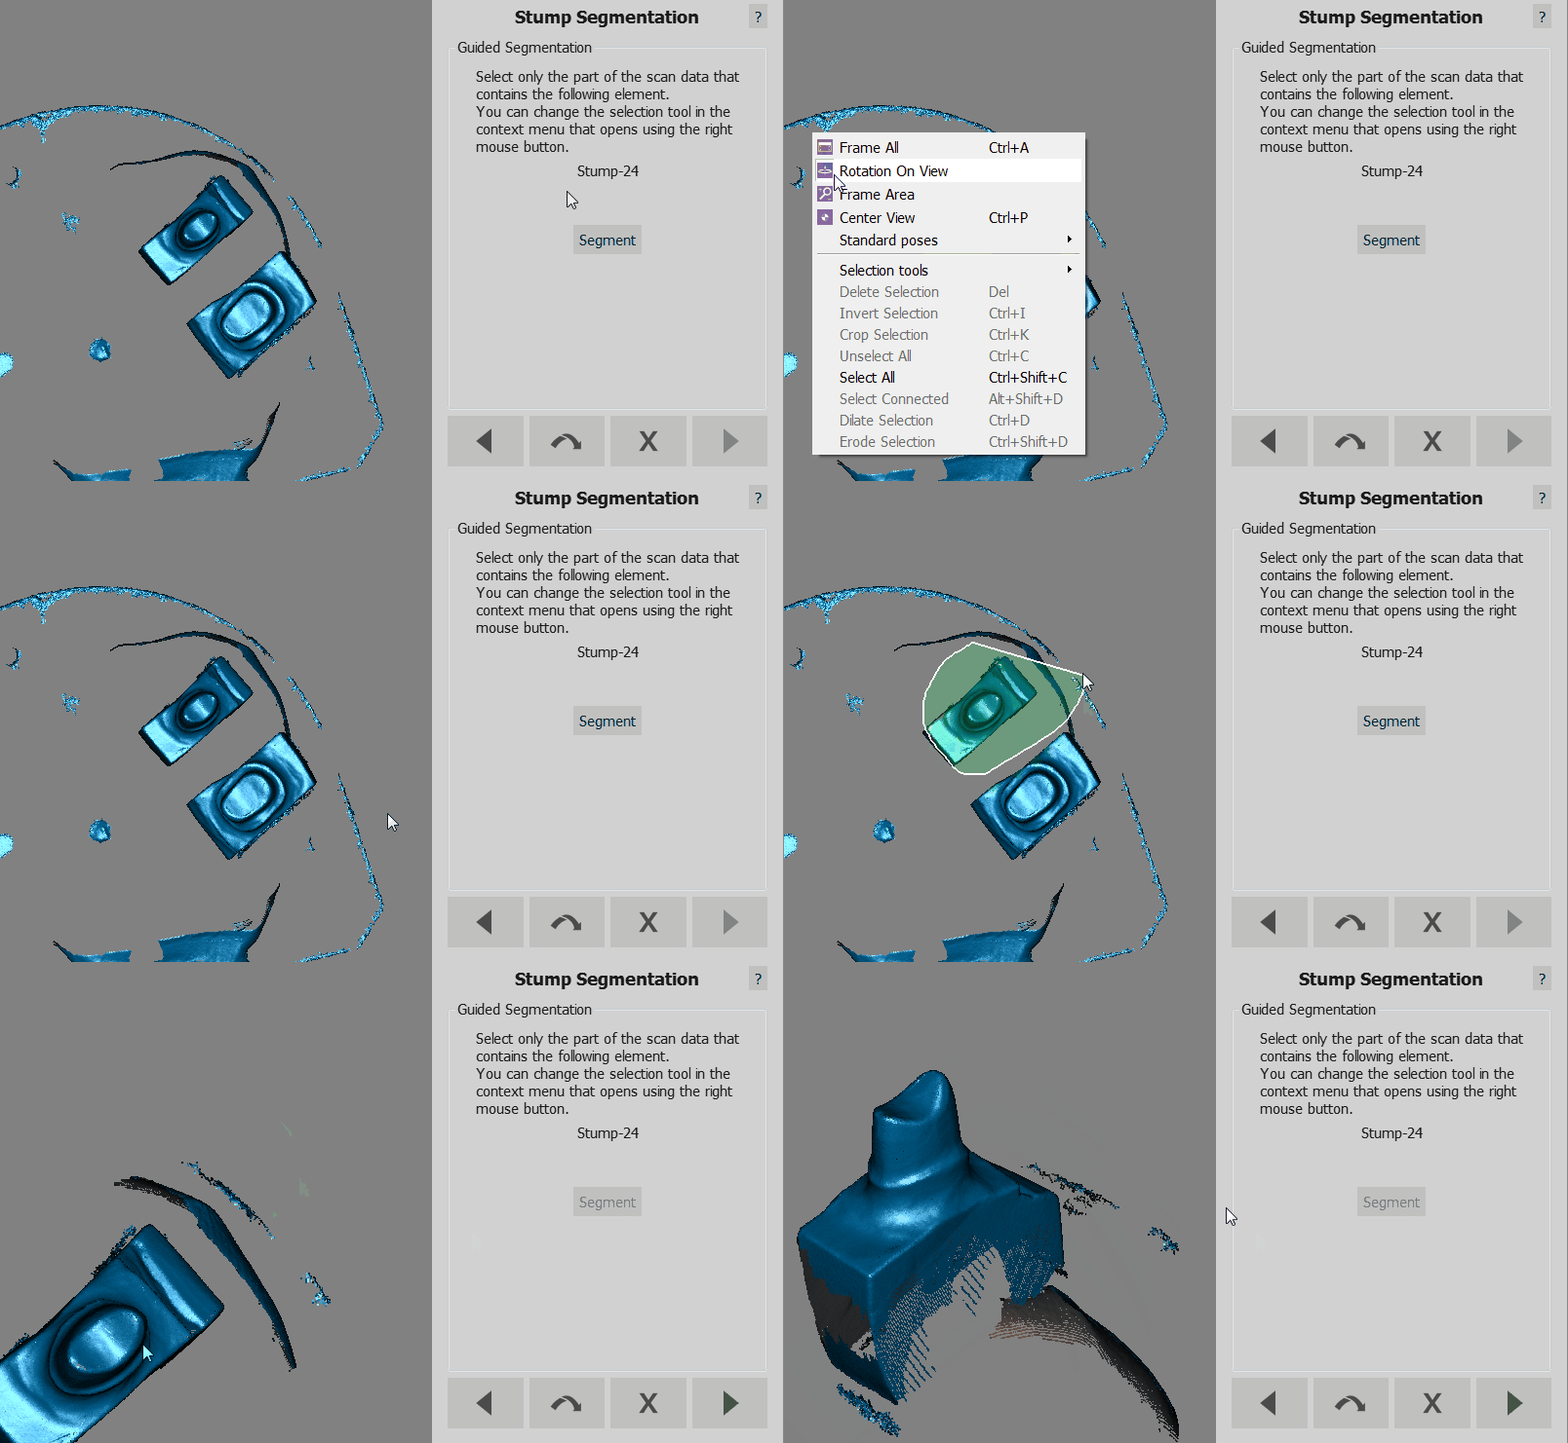
If the Multi-Die is not selected, the software will acquire the objects and, in the following step, require the user to manually identify each object.
A specific Wizard Step will ask which object has to be identified. The user has to:
- Read from the Wizard Page which object has to be selected
- Select the specific object, using a Selection Tool
- Click the button Segment
- Click the button Next
When the objects are all identified, the software returns to the Multi-Acquisition step. If all the objects have already been aquired, click Next to continue with the Step-By-Step Wizard
Integration
By clicking the Integrate button after an acquisition, the Integration mode will be launched.
