Scanner's connection
Conexión del Escáner
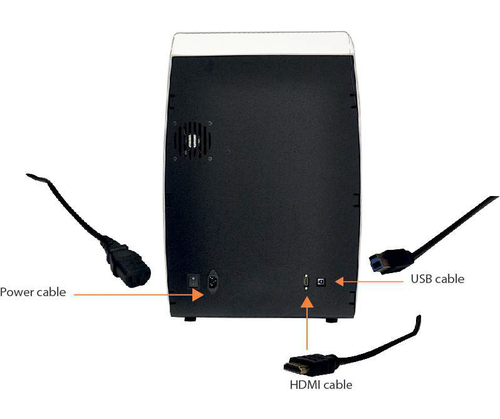
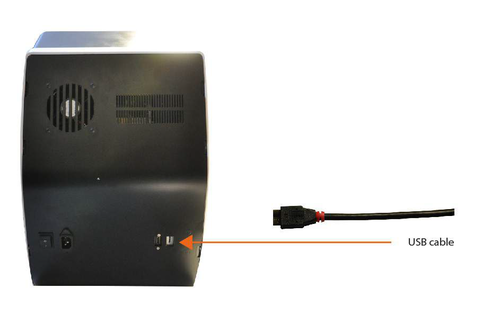
Como se ve en estas imágenes, de izquierda a derecha, en la parte posterior del escáner se encuentran el interruptor de encendido, el puerto de entrada de la energía, el puerto HDMI y el puerto USB.
Conexión Escáner Big/Deluxe
Conexión Escáner Small
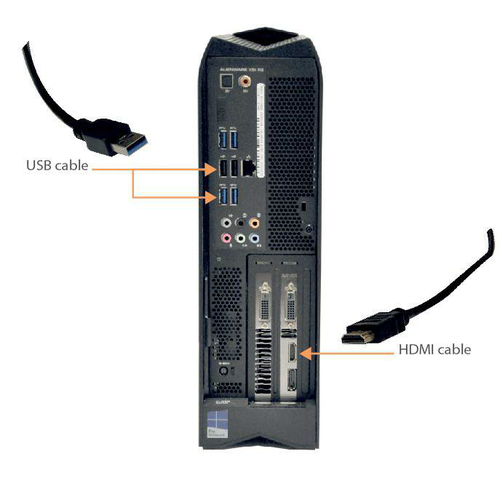
El cable eléctrico tiene un estándar de 230V y debe ser conectado a una línea eléctrica que pueda mantener el voltaje durante todas las fases de trabajo y que tenga protección contra las sobrecargas y cortocircuitos. El cable HDMI debe ser conectado al Ordenador, en el puerto HDMI de la Tarjeta Grafica. La posición del puerto depende de la marca y del modelo del Ordenador. En nuestro ordenadores, Alienware i5 e i7 de la Dell, el puerto se encuentra abajo a la izquierda:
The connection of the USB cable depends on the model of the scanner, as in the Easy and Smart models (both Small and Big) there are USB 2.0 components, whereas in the Deluxe model there are USB 3.0 components. Therefore, the USB cable of Easy and Smart Scanners must be plugged in a port USB 2.0 and the USB cable of the Deluxe model must be connected to a port USB 3.0. These ports are usually colour-coded, so it's possible to recognise the 2.0 because of its black colour and the 3.0 because of its blue colour. The USB cable that Open Technologies provides to connect the scanner to the Computer is a 3.0 USB cable (blue), however the above-mentioned instructions remain valid and even though the cable is 3.0, if the scanner is an Easy or Smart model it must be plugged in a USB 2.0.


