Difference between revisions of "Free Mode/pt-br"
(Created page with "= Geração de Malha =") |
(Created page with "Ao selecionar uma ou mais aquisições e clicando no botão Gerar Malha, o software não tem maneira de saber que estratégia de geração de malhas deve usar. <br /> Uma cai...") |
||
| Line 25: | Line 25: | ||
= Geração de Malha = | = Geração de Malha = | ||
| − | + | Ao selecionar uma ou mais aquisições e clicando no botão Gerar Malha, o software não tem maneira de saber que estratégia de geração de malhas deve usar. <br /> | |
| − | + | Uma caixa de diálogo adicional vai pedir que o usuário escolha a estratégia de geração de malhas e de escolher se quer '''agregar''' a aquisição ou não. | |
If '''aggregate''' is checked, the software will create only a mesh with all the selected acquisitions. <br /> | If '''aggregate''' is checked, the software will create only a mesh with all the selected acquisitions. <br /> | ||
Revision as of 14:06, 21 September 2015
Warning: Display title "Free Mode" overrides earlier display title "Modo Livre".
Contents
Modo Livre
O modo Projeto Livre é um uso específico do software OpticalRevEng Dental, sugerido quando o usuário precisa adquirir alguns dados que não se encaixam em qualquer um dos suportadosProjetos Estruturados.
O modo livre pode ser usado para experimentar o sistema de escaneamento ou quando o usuário precisa digitalizar apenas um único objeto.
No modo livre não há nenhum projeto Árvore, nenhum alinhamento automático e nenhum assistente passo-a-passo. No entanto, ainda é possível adquirir dados, alinhar dois objetos juntos, gerar uma malha e editar todas as informações.
A lógica do projeto é completamente nas mãos do usuário, que é responsável por escolher corretamente um item de referência, alinhar todos os objetos e escolher a melhor digitalização e malha estratégia para todos os dados do projeto.
Algumas ferramentas funcionam de forma diferente em Modo Livre , porque no projeto pode faltar alguma informação.
Aquisição
No Modo Livre, o software não tem como saber que tipo de objeto que vai ser escaneado, e que nome ele tem que atribuir ao item.
Ao clicar no botão Aquisição, um diálogo extra vai pedir para adicionar essas informações.
Alinhamento
No Modo Livre, o software não tem nenhuma maneira de identificar automaticamente o item de referência. Para alinhar dois objetos, use a função arrastar e soltar, como explicado na páginaProjeto árvore.
Geração de Malha
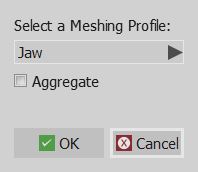
Ao selecionar uma ou mais aquisições e clicando no botão Gerar Malha, o software não tem maneira de saber que estratégia de geração de malhas deve usar.
Uma caixa de diálogo adicional vai pedir que o usuário escolha a estratégia de geração de malhas e de escolher se quer agregar a aquisição ou não.
If aggregate is checked, the software will create only a mesh with all the selected acquisitions.
If aggregate is not checked, each acquisition will be separately converted.
Implant Alignment
When an implant marker is aligned to its implant library, the software has no way of knowing the tooth position of this implant marker.
Select the correct implant position or the identification will not be correctly exported
Exocad Export
In a free project, the software has no way of knowing how to export the data to Exocad.
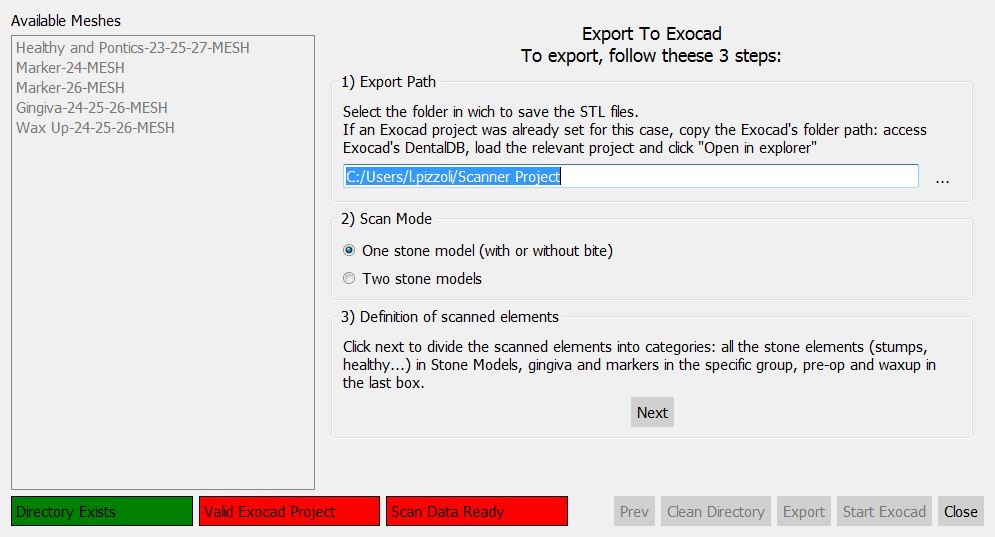
By clicking on the Export To CAD button, a wizard will start. The first page will ask:
- In which folder the data has to be exported
- If the user wants to acquire only the single model (with or without a bite) or both the stone models
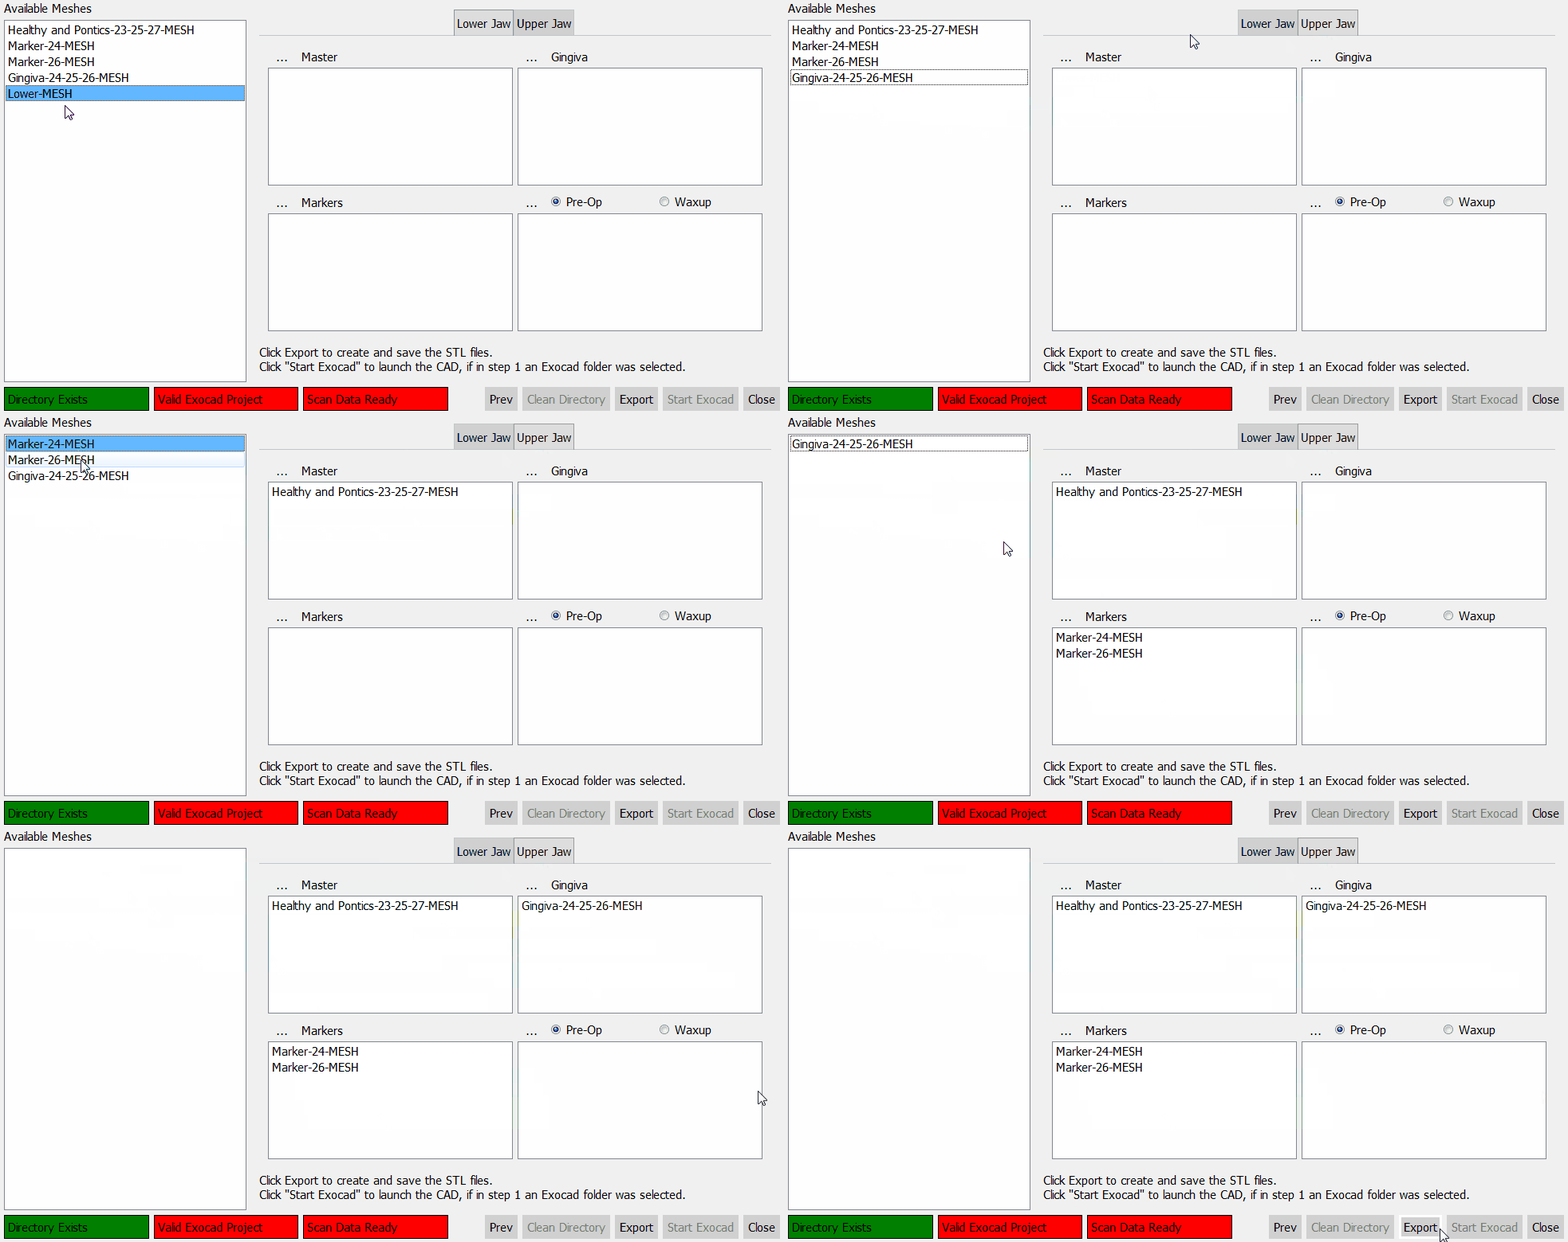
Then, after clicking next, the software will ask the user to specify the role of each mesh in the project.
For every jaw, the following meshes can be identified:
- Master Meshes : all the meshes that are part of the stone model: Healthy parts, stumps, pontic parts, etc.
- Gingiva Meshes : mesh of the separate gingiva
- Markers : meshes of the implant markers
- Pre-Op or Waxup : mesh of the Provisional Model or of a Waxup, selecting the type of element.
When all the meshes are identified, click Export to save the files on disk.


