Difference between revisions of "Dop Impronta/fr"
(Created page with "Acceptez votre choix en cliquant sur le bouton Démarrer, et le logiciel présentera l'assistant de numérisation pour la numérisation de deux empreintes et leur référence...") |
(Created page with "==Procédure de Numérisation==") |
||
| Line 26: | Line 26: | ||
Acceptez votre choix en cliquant sur le bouton Démarrer, et le logiciel présentera l'assistant de numérisation pour la numérisation de deux empreintes et leur référence occlusale. | Acceptez votre choix en cliquant sur le bouton Démarrer, et le logiciel présentera l'assistant de numérisation pour la numérisation de deux empreintes et leur référence occlusale. | ||
| − | == | + | ==Procédure de Numérisation== |
The first scan the software requires is the occlusal key. Place the object, either a triple tray or a vestibular bite, in a position that would allow to get details of both upper and lower jaw. | The first scan the software requires is the occlusal key. Place the object, either a triple tray or a vestibular bite, in a position that would allow to get details of both upper and lower jaw. | ||
Revision as of 15:17, 9 January 2017
Il est possible de numériser un cas de prothèse en utilisant deux empreintes en antagonisme à l'aide d'une touche occlusale, comme une morsure vestibulaire ou une impression à triple plateau.
Démarrant de OpticalRevEng Dental
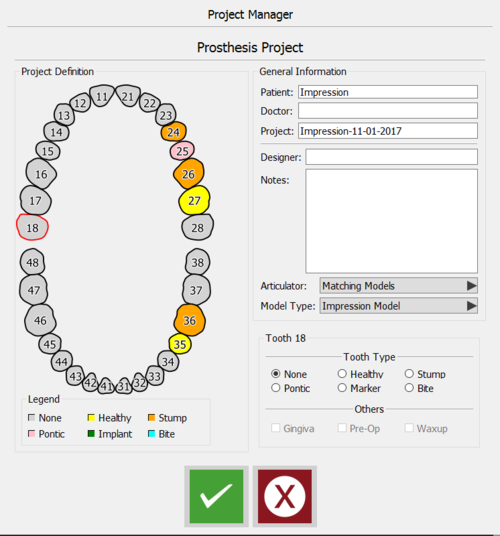
Pour numériser un projet de prothèse en utilisant deux empreintes en antagonisme directement du logiciel de numérisation, accédez au gestionnaire de projet et créez ce type de projet:
N'oubliez pas de sélectionner le Modèle empreinte dans le menu déroulant Type de modèle et d'accepter avec le bouton vert.
Démarrant de Exocad
Il est également possible d'accéder à ce type d'assistant configurant le cas dans Exocad. Il suffit de définir le projet comme d'habitude dans la base de données dentaire d'Exocad.
Enregistrez le projet et cliquez sur le bouton de numérisation. Il va démarrer la procédure guidée du logiciel de numérisation.
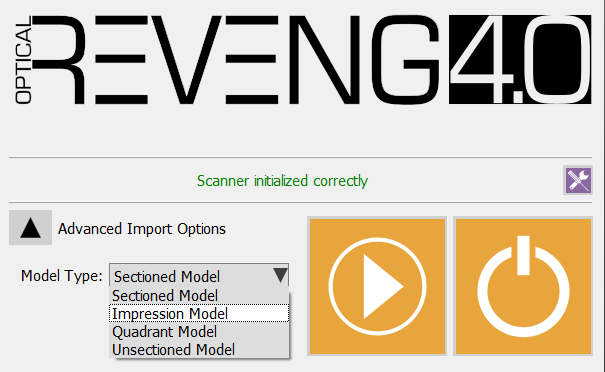
Dans l'écran de démarrage, sélectionnez Options d'importation avancées et, dans le menu déroulant Type de modèle, Modèle empreinte.
Acceptez votre choix en cliquant sur le bouton Démarrer, et le logiciel présentera l'assistant de numérisation pour la numérisation de deux empreintes et leur référence occlusale.
Procédure de Numérisation
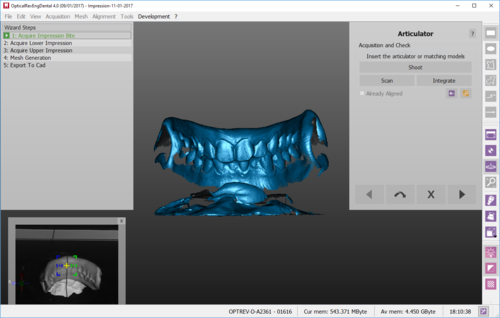
The first scan the software requires is the occlusal key. Place the object, either a triple tray or a vestibular bite, in a position that would allow to get details of both upper and lower jaw.
In our example case, a vestibular bite has been used.
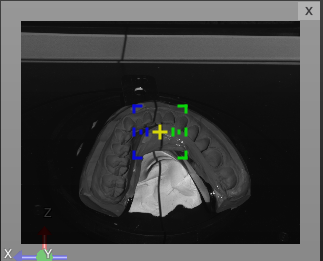
The software will then ask the user to scan the Lower Impression. Place the impression in the scanner, as described in the following picture, then click scan to start the acquisition.
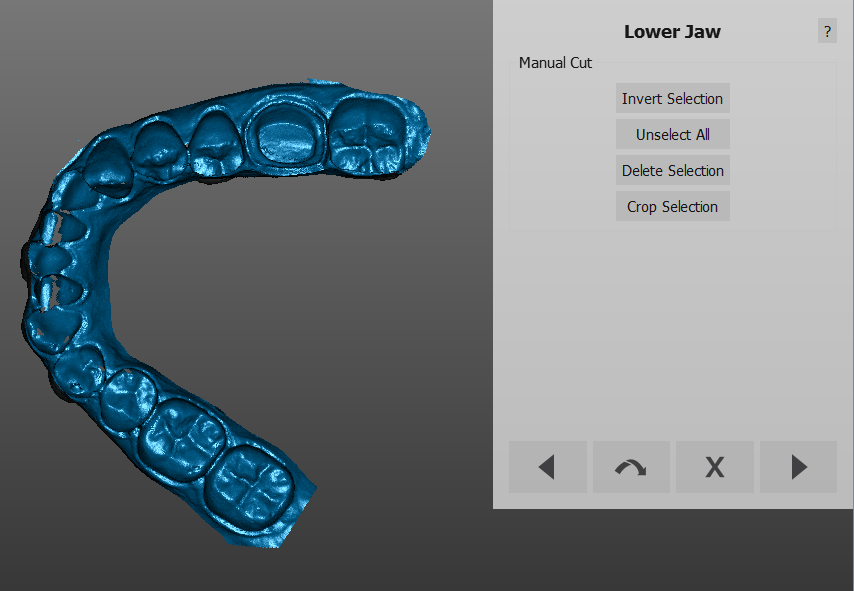
Once the impression has been scanned, click next and cut the model base, taking care not to cut part of the teeth as well. The selected part will be, as always, automatically removed.
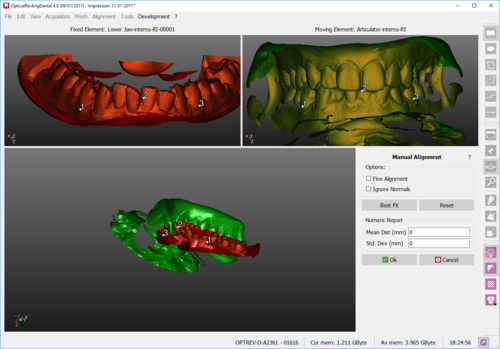
Right after the Cut Height step, the impression will be aligned with the occlusion. It is possible that the automatic alignment fails, being the objects two impression. A Manual Alignment step will be automatically presented by the software. Carefully choose the common area between the impression and the occlusal key.
Then click Best Fit, accept with OK if the alignment is good or remake the alignment clicking on Reset.
Once it has been aligned, clean the image as much as possible.
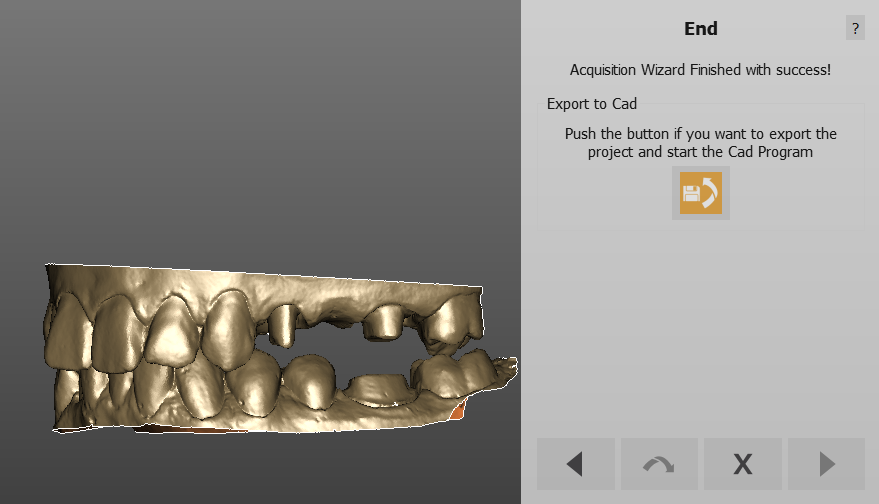
Repeat this process for the upper jaw and follow the steps until the final acquisition check. If the occlusion is correct, click next to generate the meshes.
